waiting for the email from them letting me know it is back in stock myselfFinally got around to get the volume fix from Meso installed, should have been like his from the factory but oh well putting Meso's kids through college pretty much.
-
Welcome to Tacoma3G.com, a free resource for 2016-2023 Toyota Tacoma owners!
Tacoma3G is a beginner-friendly 3rd Generation Toyota Tacoma forum (2016-2023 model-year specific). We are a small community of people who are focused on good information and good vibes. More about us....
You are using an out of date browser. It may not display this or other websites correctly.
You should upgrade or use an alternative browser.
You should upgrade or use an alternative browser.
What have you done to, or with, your Tacoma today?
- Thread starter MMoreno16
- Start date
drizzoh
6️⃣ Aficionado
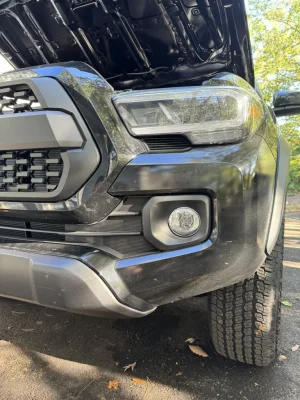
Mounted this 30" Baja Designs S8 light bar last week on the CaliRaisedLed brackets but the wiring didn't show up until the other day, so I got it wired up this weekend. I need to angle it up a bit and rewire the backlights to go thru their own relay, but pretty happy with how it turned out. Looks really clean and subtle too.
![[IMG]](/proxy.php?image=https%3A%2F%2Fi.imgur.com%2Fxhet13Kh.jpg&hash=44d3acdde4a49ee240e3778bbb455f2e "[IMG]")
drizzoh
6️⃣ Aficionado
Mounted this 30" Baja Designs S8 light bar last week on the CaliRaisedLed brackets but the wiring didn't show up until the other day, so I got it wired up this weekend. I need to angle it up a bit and rewire the backlights to go thru their own relay, but pretty happy with how it turned out. Looks really clean and subtle too.
Adjusted

![[IMG]](/proxy.php?image=https%3A%2F%2Fi.imgur.com%2FnZEx3q1h.jpg&hash=f9b08357b177707f4219ed2dcd7b70dd "[IMG]")
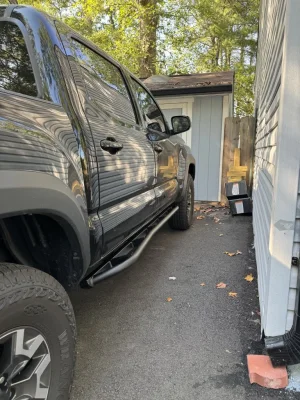
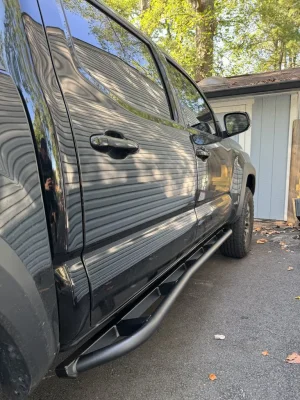
I should have never got my sliders Raptor lined. Might have to get them powdercoated.RCI rock sliders and they look amazing!
do you have a link to this?Adjusted
drizzoh
6️⃣ Aficionado
They're available all over the place. You never see them on sale so I jumped on it when showstoppers had their 21% off sale last month. Here's the link tho: https://www.showstoppersoffroad.com...driving-combo-pattern-s8-series-baja-designs/do you have a link to this?
Mines mounted with the caliraisedled brackets and a modified S8 harness to use a factory style switch.

had one of my LED bulbs in the license plate lights go out (put it in back in '15 when the truck was brand new) replaced both w/ some new dimmer VLED ones. less washout in the rear camera at night now. I guess 8 years is pretty good for a bulb.
There's a DIR cable. Disable in Reverse, it cuts out the plate lights when in reverse so there's no wash out. Definitly worth checking out.had one of my LED bulbs in the license plate lights go out (put it in back in '15 when the truck was brand new) replaced both w/ some new dimmer VLED ones. less washout in the rear camera at night now. I guess 8 years is pretty good for a bulb.
I was getting this rattling in my truck. Couldn't figure out where it was coming from. Then I realized it was my rear view mirror. Becomes loose with the custom dashcam mount I made. Gonna just vibratite it. Then I still have to install the MESO Switchback Mirror Lights. Ughhh.
Eh. I don’t want the cable. Thanks though
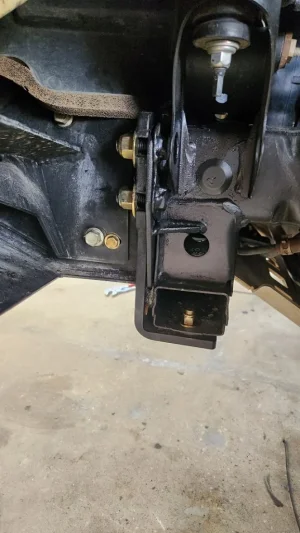
I'm a little lost. I get what it does. But if the new bolts are there, how does the bumper fit on there? What did you fill the holes with?Beefed up the front bumper mounting points with 1/2 inch grade 8 hardware and 3/16 steel reinforcement plates from Overland Outfitters.


The bumper fits exactly as before. The holes on the winch plate of my SSO bumper were large enough to allow for adjustment so the larger bolts fit without any issue. I would imagine most aftermarket bumpers would be similar.I'm a little lost. I get what it does. But if the new bolts are there, how does the bumper fit on there? What did you fill the holes with?
Once the stock studs are drilled out, they are simply replaced with larger hardware that is welded in where the stock bolts were along with adding a steel plate and gussets to reinforce the bumper mounting plates.
NoirTaco
3️⃣ Silver
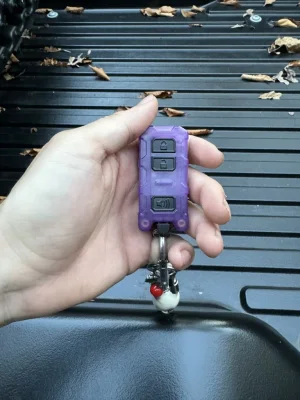
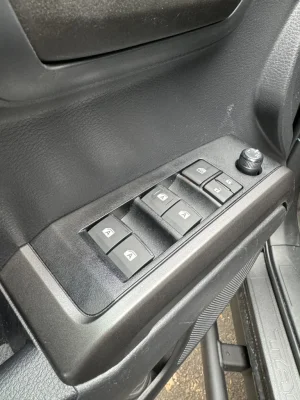
very slow weekend but was able to install the AJT Designs oversize cup holder, the minimalist V2 key fob from Meso and the all auto window switch for all the windows. Why there’s only the front 2 from the factory baffles me.
Attachments

drizzoh
6️⃣ Aficionado
Yesterday I fixed a speaker that was cutting in and out. Apparently I had a bad crimp from the initial install in March and it just started acting up. Good to go now.
That all-window auto switch is awesome. Is it pnp and does it auto up as well?very slow weekend but was able to install the AJT Designs oversize cup holder, the minimalist V2 key fob from Meso and the all auto window switch for all the windows. Why there’s only the front 2 from the factory baffles me.
NoirTaco
3️⃣ Silver
Glad you figured out the speaker issue. Electrical things suck.Yesterday I fixed a speaker that was cutting in and out. Apparently I had a bad crimp from the initial install in March and it just started acting up. Good to go now.
That all-window auto switch is awesome. Is it pnp and does it auto up as well?
Yes it’s plug and play and works flawlessly. Auto down and up yes.
drizzoh
6️⃣ Aficionado
Rad about the switch module. Will definitely have to add that to my want list.Glad you figured out the speaker issue. Electrical things suck.
Yes it’s plug and play and works flawlessly. Auto down and up yes.
And heck yeah d00d, lucky enough it was also the first thing I checked. Glad I don't have to replace a tweeter.
I actually did this, but I completely chopped off the frame ends and welded in new 1/4" plates, I also ground down to make them fit flush with the rest of the frame.Beefed up the front bumper mounting points with 1/2 inch grade 8 hardware and 3/16 steel reinforcement plates from Overland Outfitters.
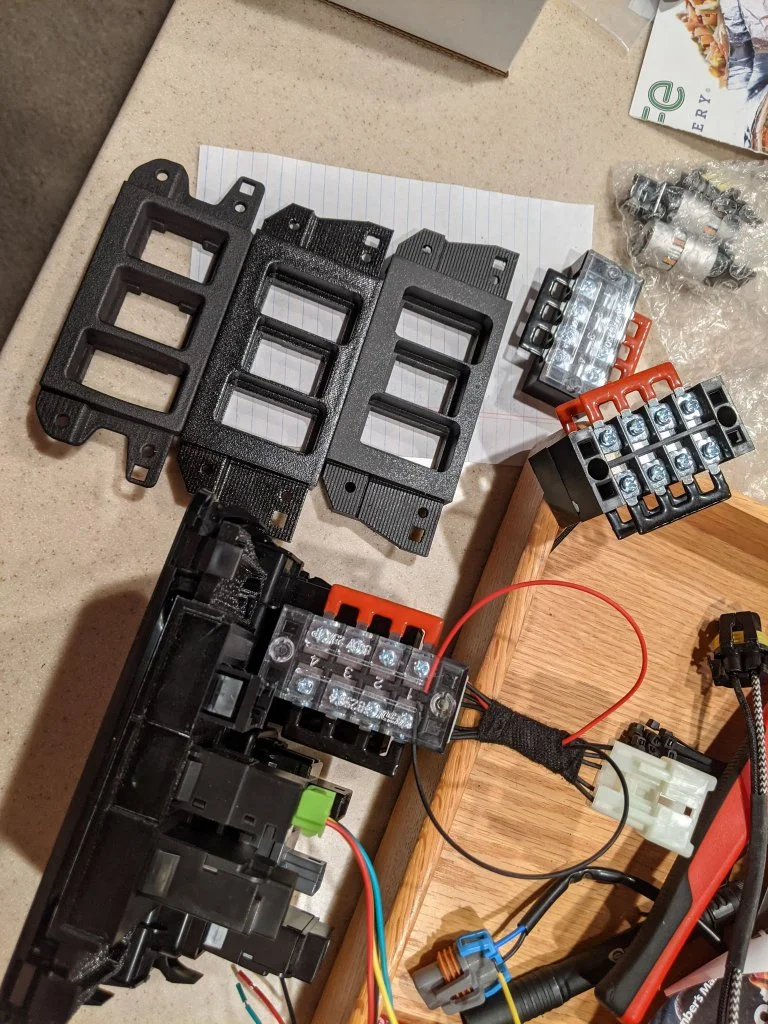
Relocated traction control to overhead using the Meso 2 switch panel and an extension cable. I was prepared for a fight, but it wasn't bad, just a bit tedious routing the cable. Made room to add future switches although I am not sold on keeping rockers, but they are easy to connect to the KC Flex Era 3's for now. Some type of switch panel will probably be coming in the future.


drizzoh
6️⃣ Aficionado
Overhead switch looks awesome. Is the 2-switch panel pnp or did you have to cut and glue?Relocated traction control to overhead using the Meso 2 switch panel and an extension cable. I was prepared for a fight, but it wasn't bad, just a bit tedious routing the cable. Made room to add future switches although I am not sold on keeping rockers, but they are easy to connect to the KC Flex Era 3's for now. Some type of switch panel will probably be coming in the future.
100% PNP. One of the reasons I went with the 2 over the 3. Definitely have to cut and modify to fit 3.Overhead switch looks awesome. Is the 2-switch panel pnp or did you have to cut and glue?
Need one? I have the file for this.Overhead switch looks awesome. Is the 2-switch panel pnp or did you have to cut and glue?
I've found that if you sand it a little and hit it with some spray paint, it looks pretty OEM.
Far right. I hit it with a more matte liner spray. Could also make it textured if it's not too curved.