S
SDyota_66
possibly a ghost :(
I work on North Island. So I'll keep an eye peeled for you.You assumed correctly. I'm over in Coronado. Work all over SD. ?
Tacoma3G is a beginner-friendly 3rd Generation Toyota Tacoma forum (2016-2023 model-year specific). We are a small community of people who are focused on good information and good vibes. More about us....
I work on North Island. So I'll keep an eye peeled for you.You assumed correctly. I'm over in Coronado. Work all over SD. ?
I work on North Island. So I'll keep an eye peeled for you.
That's why I haven't seen you. I hit the gate about 5:15. Get in early so I can get off at 2 and beat the traffic.I've probably seen you on the bridge coming into town then. I leave the island around 6:30 - 6:40am. I'll keep an eye out. ?
That's why I haven't seen you. I hit the gate about 5:15. Get in early so I can get off at 2 and beat the traffic.
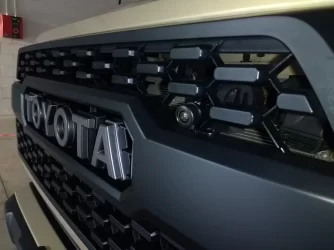
I will be doing this camera mod soon I have the same kit in garage. Post up any tips or tricks that were confusing from instructions if you get a chance!
I will be doing this camera mod soon I have the same kit in garage. Post up any tips or tricks that were confusing from instructions if you get a chance!
Well done.
Jealous
Don't be. Your checkbook isn't. Hahahahaha
It already hates me
Looking good! How is the Plano case mounted? Does it have attach points or do you strap it down?Since we returned home we have already started with more upgrades. We leave on or around September 9th for a one month trip all the way up to the Pacific Northwest. So we are currently trying to dial everything in, specifically trying to make more room for storage in the back of the bed by storing lesser used items elsewhere.
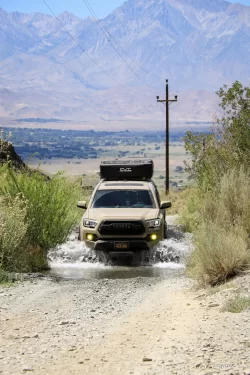
So, the new front roof rack went on yesterday. Then the first of two Plano boxes went on today, the second arrives Monday. Also figured out a mounting for the traction boards. They won't live up there permanently, just when we travel offroad.


Looking good! How is the Plano case mounted? Does it have attach points or do you strap it down?
Sounds like something I could easily do with my Frontrunner bed rack. Thank you.The Prinsu rack cross bars are spaced 10" apart. I measured out and drilled 4 mounting holes, then used a couple 1.5" long bolts slid into the rack track. A wing nut, a couple of rubber washers and one metal washer and it's pretty solid.
I'll be mounting the second box today and I'll take some photos.
Sounds like something I could easily do with my Frontrunner bed rack. Thank you.
Looking good! How is the Plano case mounted? Does it have attach points or do you strap it down?
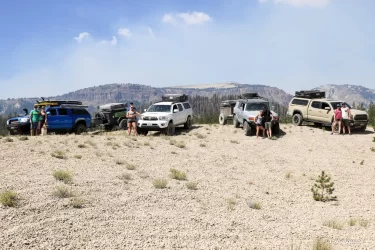
How is the trip going?
This is an awesome trip you’re doing. @Paige and I are either gonna do a very similar route or a much bigger Cali to NY back to Cali when I get out of the Marine Corps. Each option has its pros and cons though.You caught me online. So far it's been great. We're in Bend, Oregon. Staying here two nights... In a hotel. Haha. Camping is great, but so are occasional showers. Plus this town is really cool.
I'll post some good pics soon. Almost none of them are on my tablet but we're having a great time, the truck has been awesome, and we're already considering more upgrades. Haha
This is an awesome trip you’re doing. @Paige and I are either gonna do a very similar route or a much bigger Cali to NY back to Cali when I get out of the Marine Corps. Each option has its pros and cons though.
Hell yeah that would be great! [email protected] whenever you get the chance.Well if you are considering a similar trip to ours I can send you the full .gpx (GPS) file of our entire trip. Kind of handy to have the roads used, towns passed and waypoints of things to see and places to stay. Then you can pick and choose to use whatever you want from it and make it your own.