• Welcome to Tacoma3G.com, a free resource for 2016-2023 Toyota Tacoma owners!

    This website is the passion-project of a USMC veteran/mechanic, @Tyler. I created Tacoma3G.com to share my knowledge of this subject with others and to provide like-minded folks with a comfortable space to ask questions and create 'build threads' within our Tacoma Forums. Now, if the format of this website is confusing to navigate for you, or if you're interested in my full mission and T3G's history, check out the Help and About pages.

CoastieRon's Silver build & BS

Ron

5️⃣ Platinum
Tacoma3G Supporter
Tacoma3G O.G.
Joined
May 1, 2018
Messages
339
Reaction score
476
Location
The Gate City
2018 Sport DCSB Auto
Silver Sky
Jan 1: New Truck, build product links. This entry will be updated for each product I install.

Welcome to my progression of idiocy! I know I'm new here, but I'm not a stranger to modifying the cars/trucks I've owned. The last truck was a 2009 Tundra that I gutted the stereo. Then there was the Audi build that I dropped a ton of cash in with a stage 2 tune, exhaust, etc. Before that was the 2000 Tundra that got the treatment as well.

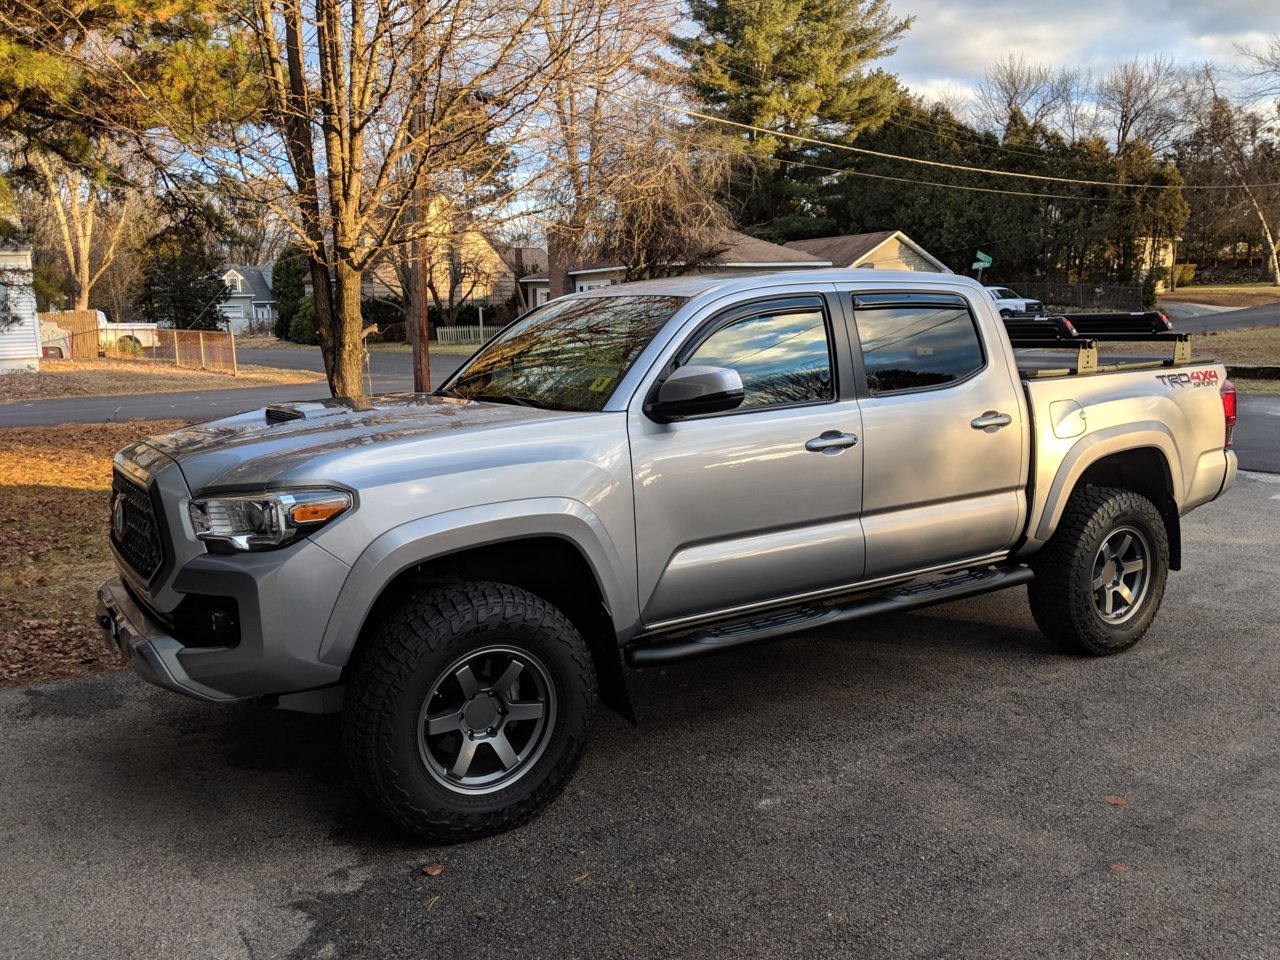
So this may or may not be a really long thread, but I'm going to use it for a record of what I am going to do to this truck. Here it is nice and stock:

taco-jpg.2483819


I've never had the opportunity to track starting 5 days after receiving a truck, and am going to take advantage of all the great information on this page. Edited 6-25: I'm removing all of the hyper-links to cut the size of this first post down. If you are on this web forum, you should be computer savvy enough to get your Google-Fu on and find the items listed.....

Updated 01/02/2019

Dealer Installed:
Black Step Bars - Toyota PN PT767-35112
AVS Vent Visors

Aesthetic-Functional:
AJT Design Key Fob (cement) - this now sees limited use
Hondo Garage AR15 Bolt Radio Knobs
SR Black Gril Bezel Toyota PN 52711-04010
TuffSkinz Tailgate Inserts (matte black)
Etsy Cell Phone Magnetic Holder
Vehicle OCD Console Organizer
Vehicle OCD Glove Box Organizer
Amazon Center Console Top Organizer
OEM Bed Mat PN PT580-35050-SB
OEM Truck Bed Header Rail PN PT278-35100-BH
KB Voodoo Hi-Rise crossbars
Yakima Button Down 6 Ski Rack
MeSo Customs color coded Headlight Trim Plates
MeSo Customs Coin Bucket


Audio-Electronic:
-For Stereo:
Morel Tempo Ultra 692 6x9 component set (front doors & dash)
Morel Tempo Ultra 602 Integra coaxial set (rear doors)
Audison APS 10D 10" Subfoofer
Arc Audio Xdi 850.5 Amp
Mr. Marv Sub Box/Amp Rack
Speed-Wire
10 Gauge Speaker Wire
Metra 70-1761 Harness (for speaker wires)
Metra 71-1761 Harness (for head unit)
Metra 72-8104 Harness (for door speakers)
Noico 80mil Sound deadener
USB/Aux extension (for install into glove box)
-For Charging:
MicTuning USB Power Outlets
-For Towing:
Redarc Tow Pro Elite Tow Brake
Tekonsha Toyota Wiring Harness PN 3017-S
Redarc/Sub Knob/1 Switch Switchplate by forty2skates on Shapeways
-For Starting:
12volt Auto Starter
Lexus Wallet Key Card PN 89904-53511
Lexus Key Blank (for wallet card) PN 69515-30350
-For Camera:
BeatSonic Camera Interface (Anytime Reverse Camera)
BlackVue DR590-1CH Dash Cam
Power Magic Pro
Blendmount for BlackVue dashcam

Lighting:
MeSo Customs Smoked Mirror Turn Signals
Spartan X Customs Scoop Light
Cali Raised LED Fog Pods Kit (with 3x2 18w Amber)

Mall Crawling:
Bilstein 5100 PN 24-263108 (front)
Bilstein 5100 PN 24-186728 (rear)
OME 884 Springs
Rogue Offroad 1-1/2" AAL
HeadStrong 1/4" Spacer (driver side lean mitigation)
Falken Wildpeak A/T3W 265-70-17 Standard Load
Level 8 MK6 Wheels, 17x8", ET0, Gunmetal Gray
TRD Pro Skidplate PN PTR60-35160
RokBlokz Mudflaps PN 4027-SH (standard size)

Under Hood:
TRD Intake Flow Accelerator PN PTR03-35160-AE
HPS 57-1600 Red Air Intake Hose


Up to date as of 1/02/2019. As it stands today:

now-jpg.8996


Things I'm Thinking About:

Hammock stand attachment for trailer receiver
front camera on demand


Honestly, this may be the cheesiest not-build thread ever, but there will be pictures.....
 

Attachments

  • at home.jpg
    at home.jpg
    515.8 KB · Views: 468
  • at icehouse.jpg
    at icehouse.jpg
    488.9 KB · Views: 194
Last edited:
Jan 5: Vent Visors and Step bars installed by the dealer. These were "We Owe" items

img_20180105_163651-jpg.2490298
 
Jan 6: Subaru Tweeters installed

I put the tweeters in today and I have to say, the OEMs I pulled out we're world's nicer than the ones that were in my 2008 Tundra.

I usually don't prescribe to forum hype, but the Kicker drop ins do make a difference. They are brighter & clearer. I'm pretty happy with them.

Like others have said, now it really highlights how bad the other speakers are, and I can't wait to roll on those.
mvimg_20180106_131926-jpg.2491354
mvimg_20180106_130804-jpg.2491355

 
Jan 8: Speakers ASSEMBLE!!!!

Last set of speakers came in. I am sending back the Kicker 6x9s. I've decided to use a set of unused old school PPI 6.5" woofer drivers in the front door instead. So these are the last of the speakers.

The PPIs friggen pound, so there will be no sacrificed low end in my truck.
mvimg_20180108_194426-jpg.2494995


Also got my 12v solutions starter in, and will probably put it in tomorrow.

I've decided to not go simple on my sound and have ordered a sub box/amp rack, Arc Audio 850.5 amp, wiring kits and front speaker adapters all from @Mr Marv.

Can't wait to really get rolling on this. For today, I put on my HONDO AR nobs.
 
Jan 9: 12Volt Solutions Remote Starter

Installed the 12 Volt Solutions remote starter. Extremely easy to install, but for some reason it took me 4 start button pushes to get the light to turn green where the video says 2. No biggy, took me longer to take panels off and put them back on than to connect and program it.

Oh yeah, and a bed mat from the dealership. $98 was good for me.
 
Jan 15: Rear speaker install

Today I got a couple of hours interruption free so I installed the rear kickers. These doors are way easier to remove than the Tundra's we're.

My back was screaming due to a "jump" I did at Cannon mountain in zero vis. I did not see said jump, and did not stick the landing. Skied the rest of the day anyways. Boy am I feeling it today though.

Anyways, I only put the 80 mil Noico inside the door and around the mount area. I'm not coating the whole damn door again. Waste of time and resources, and I'm trying to just use what I have on hand.

I am having everything shipped to my office to mitigate questions from the wife, so the custom adapters for the front doors are sitting there. Will try to get those in this week.

Honestly, this head unit pushes the Kickers (tweeters and rears) very well. I'm not sure it's going to push the PPIs though, but that's why the amp is coming with harnesses.

mvimg_20180115_133303-jpg.2505453

mvimg_20180115_142400-jpg.2505454


I used the small grommet hole to put speaker wire through and Noico'd that as well.

So far, I'm not disappointed at all.
 
Jan 16: Front speaker mounts

Got my front mounts in today and am coating them for moisture protection.

mvimg_20180116_160639-jpg.2507611

mvimg_20180116_160728-jpg.2507612

mvimg_20180116_162421-jpg.2507613


Hopefully I can use the snow day tomorrow to install the PPI drivers
 
Jan 17: PPI Install (fronts)

Baby steps. Paint cured nice on my pellet stove.

mvimg_20180117_120106-jpg.2508758

Speaker install completed. As I suspected, the head unit does not push the PPI speakers well at all, but they are still light years better than OEM. Once the amp & sub gets in there, it'll be all business in the front, party in the rear. Like a friggen 1987 mullet (you know you had one).

mvimg_20180117_134750-jpg.2509114

mvimg_20180117_145219-jpg.2509117

mvimg_20180117_152951-jpg.2509119


Total time per door including the Noico is 30-40 minutes each. If you cut the strips that are going in the door ahead of time, it cuts down the time. It took 1 sheet per door, and I have some left over to put behind the back seats later on when the sub box gets in.
 
Feb 5: USB charging ports installed

So I'm waiting on a few things but got some goodies in the mail today, so I installed this little item.

mvimg_20180205_172308-jpg.2543591


And using the fantastic directions by @tonered found here:

https://www.tacomaworld.com/threads...-3rd-gen-today.399305/page-3842#post-17070853

I put in the other USB outlet. I use this one to recharge my watch.

mvimg_20180205_194245-jpg.2543912


I also ran my charger cord underneath the console and came out between the charging pad (which is useless to me) and the left cupholder.
 
Feb 9: Redarc Tow Pro Elite came in

Hoping for a few things to come in tomorrow. Today though, the Redarc Tow Pro Elite came in. I can't install it yet, waiting on the switch plate to come in for it. Then, I found my soldering iron won't start (butaine) so I used the connectors that came with the unit.

mvimg_20180209_195923-jpg.2550199


Sweet looking unit, can't wait to get it installed.

img_20180209_194305-jpg.2550200
mvimg_20180209_194252-jpg.2550201


Stuff happening tomorrow....
 
Feb 10: Skidplate and grille bezel install

Little things today:

First, a nice bath with hot water
img_20180210_142515-jpg.2551525
mvimg_20180210_142525-jpg.2551531
mvimg_20180210_142532-jpg.2551535


Then skid plate

img_20180210_142743-jpg.2551536
img_20180210_143456-jpg.2551537
mvimg_20180210_152313-jpg.2551538
mvimg_20180210_154023-jpg.2551542


Then Grille bezel swap
img_20180210_152304-jpg.2551548
img_20180210_152812-jpg.2551550
mvimg_20180210_153804-jpg.2551556


I like the grille that the 2018 Sport comes with. I think there are too many Pro and Faux Pro grills out there, and I'm all set with that. Also, there are zero aftermarket grilles that support the TSS right now.

I went with the TRD skid plate because this truck probably won't see any serious off-roading other than some camping trips with sketchy access roads. Any lift this truck gets is going to be asthetic in nature quite frankly, and won't be until it's time to get new tires.

Next item to be installed is the trailer brake, I'm just waiting on the switch plate for that. After that, sub and amp....

mvimg_20180210_153013-jpg.2551554
 
Feb 12: Redarc Installed with switch plate #1.....

Finished up putting in the tow brake. Nice out of the way install. Great design by a member here @forty2 (I think?). Need another cover for now, but I do have plans for those spots....

mvimg_20180212_170121-jpg.2554938
img_20180212_173335-jpg.2554939
mvimg_20180212_173346-jpg.2554940
mvimg_20180212_173936-jpg.2554941
redarc-jpg.2556044


I needed to put a washer in to tighten the unit in firmly. Other than that, pretty clean finish. The other spots will have my sub nob and reverse on demand/front camera (maybe).

I have to slow down....
 
Feb 17: Beatsonic Camera on demand install and some audio stuff

Today I had some things arrive, and did a couple of little things.

Goodies:

img_20180217_122907-jpg.2562989
img_20180217_123024-jpg.2562991
mvimg_20180217_144530-jpg.2562992


I put a hole in the amp rack for the wires
mvimg_20180217_151442-jpg.2562995
mvimg_20180217_151503-jpg.2562996


I have other things to do with the sub box/rack before they go in. It needs wood filler and painting, and I'll do some of that this week. @Mr Marv does beautiful work.

Today I had the opportunity to move the USB to the glovebox. I'll be honest here, I somewhat fucked this up by putting the hole too far back. I couldn't reach far enough back to properly tighten the retaining nut, and now I feel as though I need to take the whole glovebox apart to correct my fuck up.

img_20180217_162700-jpg.2563000


Then I put the Beatsonic camera system in. I don't have a front camera yet, but I had rear camera on demand for the last truck, and I wanted it again. I'll add a front camera later.

img_20180217_162650-jpg.2563014
 
Feb 18: Subwoofer box work

A little filling and sanding
img_20180218_184811_1-jpg.2565360


I bough a quart of Acry-Tech DuraTex to paint these items with that should hopefully come in this week. This project has been slow going with baby steps because I can't seem to find time to blow it all out at once.
 
Feb 25: Switch panel #2, garage door opener start and subwoofer box stuff

Went skiing this weekend, do not much done. Waiting on some items to finish a few things, but for now

First the Redarc/Sub panel
mvimg_20180225_123532-jpg.2577727

mvimg_20180225_124600-jpg.2577731

mvimg_20180225_124636-jpg.2577733

img_20180225_125002-jpg.2577738


Then I worked on my garage door opener. I had an old door opener I could use for this project.

mvimg_20180221_182735-jpg.2577743

mvimg_20180225_131009-jpg.2577744

mvimg_20180225_135440-jpg.2577745

mvimg_20180225_140124-jpg.2577746

Next up, painting the sub box and amp rack

Staying busy setting up for final install. The DuraFlex paint for sub boxes is awesome, but a quart goes a very long way. I started by brushing a coat, letting that dry/set, then rolling it using the roller supplied. I have enough of that stuff to roll another couple of coats. Will probably roll at least one more on the front sides.

img_20180225_185611-jpg.2577959
img_20180225_185628-jpg.2577961


Still a lot to do, but me and time aren't getting along right now.....
 
Feb 26: finished garage door opener project and subwoofer box stuff

Finished out my garage door opener project.

img_20180226_182057-jpg.2579662
img_20180226_182301-jpg.2579663


Works just fine. I wish it was a momentary switch, but I like my switch just fine. My kids have called my trucks the yard matey for years, because the plate (YARM8E), so why not...

Finished getting the sub box together. The Duratex paint is fantastic.
img_20180226_184152-jpg.2579672
img_20180226_183822-jpg.2579674


This weekend, hopefully I'll be able to get the amp and sub installed.
 
Mar 3: Soldering of wire harnesses for sub, amp. I did this to keep my head unit, drive the sub and still push power to the kickers and PPI speakers.

Getting shit done.

img_20180303_163204_01-jpg.2587686
img_20180303_163212_01-jpg.2587688


Just need to solder RCA connections.

img_20180303_183023-jpg.2587939
 
March 4: RCA connectors for amp and install.

Today's work!

RCA plugs soldered
img_20180304_090021-jpg.2589449


Fuse is in. This might be a temp spot
img_20180304_123231-jpg.2589450


Tuning done!
img_20180304_141643-jpg.2589451

I used a DSO Nano oscilloscope to set the gains. The OEM head unit doesn't clip even at Max volume, but I set the gains at 52 volume, using 1khz tone at 0dB, and 60hz at 0dB. @Mr Marv was very helpful.

All snug and done:
img_20180304_153917-jpg.2589454
 
Mar 12: sound

I'm extremely happy with how everything sounds right now. Max volume (that I can stand) is now 40 on the dial. I'm getting a great thump from not only the midwoofers on the doors, but also the sub in the back. Next up is something I saw in another thread, switching out the OEM foglights with Lexus projector foglights. Then hopefully a set of @mesojdm ultimate turn signals.
 
Mar 14: Lexus projector fogs

Put in the lexus projector fog lights tonight, and they look great. I didn't take off the grill. Tried to take off the fog trim and may or may not have broken a clip. I was going to get sr5 trim anyway. Took 5 minutes a side after figuring out I could get them in with minimal issue without removing anything.

Right one switched, left one OEM

mvimg_20180314_185614-jpg.2606737

Just DRL
mvimg_20180314_190308-jpg.2606739

Lows
img_20180314_190328-jpg.2606742


Part numbers

screenshot_20180312-201331-3-jpg.2607011
 
Mar 19: Fogs dark pic and SR5 foglight bezels

Night time picture of Lexus fogs:
fogs-jpg.2614223


Changed the fog bezels too. I like the look of these much better than the ones that came with the truck, personal preference I guess.

bezel-jpg.2614226
 
Mar 24: Tailgate inserts, emblem covering and mesojdm blinkers

Good day today! Washed and a quick once over inside, then:
Tailgate inserts, matte black bt TuffSkinz
mvimg_20180324_120438-jpg.2624060

mvimg_20180324_120645-jpg.2624063


Covered the chrome emblems

mvimg_20180324_193114-jpg.2624065


Installed @mesojdm ultimates

mvimg_20180324_123948-jpg.2624066


The blinkers went in quicker than the inserts did, and look fantastic.

I kind of want to do a lift now lol
 
Mar 25: YOTA LOL

Was doing some detailing today and was taking off the Toyota of Nashua decal and decided to leave this:

fb_img_1522014410107-jpg.2625609
 
Mar 28: Ordered a lift.

I know I said in my first post that I wouldn't....

screenshot_20180328-203321-jpg.2631246


But I bought a lift....
 
Mar 31: rambling

So I was looking at maybe buying a black exaust tip or painting mine until my cousin told me he would powder coat it for me this week with some other parts he's running.

That thing is really a pain in the coin purse to get off the pipe....

Also, I bought a scoop light.

Damn it all.

Still need springs.
 
Apr 2: rambling

I'm sitting here, reading through this thread and noticing a pattern of ordering. In other words, I say I'm not going to do something, then have a few beers and order the stuff anyway. The spread sheet I'm running is ridiculous at this point for money spent/"value" added, and I think (LMAO), I should stop ordering shit after I figure out what springs I need, and figure out where to put a scoop light switch. The good news is, I'm not paying for labor (I think this is good news)....
 
Apr 2: SKEW Light 1

So quick.

img_20180402_180507_01-2-jpg.2639942


This is gonna be sweet.
 
Apr 5: Exhaust tip powdercoated and installed

img_08011-2-jpg.2644555

Close up

img_20180405_160548-jpg.2644630


All powder coated!

And mounted.

img_20180405_223725-jpg.2645309
img_20180405_223743-jpg.2645310
 
Back
Top