There are several threads on installing seat heaters aka heated seats but the ones I have seen, have you tap into the fuse box. I like to keep my installs looking stock so I decided to pull the wiring diagram and trace the seat heater wiring to see what I could find.
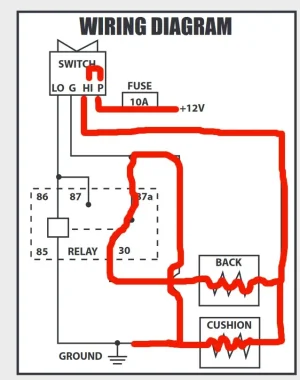
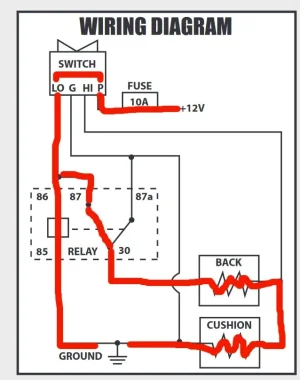
It turned out that in my Tacoma ('21 SR5) it is pre-wired for seat heaters. A little more sleuthing and I found that the factory installed a seat heater fuse but no relay. With the relay installed, the factory wiring worked as expected i.e. the circuit was hot when the truck was running and turned off when the truck was off.
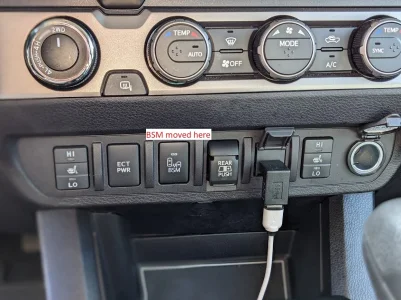
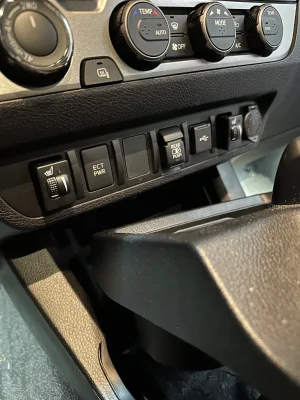
I took some pictures along the way that are attached. The switches look factory except for the fact that the blue light is always on (not controlled by the headlights) and the low/high indicators are orange instead of the green used everywhere else. I've already ordered some green LEDs and plan to change them out to make the switches look even more factory.
What you need to know:
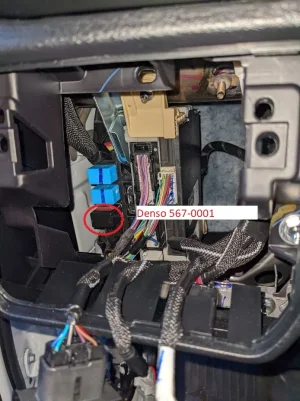
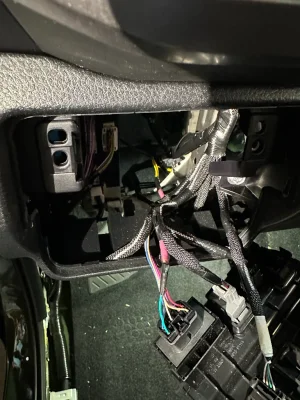
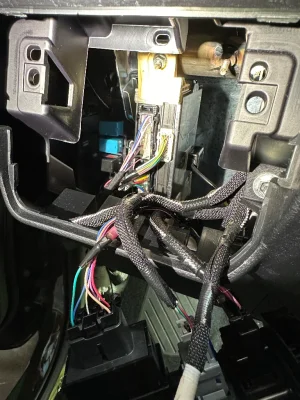
The empty relay location is behind the switches to the left of the steering wheel. You can just reach up behind there and pop out the switch plate to see where the relays go. I bought a genuine 4 pin Denso relay (567-0001) from Amazon but there are tons of cheaper off brands as well. I couldn't find the part number for the factory relay but the 567-0001 supports 20amps which is what the fuse is so I don't anticipate any problems. When I bench tested the seat heaters it pulled about 4 amps a seat on high. Install this relay and the seat heater circuit will be live.
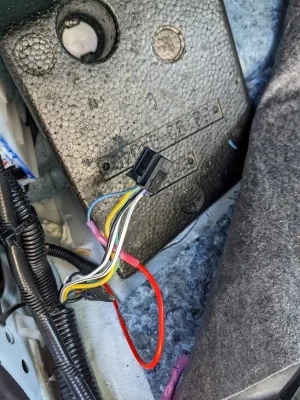
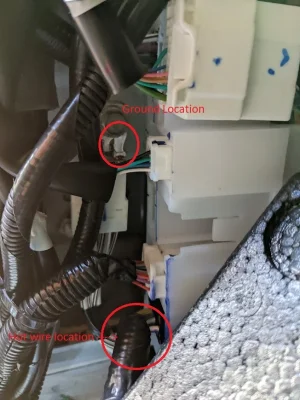
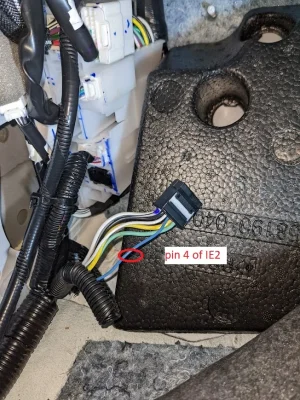
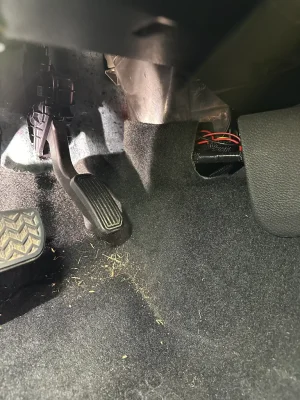
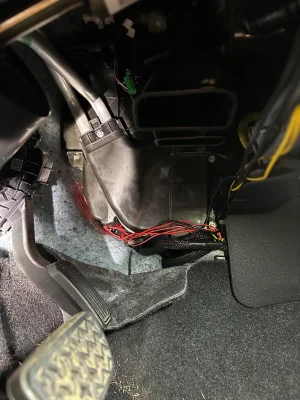
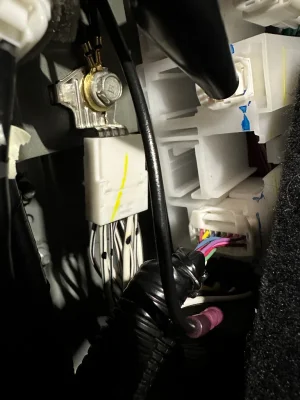
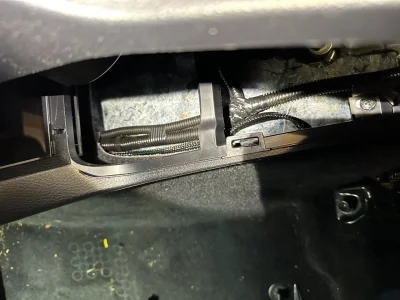
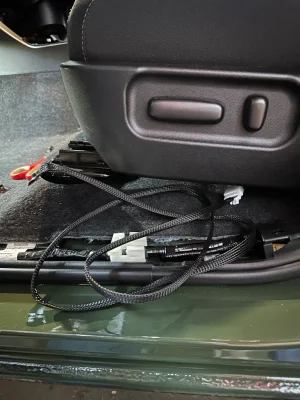
Next I located IE2 which is the junction for the seat heater going to the driver's seat. It is behind the driver's side kick panel. Per the factory diagram, the seat heater is on pin 5 of IE2. During testing, I determined it is actually on pin 4 of IE2. I cut the wire coming out of pin 4 and spliced in my seater heater wiring. I only needed one connection for both seats because I combined the two wiring harnesses behind the switches.
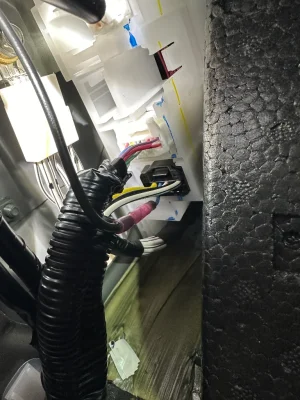
I knew I would need a ground point and, fortunately, there is one right next to IE2.
I wired everything together and the seat heaters work great.
I'd note that you could use this circuit to power any high current device you want (lighting for example) and just re-label the fuse panel. Also, when enabled you have +12v going to both seats so there might be something else you could do with that that might be useful.
I hope this helps some people. I know it will save some time on wiring up a seat heater install.
edit: added term heated seats to help with searching.
It turned out that in my Tacoma ('21 SR5) it is pre-wired for seat heaters. A little more sleuthing and I found that the factory installed a seat heater fuse but no relay. With the relay installed, the factory wiring worked as expected i.e. the circuit was hot when the truck was running and turned off when the truck was off.
I took some pictures along the way that are attached. The switches look factory except for the fact that the blue light is always on (not controlled by the headlights) and the low/high indicators are orange instead of the green used everywhere else. I've already ordered some green LEDs and plan to change them out to make the switches look even more factory.
What you need to know:
The empty relay location is behind the switches to the left of the steering wheel. You can just reach up behind there and pop out the switch plate to see where the relays go. I bought a genuine 4 pin Denso relay (567-0001) from Amazon but there are tons of cheaper off brands as well. I couldn't find the part number for the factory relay but the 567-0001 supports 20amps which is what the fuse is so I don't anticipate any problems. When I bench tested the seat heaters it pulled about 4 amps a seat on high. Install this relay and the seat heater circuit will be live.
Next I located IE2 which is the junction for the seat heater going to the driver's seat. It is behind the driver's side kick panel. Per the factory diagram, the seat heater is on pin 5 of IE2. During testing, I determined it is actually on pin 4 of IE2. I cut the wire coming out of pin 4 and spliced in my seater heater wiring. I only needed one connection for both seats because I combined the two wiring harnesses behind the switches.
I knew I would need a ground point and, fortunately, there is one right next to IE2.
I wired everything together and the seat heaters work great.
I'd note that you could use this circuit to power any high current device you want (lighting for example) and just re-label the fuse panel. Also, when enabled you have +12v going to both seats so there might be something else you could do with that that might be useful.
I hope this helps some people. I know it will save some time on wiring up a seat heater install.
edit: added term heated seats to help with searching.
Attachments
Last edited:
") The second time around the hog rings seem easier.
The second time around the hog rings seem easier.