Last edited:
-
Welcome to Tacoma3G.com, a free resource for 2016-2023 Toyota Tacoma owners!
Tacoma3G is a beginner-friendly 3rd Generation Toyota Tacoma forum (2016-2023 model-year specific). We are a small community of people who are focused on good information and good vibes. More about us....
You are using an out of date browser. It may not display this or other websites correctly.
You should upgrade or use an alternative browser.
You should upgrade or use an alternative browser.
What have you done to, or with, your Tacoma today?
- Thread starter MMoreno16
- Start date
Nice. My 40% delete should be here hopefully this weekGoose Gear
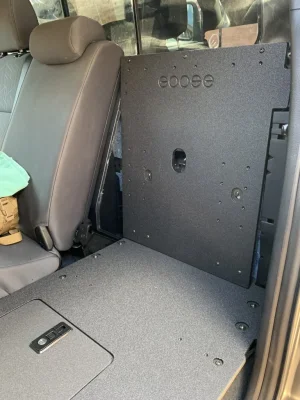
Nice! I'm having some minor issues with fitment on the 40% back panel. The OEM back subwoofer panel is interfering, not sure if it was a change in design by Toyota, or what. I reached out the GG yesterday.Nice. My 40% delete should be here hopefully this week
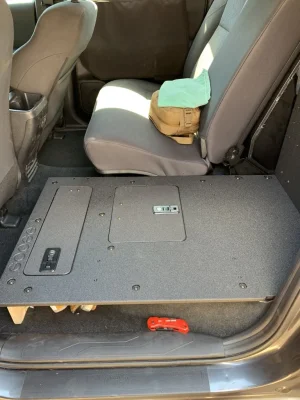
I'd recommend, if you are planning on removing the seat-belts, picking up a 7/16-20 set screw (or some RTV). The lap-belt retention bolt, goes through to the outside of the cab, so when removed, you now have a place for dust, moisture, etc. to enter the vehicle under the RSD platform.
Last edited:
Hmm interesting. I’ll check that out when I’m doing the install. I have plenty of rtv and a bolt is an easy fit. I might even just leave the seat belt incase I need to put the seat back in. Thank for the heads upNice! I'm having some minor issues with fitment on the 40% back panel. The OEM back subwoofer panel is interfering, not sure if it was a change in design by Toyota, or what. I reached out the GG yesterday.
I'd recommend, if you are planning on removing the seat-belts, picking up a 7/16-20 set screw (or some RTV). The lap-belt retention bolt, goes through to the outside of the cab, so when removed, you now have a place for dust, moisture, etc. to enter the vehicle under the RSD platform.
nice color combo... just curious, how much clearance do you have on your back window?? Looks like you are living dangerously thereLocked down my spare tire set up in preparation for the Archive Garage install. Took some time getting together all the odds and ends needed to make it look and function just right. Will have the install video up soon. Sneak Peak pics.


nice color combo... just curious, how much clearance do you have on your back window?? Looks like you are living dangerously there
I have right about an inch between the tire the sliding glass. Here is a test fit pic with the front tie downs just sitting in place, not installed yet.
DavidLReid
7️⃣ Connoisseur
![IMG_8163[1].webp](/data/attachments/30/30401-4f6912bd9b3d62cea4cf30d386653d1b.jpg?hash=VKK14XOjWb)
![IMG_8164[1].webp](/data/attachments/30/30402-d68c6b035205e1756b4efc8778b665a0.jpg?hash=5TQnStvuN9)
Love the idea...but you just made getting your traction boards out in a recovery scenario really challenging. Also with bed flex that tire is going to get really really close to that window! Build is looking great so far, love the new ideasI have right about an inch between the tire the sliding glass. Here is a test fit pic with the front tie downs just sitting in place, not installed yet.

")
Thanks man, I have fun working on it. The tire is real easy to move in order to get to the boards. I also have a second mounting point on the Prinsu for the boards using some galvanized gate hinges. They can be run on the rack when for rides, I just don't like them on the rack full time. I also don't like the pins sticking straight up, so thats why the hinges worked for me. I will keep an eye on how close it gets to the back glass. I have a ride on July the 3rd, I plan to watch how it moves. The angle of the tire can be tweaked to provide more clearance. Also, will be monitoring how the strap holds up to the elements. I appreciate you taking the time to reply. Here is a link to the gate hinges install for the Prinsu incase you were curious. Thanks again.Love the idea...but you just made getting your traction boards out in a recovery scenario really challenging. Also with bed flex that tire is going to get really really close to that window! Build is looking great so far, love the new ideas
Original link: https://youtu.be/c47Ndi3yxGI
Maybe cover that set screw with some silicone to prevent corrosion?
Went adventuring for a week, in the U.P. of Michigan.


The UP is one my favorite places to explore! Checkout the XPDN2 trip we just did with Milestar Tires in the UP on youtube; 4 days, 19 rigs, 500+ off-road miles!Went adventuring for a week, in the U.P. of Michigan.
I ended up adding some protection to it, luckily, I live in a fairly dry climate.Maybe cover that set screw with some silicone to prevent corrosion?
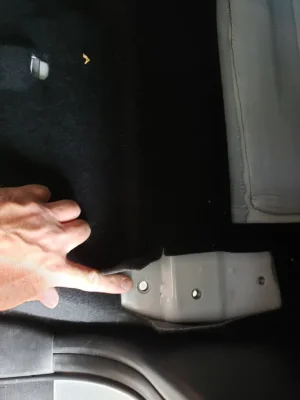
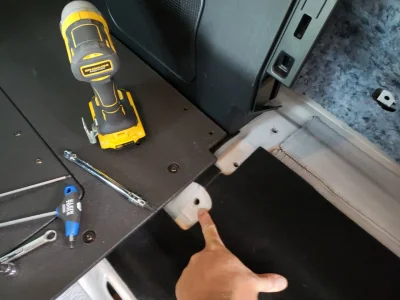
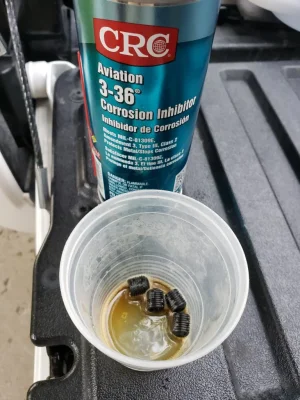
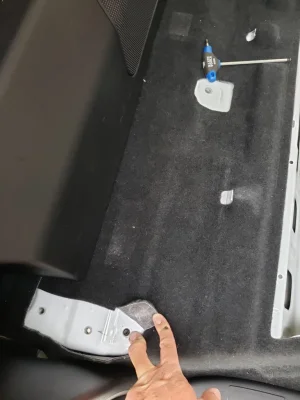
Well, after a few hundred miles, I could hear air rushing into the cab at speed and could feel the higher temps in the RSD panels. I realized I missed some seatbelt holes. So last night I removed the RSD lower panels, found the two holes I missed, removed the two previous set screws I installed from below, soaked four set screws in some CRC 3-36, put a blob of RTV down the holes and installed the setscrews from the inside.
If all seat-belts are removed, there are FOUR holes that need filling. I missed two.Hmm interesting. I’ll check that out when I’m doing the install. I have plenty of rtv and a bolt is an easy fit. I might even just leave the seat belt incase I need to put the seat back in.
Attachments
Finished up running the air lines for the lockers and wiring/ install of the OEM style Toyota switches for the overhead console.
Original link: https://youtu.be/snhGjtQz0uQ
Original link: https://youtu.be/snhGjtQz0uQ
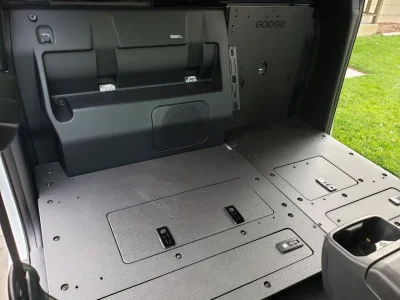
Got my goose gear seat delete in today. Took a bit of figuring out to get it right but it’s a solid system.
Attachments
Anything cool?Drove the '18 to the Gun Shop.......drove 'er home........gettin' ready to drive 'er to an Anniversary gathering......then taking it shooting later this pm!
It's all cool! LOL My local is gettin ammo back on the shelves...gettin some of those dirty black guns back in stock....22LR ammo back in stock at a decent price.....Glocks in stock......I was lovin' it!Anything cool?
Decals and fender chopping.


Patrickz
2️⃣ Bronze
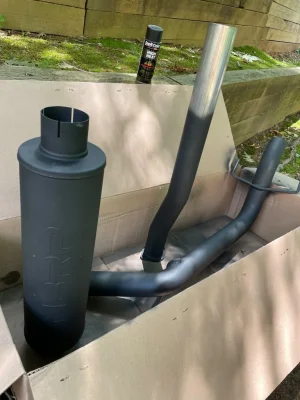
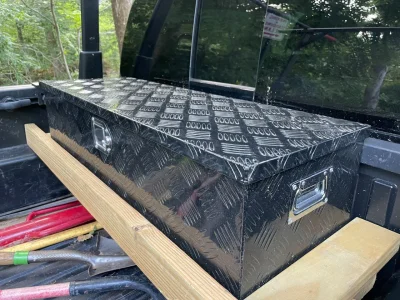
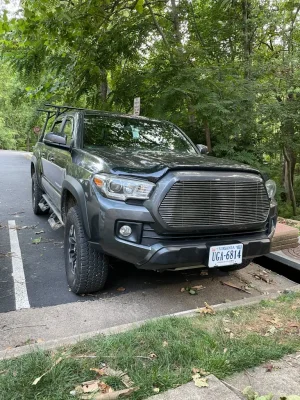
Replaced front grill with a chrome billet grill. Son says it looks like a guys truck now... Also added a bug deflector and a MBRP muffler but did re-paint it with high heat bk color. And a month ago added a nice little tool box.
Attachments


Last edited:
Installed the Morimoto License Plate Lights and Morimoto XB Mirror Turn Signals.
Removed the MESO's.
Original link: https://www.youtube.com/watch?v=cJkynuSdCxE
Did some adjusting on the switch panel I 3D printed. Have to get new screws.
Want to find a better solution for switch illumination. The terminal block is sort of clunky. Maybe I'll make something like a single point terminal. Don't really want to do a 5 to 1 splice.
Ordered a new Driving Light switch because it was a different shape. Hope the new one will match.
My three legged companion was slipping on the door sill moulding and needed a bit of extra traction getting into her crate, so I added a bit of grip tape to the door sill moulding. We will see how the adhesive holds after the summer turns to winter. I had only planned on adding the tape to the drivers side, however, mistakes were made and I forgot to flip my pattern, so I ended up with a set for the passenger side...
Made a pattern with a lumber crayon.

Traced the pattern onto the back of the grip tape.

Cut the shape out of the grip tape, only to discover I forgot to invert it.... Cut out a second set...

Applied the grip tape to the sill moulding...

Popped the moulding back in, all done!

Made a pattern with a lumber crayon.
Traced the pattern onto the back of the grip tape.
Cut the shape out of the grip tape, only to discover I forgot to invert it.... Cut out a second set...
Applied the grip tape to the sill moulding...
Popped the moulding back in, all done!