That turned out super nice!!!! Great idea!My three legged companion was slipping on the door sill moulding and needed a bit of extra traction getting into her crate, so I added a bit of grip tape to the door sill moulding. We will see how the adhesive holds after the summer turns to winter. I had only planned on adding the tape to the drivers side, however, mistakes were made and I forgot to flip my pattern, so I ended up with a set for the passenger side...
Made a pattern with a lumber crayon.

Traced the pattern onto the back of the grip tape.

Cut the shape out of the grip tape, only to discover I forgot to invert it.... Cut out a second set...

Applied the grip tape to the sill moulding...

Popped the moulding back in, all done!

-
Welcome to Tacoma3G.com, a free resource for 2016-2023 Toyota Tacoma owners!
Tacoma3G is a beginner-friendly 3rd Generation Toyota Tacoma forum (2016-2023 model-year specific). We are a small community of people who are focused on good information and good vibes. More about us....
You are using an out of date browser. It may not display this or other websites correctly.
You should upgrade or use an alternative browser.
You should upgrade or use an alternative browser.
What have you done to, or with, your Tacoma today?
- Thread starter MMoreno16
- Start date
Thanks! I was surprised and happy at the outcome! I'm going to check the clearance and see if I can add a strip the lower door frame as well, just to be extra cautious.That turned out super nice!!!! Great idea!
*Edit*
There was clearance, so I went ahead and added the lower strip.
Last edited:
how sturdy do those sliders feel? they look like smaller tubes than other brands that I've seen.Added some Westcott rock sliders and switched to an AGM battery.


Installed the Morimoto License Plate Lights and Morimoto XB Mirror Turn Signals.
Removed the MESO's.
Original link: https://www.youtube.com/watch?v=cJkynuSdCxE
Did some adjusting on the switch panel I 3D printed. Have to get new screws.
Want to find a better solution for switch illumination. The terminal block is sort of clunky. Maybe I'll make something like a single point terminal. Don't really want to do a 5 to 1 splice.
Ordered a new Driving Light switch because it was a different shape. Hope the new one will match.


Love the license plate. What part of PA are you from?
I think what you are seeing is an effect of the wide angle lens on my iPhone. The tubing is 2”x .120 DOM. It’s pretty standard for sliders, cages, etc.how sturdy do those sliders feel? they look like smaller tubes than other brands that I've seen.
Backed it in the garage after driving in the rain and wiped it down. Like brand new!
Scott, you hire out your cleaning service? LolBacked it in the garage after driving in the rain and wiped it down. Like brand new!
Absolutely! But travel expenses can be costly. LOL!!!Scott, you hire out your cleaning service? Lol
We need the rain here, is that included? Quote for services to 89701?Absolutely! But travel expenses can be costly. LOL!!!
What’s the tailgate button do?Shift knob mod

poroto
2️⃣ Bronze
Open the tailgateWhat’s the tailgate button do?
There is a rain shortage so the cost of bringing it with me is sky-high.We need the rain here, is that included? Quote for services to 89701?
Sweet!Open the tailgate
Love the license plate. What part of PA are you from?
Central PA. Mechanicsburg.
Been there. I'm originally from western PA. Ligonier to be specific.Central PA. Mechanicsburg.
Got my AVID bumper back from the powder coater and installed. Added a plug in for my battery tender.


Test fitting 35’s. In prep I did a CMC and flattened the pinch weld. Then I trimmed the fender in some spots. Lastly, I adjusted the alignment by maxing out the caster as far forward as possible.
so far I have not had any rubbing, but that will be a different story off road. I’ve gone ahead an ordered a set of new front shocks to raise the front a bit more, which should help.
I also upgraded the wheels to the SR8 from SCS. The new set up is about 12 pounds lighter per wheel and tire combo than my 33’s mostly due to the weight of the wheels, but the tires are a bit lighter too.
time for a re-gear!
Last edited:
Test fitting 35’s. In prep I did a CMC and flattened the pinch weld. Then I trimmed the fender in some spots. Lastly, I adjusted the alignment by maxing out the caster as far forward as possible.
so far I have not had any rubbing, but that will be a different story off road. I’ve gone ahead an ordered a set of new front shocks to raise the front a bit more, which should help.
I also upgraded the wheels to the SR8 from SCS. The new set up is about 12 pounds lighter per wheel and tire combo than my 33’s mostly due to the weight of the wheels, but the tires are a bit lighter too.
time for a re-gear!


Rig is looking good.
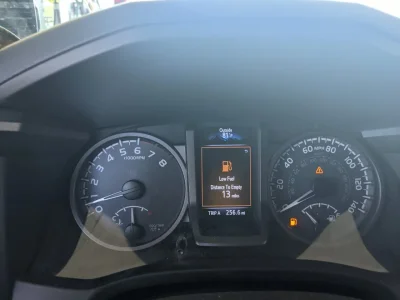
I got my Victory 4x4 roof rack yesterday, and my son and I assembled it. Today we installed it atop the truck, and I swear the only thing preventing a profanity laced two hours of frustration was him being there helping me. It took a solid 10-15 min to get the first bolt in, about 2 min each for the next 8, and then about an hour and a half for the last one. The threads in the roof holes weren’t the M6 bolt size, so that threw off the first one. Once I figured out the 1/4x20 worked it was a breeze till the last bolt. That sonofagun would NOT go in. Almost cross threaded it several times but caught myself and backed it out. Finally, with a hex drive, a lot of downward pressure, and channel locks, I was able to get that last one in. I absolutely should have bolted on the brackets and THEN put the side rails and cross bars on. It would have saved a ton of frustration.
I wouldn’t have been able to install it without my son’s help, either.
Now I need to get the appropriate foam tape and put the weatherstripping back in. But, it’s late, and I think I deserve a few fingers of whiskey.
I wouldn’t have been able to install it without my son’s help, either.
Now I need to get the appropriate foam tape and put the weatherstripping back in. But, it’s late, and I think I deserve a few fingers of whiskey.
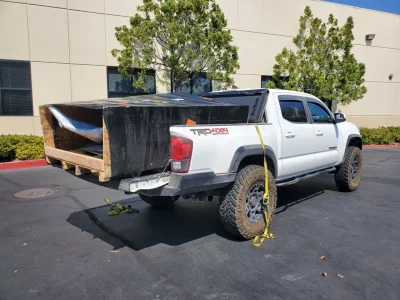
Nice wood! What are going to build?Recieved this yesterday
Nice work. Looks great!I got my kings installed, I still need to do some fine tuning.


what did I do today? well its a little gift for my buddy who has a jeep.... all in good natured fun of course.

The juxtaposition of trying out 4wd and spreading the ashes is quite an interesting coincidence.Got to test out the 4wd over the weekend to spread my step dad's ashes on family property. It was quite the trip in the woods.
These are the terms I was given lol. Needless to say, Tacoma performed flawlessly. My uncle has 800 acres, and it was my step dad's wished to be spread at a pond on the farm.The juxtaposition of trying out 4wd and spreading the ashes is quite an interesting coincidence.
-
About us
Tacoma3G.com is a forum for 3rd Generation Toyota Tacoma enthusiasts (2016-2024 model-years).
- Quick navigation
- User menu


