D
Deleted member 5519
possibly a ghost :(
I used to work in it every day.Great shots. I am lucky to work on the Ocean every day myself

Tacoma3G is a beginner-friendly 3rd Generation Toyota Tacoma forum (2016-2023 model-year specific). We are a small community of people who are focused on good information and good vibes. More about us....
I used to work in it every day.Great shots. I am lucky to work on the Ocean every day myself
Cancel it and go with eibach! That's insanewent to my local 4x4 store today, waiting 2 months for my front 6112 Bilstein's, to come in. This is getting a little ridiculous
A lot of shock companies have long lead times due to vendor and supply issues. I know king is 3-5 months right now for shocks, same with fox.went to my local 4x4 store today, waiting 2 months for my front 6112 Bilstein's, to come in. This is getting a little ridiculous
Oracle vinyl.painted, or wraps

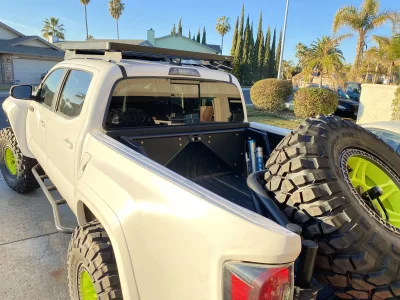
big fan of the color!!!Got my Method MR106 Beadlock wheels powder coated with Prismatic Powders CHARTREUSE SHERBERT, beadlock rings and center caps painted with Steel-It, PowerTank Monster Valves drilled and installed, and new BF Goodrich Krawler T/A KX tires in 37x12.5” mounted up. Front is tubbed, and on camburg +3 LT

Thanks dude! Yea I’m super happy with how the chartreuse came out, and the combo with the gray Steel-It. I had a few cans of black Steel-It left over from doing some stuff in case the gray didn’t look as good as black, and I only painted one ring and center cap gray at first just to check it out but it looked so good I didn’t even bother seeing what the black would look like and I just went right to painting the rest.big fan of the color!!!
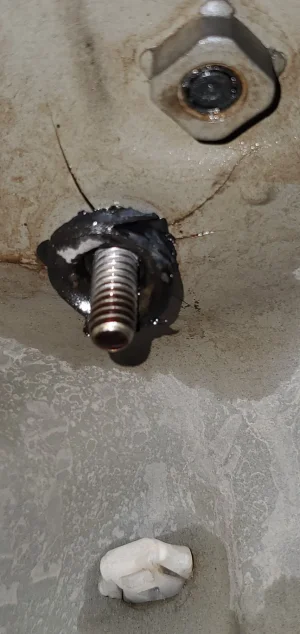
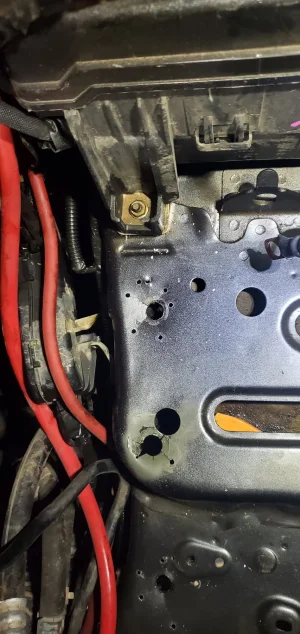
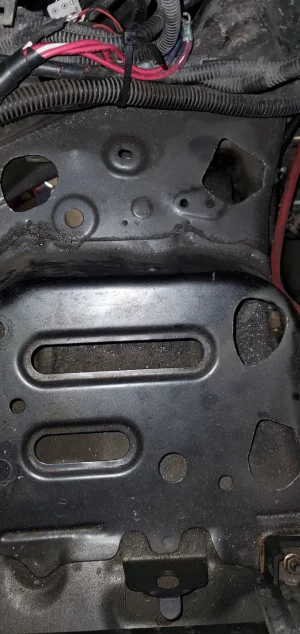
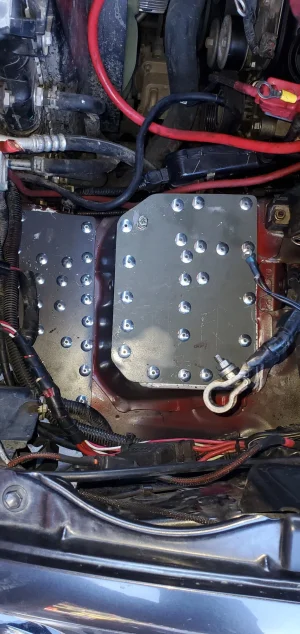
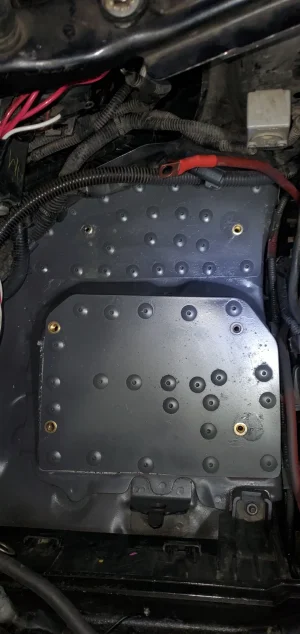
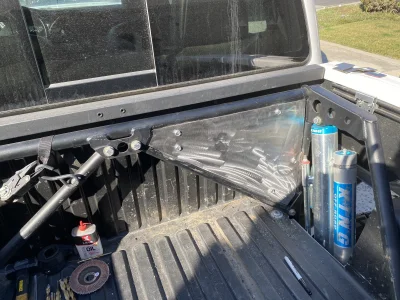
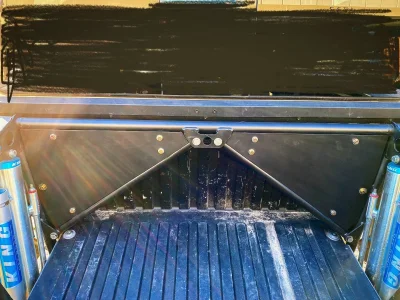
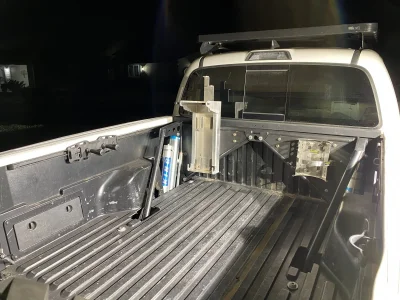
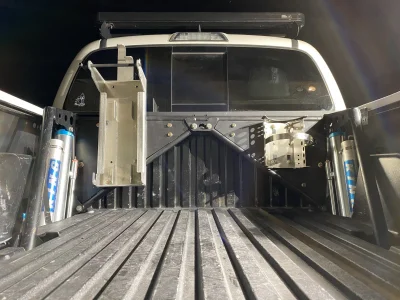
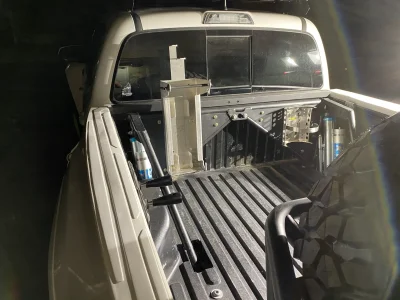
Shooooots... what system were you using? I'm now a bit worried about the dual battery kit that I'm running and if there is something I need to do to prevent similar headaches.Spent the last couple days repairng the damage caused by placing 100lb batteries on 6 small mount points. Had to stop drill and cut damaged sections of the OEM battery shelf out and build a doubler to remount the dual battery tray. Used 16 gauge steel, 3/16" steel rivets, and rivnuts. I used a lot of rivets on this, but the damage was extensive and I didn't want the chance if it moving. I also applied sealant between the sheets of steel to help hold it all in place. Shouldn't be visiting this again. Transparently, I wish I had made the one side a bit longer since the rivnuts ended up super close to the edge.
The existing damage caused enough movement for the batteries to contact the oil filler neck and knock it off. Turns out the oil filler is epoxied onto the valve cover, and the cap screws into the valve cover no problem should this happen to anyone else.
very nice, I am on week 10 on front shock wait.Thanks dude! Yea I’m super happy with how the chartreuse came out, and the combo with the gray Steel-It. I had a few cans of black Steel-It left over from doing some stuff in case the gray didn’t look as good as black, and I only painted one ring and center cap gray at first just to check it out but it looked so good I didn’t even bother seeing what the black would look like and I just went right to painting the rest.
have new bedsides and fenders going on in a couple of weeks, these currently are 6” up front and 4” in the rear but the rear are almost cracked in half already from hitting the tires, the 6” should be much better, and then it’ll be getting a wrap at the end of the month once it back from Fiberwerx.
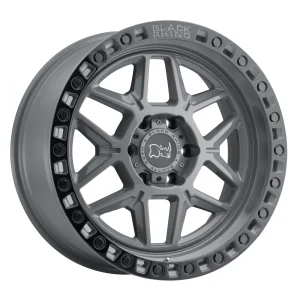
the wheel is also very similar to what I bought, I went with the Black Rhino, Kelso. The bead rim looks almost identicalGot my Method MR106 Beadlock wheels powder coated with Prismatic Powders CHARTREUSE SHERBERT, beadlock rings and center caps painted with Steel-It, PowerTank Monster Valves drilled and installed, and new BF Goodrich Krawler T/A KX tires in 37x12.5” mounted up. Front is tubbed, and on camburg +3 LT
Ouchvery nice, I am on week 10 on front shock wait.

I'm running the Genesis Offroad kit. If you have the option of putting the aux battery on the passenger side I'd go that route. I didn't have that option on my sport.Shooooots... what system were you using? I'm now a bit worried about the dual battery kit that I'm running and if there is something I need to do to prevent similar headaches.
0Replaced my CV axle. It was a bitch.
That's what I'm running too.... I guess I'm going to have to look into supporting it. I should probably have done a remote battery, but I have the ARB compressor set up in the space above the airbox. Now I'm thinking the in-bed mount for that would have been better. Live and learn I guess.I'm running the Genesis Offroad kit. If you have the option of putting the aux battery on the passenger side I'd go that route. I didn't have that option on my sport.
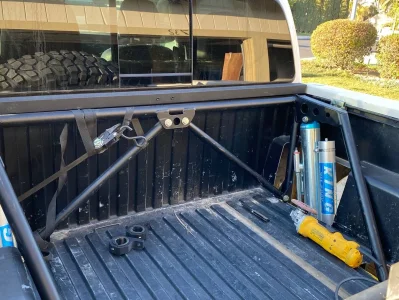
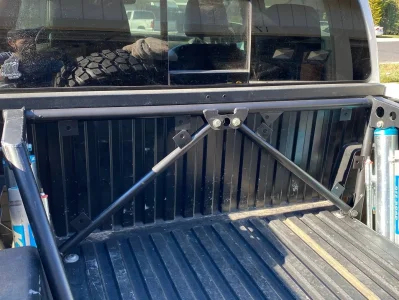

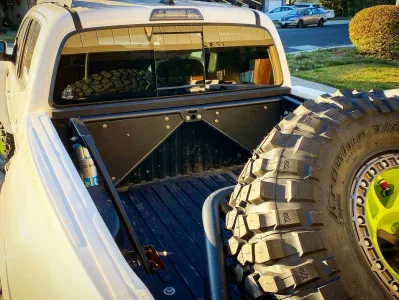
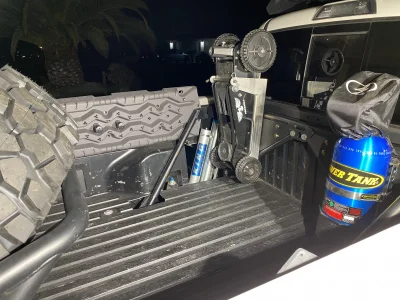

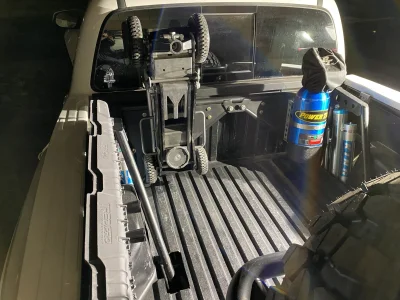
Thanks! Just finished mounting the tredpros, PowerTank, and pro-eagle, thought I’m going to adjust the pro eagle as it looks a touch off, and the tred pros didn’t fit nice on the cage so I mounted to the bed rail opposite from the water port mount for when I go camping. Pretty happy with it so far, and still space to mount a fire extinguisher and some other little stuff, and I’ve still got the roof rack, since most of my bed is taken up by the tire carrier.
Thanks! Camburg bed cage, Camburg SUA kit, and King 3.0 triple bypass with piggyback reservoirs. Haven’t checked rear travel (or front for that matter) especially with the 37’s now, because I’ll blow my 4” bedsides up for sure, they’re just barely hanging on after a year with 35’s, once the 6” bedsides are on I’ll try and see if I can get some kinda numbers, but the truck feels great on the street, the rocks, trails (that I can fit on) and the little sand I’ve been on, but it’s just been finished up so there’s a lot planned this year for itNice work. But, that rear suspension caught my eye. Impressive.