• Welcome to Tacoma3G.com, a free resource for 2016-2023 Toyota Tacoma owners!

    Tacoma3G is a beginner-friendly 3rd Generation Toyota Tacoma (2016-2023 model-years) forum. We are a community of people who are focused on good information and good vibes.

What have you done to, or with, your Tacoma today?

2020-05-25 14.07.42.webp


Plenty of room for me...I had a good hands width. I think the F150s that had been up here shaved off some bark though.
 
Hey you may want to check your jackstands see if there on the recall list! They have been failing and falling on people!

I checked mine as soon as I saw that a couple of days ago and mine technically aren't apart of the recall. But honestly I have to admit I'm not to keen to get back under my truck with stands that look identical to the recalled ones.
 
Hey you may want to check your jackstands see if there on the recall list! They have been failing and falling on people!
Yeah, I bought some acdelco stands for this project. Those just happened to be there for the photo! Good call though! Seriously check your stands. Mine were part of the recall.
 
Yeah, I bought some acdelco stands for this project. Those just happened to be there for the photo! Good call though! Seriously check your stands. Mine were part of the recall.
I ordered a set of 6 ton Big Reds from at Home Depot! Has a pin for added safety!
 
This has been a really fun project over the last 2 weeks! Up here in Michigan we do a lot of winter camping...and with out new RTT that we got a few months ago we wanted to design a heating setup that would keep us warm and toasty throughout the night without creating any condensation! So we built in a 5Kw heater into our Pelican V800 case.

Parts:
Pelican V800 - $200
5Kw Ebay Heater - $90
Additional Parts / Fittings - $150

For those that area curious...no the plastic does not melt. With the proper heat shielding (even more has been placed strategically since these photos) the plastic gets warm but never reaches an unsafe temperature. The hose going into the tent packs up incredibly small and expands big, with really only needing about 1 foot of hose between the tent and the heating unit its incredibly efficient with minimally lost heat. (You can see the outside hose packed up inside the case). For the electronics, we are using an aviation waterproof connector on the outside of the case to extend the thermostat from the case into the tent (since the diesel heater is self regulating to what temperature you set).

Over the summer we will fire up the heater about once a month to double check on the build and the fittings to make sure they are off-road worthy, and then itll be cooler nights here before you know it and we can stay nice and cozy :)

IMG-6974.webp
IMG-6973.webp
 
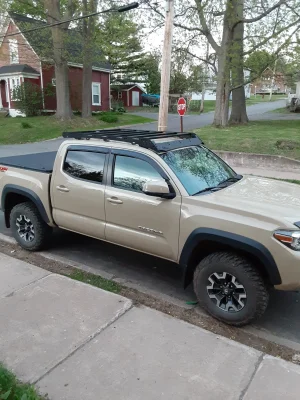
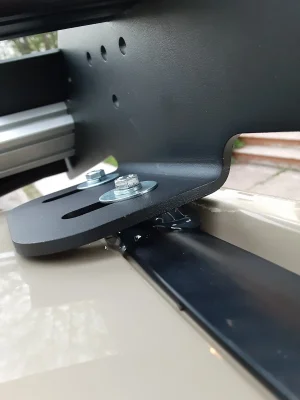
Installed my Prinsu roof rack today. The Cali Raised light bar is on its way. My intentions were to drill 3/4" holes in the stripping but that wasn't happening because of the metal strip in the rubber. So I cut 3/4" off for the spacers and siliconed the gaps. Best I could do. Next buy is rock sliders. Any recommendations for a bolt on set?
 

Attachments

  • 20200529_204247.webp
    20200529_204247.webp
    425.3 KB · Views: 85
  • 20200529_204308.webp
    20200529_204308.webp
    141.5 KB · Views: 87
Rattles? Loose fog lights? Mud in your engine bay?

really cool project. Pondering that for mine when I do bigger tires.
Got up to 80 on the highway and didn't notice any extra noise. But I do have a Prinsu rack with a Plano case & traction boards that causes quite a bit of wind noise.

So good so far.
 
Had spindle gussets installed yesterday, my cab mount repaired, and installed the mid and rear skid plates. FabZone Armor out here in San Diego, CA absolutely KILLED it. I'm so impressed with these guys metal fab skills, and their work ethic. I definitely recommend them.

As the paint on the gusset is drying...
View attachment 22940

What a spindle looks like before the gusset reinforcement is welded on....
View attachment 22941

Gusset during mock up onto the spindle...
View attachment 22942
View attachment 22943

The final product installed...
View attachment 22944

How the cab mount turned out...View attachment 22945

What the Cab Mount looked like before... (To be fair, this was my own doing. I had a CMC done and while it was very good, my upgrade to 35's required more and I was headed on a 2 week trip the next day. So drastic measures were taken. I knew someone some day would be able to repair it. So I did what I had to do and got on the road. It was a great trip to🤣.)
View attachment 22946
View attachment 22947View attachment 22948

And the skid plates fully installed...
View attachment 22949
View attachment 22950
 
Back
Top