Hey everyone, I've been putting off a quick mod for a while now, rerouting the rear differential breather.
Figured I do a quick walkthrough and take pictures in case anyone else wanted to do it as well.
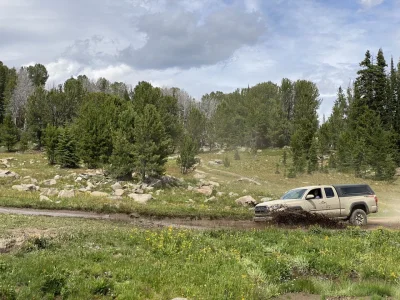
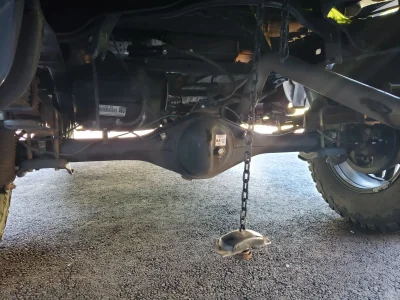
For those who don't know, there is a little knobbly looking thing on the left side of the top of the rear differential. That's the breather. Now, generally, everything is fine. But since most of us here like to offroad, we find ourselves traversing water. Or some of us (me included) just want to be safe. Basically a snorkel for your diff. So there's a quick, cheap and easy mod to move the breather up into the bed and nice and safe away from any pesky water.
What you'll need:
-Plug breather (part # 90930-03136)
-Union (part # 90404-51319)
-Fuel line (3/8ths) (I used about 8 feet)
-Two 3/8ths hose clamps
Tools
-Drill
-3/8ths bit
-12mm socket/wrench
-Flathead screwdriver
Not needed, but highly recommended, drop the spare. Gives you plenty of maneuvering room (especially if you're not lifted)


Clean around the breather.
Remove it with your 12mm.
Install the Union, and fit the fuel line over it.
Tighten down the hose clamp.
Don't cut it short, we'll do that later.

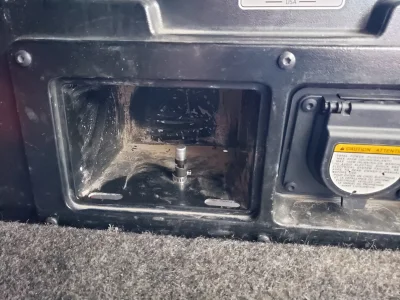
Next, to find a spot for the other end of the breather. Popular spots are the cubbyholes in the bed, and I used the smaller one on the right, as I eventually want to install an ARB compressor in the larger one. I debated widening the one of the two small holes in the rear in the cubbyhole, but decided to drill my own closer up. (It's up to you if you wanna remove the cubbyhole, I did, but it's not necessary)

Next route the fuel line up and around towards the hole. I used zipties to hold it all in place. I had to go up and around to avoid the exhaust.


Now, lightly pull the fuel line through the hole. We want to leave enough slack to compensate for droop. When you're satisfied with the amount, cut it about 1-2 inches from inside the cubbyhole.
Put the other hose clamp over, put the plug breather on, tighten it down and you're done!

Took me about 25 minutes cause I kept stopping to take pictures. Gives me a little more peace of mind when crossing water, even deep puddles while just driving.
Figured I do a quick walkthrough and take pictures in case anyone else wanted to do it as well.
For those who don't know, there is a little knobbly looking thing on the left side of the top of the rear differential. That's the breather. Now, generally, everything is fine. But since most of us here like to offroad, we find ourselves traversing water. Or some of us (me included) just want to be safe. Basically a snorkel for your diff. So there's a quick, cheap and easy mod to move the breather up into the bed and nice and safe away from any pesky water.
What you'll need:
-Plug breather (part # 90930-03136)
-Union (part # 90404-51319)
-Fuel line (3/8ths) (I used about 8 feet)
-Two 3/8ths hose clamps
Tools
-Drill
-3/8ths bit
-12mm socket/wrench
-Flathead screwdriver
Not needed, but highly recommended, drop the spare. Gives you plenty of maneuvering room (especially if you're not lifted)
Clean around the breather.
Remove it with your 12mm.
Install the Union, and fit the fuel line over it.
Tighten down the hose clamp.
Don't cut it short, we'll do that later.
Next, to find a spot for the other end of the breather. Popular spots are the cubbyholes in the bed, and I used the smaller one on the right, as I eventually want to install an ARB compressor in the larger one. I debated widening the one of the two small holes in the rear in the cubbyhole, but decided to drill my own closer up. (It's up to you if you wanna remove the cubbyhole, I did, but it's not necessary)
Next route the fuel line up and around towards the hole. I used zipties to hold it all in place. I had to go up and around to avoid the exhaust.
Now, lightly pull the fuel line through the hole. We want to leave enough slack to compensate for droop. When you're satisfied with the amount, cut it about 1-2 inches from inside the cubbyhole.
Put the other hose clamp over, put the plug breather on, tighten it down and you're done!
Took me about 25 minutes cause I kept stopping to take pictures. Gives me a little more peace of mind when crossing water, even deep puddles while just driving.
")