• Welcome to Tacoma3G.com, a free resource for 2016-2023 Toyota Tacoma owners!

    This website is the passion-project of a USMC veteran/mechanic, @Tyler. I created Tacoma3G.com to share my knowledge of this subject with others and to provide like-minded folks with a comfortable space to ask questions and create 'build threads' within our Tacoma Forums. Now, if the format of this website is confusing to navigate for you, or if you're interested in my full mission and T3G's history, check out the Help and About pages.

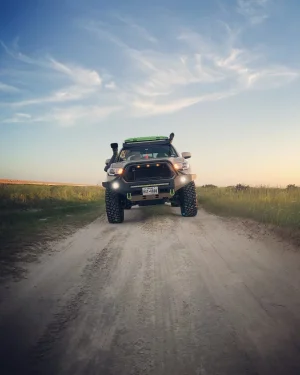
Trail limo build page

148,xxx miles and I finally had to replace parts unwillingly. CV axel boot on the drive side decided to fail and the seal on the boot released more oil than I was comfortable with driving around on.
So last week I picked up two cv axels from Napa auto parts and headed to my parents to make use of some tools from my dad and grandpa.

What a bitch.... ended up taking all day. The “good” one was the worst. I tried being nice to it, it just didn’t cooperate. So I beat it hard until it finally came out.

the first side (passenger) took 3 hrs by time I got tools I needed and got it taken apart and back together. The driver side took 30 min.

Lesson learned on this one for sure. Use a vehicle lift. A jack does not get enough room for leverage.

it was not a hard replacement, but it was frustrating at moments. When things have 140,000 + miles, they don’t come apart like the trucks on YouTube making the fix look super easy.

went ahead and replaced my sway bar bushing and links while I had it apart and ordered a new skid, once I realized the stock one was beat up pretty good trying to rebolt it on and line up the holes.

Needless to say, I could do it again to avoid paying Toyota $480/side.
 
Got the new rci Offroad skid installed Friday. Looks awesome. Also, got the truck detailed for one time a year
D67B0B8C-4B9C-4D75-B639-F5E66A29BDCD.jpeg
0E63559E-F1AA-4E32-A0A8-0E29F958D86F.jpeg
A7427A4F-1B49-4422-9A0A-99EB22A23994.jpeg
FB0060DE-D1F6-459E-B303-6A4DBEDC397C.jpeg
 
Latest Update:

Bought myself a 2020 t4r venture package fully loaded as a daily driver to cut back on my Tacoma’s high mileage.

Recent Mods:
-Redline hood struts
-CMC with home made plates
-35” bfgoodrich km3s
-Added Method NV w/ full size spare
Going to work on a spare tire carrier after I get settled into my new house soon
-Painted my interior trim pieces
-Replaced condenser coil on my tacoma and had the AC recharged

3B9BC041-B341-45B1-99E0-1FE57F8A94B6.jpeg
DC2AD136-041C-4608-A052-614C73EA3036.jpeg
B222F34E-A707-41A3-A5BA-1A5F1D9E93A9.jpeg
AF926360-D022-4655-83D5-BFE87BDBF7EE.jpeg
C383F7F2-4650-450B-85EA-C880DF841655.jpeg
D8824C6A-C05F-4A5F-AD3D-06E8E6697BBD.jpeg
3D4700B9-471D-4CE7-99FC-48049C7209A0.jpeg
9D648539-F420-4943-BE13-1350C3357571.jpeg
237629AB-152D-4556-8407-8CDD84CE93BA.jpeg
0A41BCCE-4DB6-4F0F-AFB9-3AA0BDC608E8.jpeg
B203EBA8-968B-4622-AABC-A6FBD84E27AC.jpeg
BCAA1256-4F49-484A-9EA8-87B3B5834ED0.jpeg
2F2F113D-DBF7-4977-BC5D-167E68EC58F4.jpeg
4E2350BA-A39F-42F6-8E7C-38A6CDFC3035.jpeg
77BA8A8B-4313-4AB1-B3F4-89E4B4892C2A.jpeg
29D3C724-D026-4B0E-BE4A-908EC9F728EB.jpeg
8F8761CB-A334-4515-9CCC-07CA7A7F88B7.jpeg
8B60B69C-4035-4F19-81E0-BDEAEC2F3E41.jpeg
B70FBA33-E47A-4559-8F09-7F338A71BE1F.jpeg
 
-Painted my interior trim pieces
@Traillimo
Can you run me through your interior painting process? I've been thinking about doing the same but didn't want it to all have a matte/DIY look if you get what I mean. Do your interior pieces have the same semi-gloss look as before?
 
@Traillimo
Can you run me through your interior painting process? I've been thinking about doing the same but didn't want it to all have a matte/DIY look if you get what I mean. Do your interior pieces have the same semi-gloss look as before?
Sorry I haven’t been on lately and just saw this.

So I picked up a semi gloss paint. Krylon from Lowe’s in the color I wanted. Not my favorite paint choice because it goes on runny, but the only color I liked that matched my intent. Just be sure it is a plastic bonding paint.

As far as disassembly there are a ton of small screws in the back of the dash pieces. So once you remove from truck you can unscrew the trim from the main dash. The only ones you can remove are the trim pieces around the door controls. Those are molded in one solid piece if I recall correctly, so I just taped them off once removed from the truck.

I sanded it down rough using a mild sand paper grit. And then wet sanded with fine grit sandpaper. The intent was not to fully remove existing paint finish from factory, but to clean and smooth the surface for new paint. So don’t feel like you have to buff it all the way to plastic when sanding. Then wiped with alcohol. Don’t touch with your hands after this point. Wear latex gloves or coat hangers 2 coats of primer for plastics. 3-4 coats of paint and plenty of dry time. You can clear coat, but I did not in this case. Be sure to apply light coats. It will eventually cover everything. Do more coats if needed. Thick coats tend to run on non flat surfaces like these trim pieces.
 
Back
Top