• Welcome to Tacoma3G.com, a free resource for 2016-2023 Toyota Tacoma owners!

    This website is the passion-project of a USMC veteran/mechanic, @Tyler. I created Tacoma3G.com to share my knowledge of this subject with others and to provide like-minded folks with a comfortable space to ask questions and create 'build threads' within our Tacoma Forums. Now, if the format of this website is confusing to navigate for you, or if you're interested in my full mission and T3G's history, check out the Help and About pages.

Recovering Jeep addict

Biohazard

7️⃣ Connoisseur
Rig of the Month
Tacoma3G Supporter
Joined
May 19, 2020
Messages
1,100
Reaction score
2,019
Location
Northeast MS
2020 Pro DCSB Auto
White
Current mods (January 2023)

45558DEA-9FD2-46A5-AA95-9675E39D59D4.jpeg

Inside:
-Victory 4x4 Molle panels center console and both front doors
-Hondo's unholey ac vent mount iphone holder
-cover king seat covers in kryptek black camo

Outside:
-sos concept sliders
-Leitner Designs bed rack system
-prinsu roof rack
-iKamper 3.0
-DECKED bed system
-cbi hidden winch mount
-smittybilt X2O 10k LB winch
-westcott preload 2 inch lift fromt
-Icon RXT rear leaf springs, full set (level 3)
-Matte black vinyl hood wrap
-hood struts
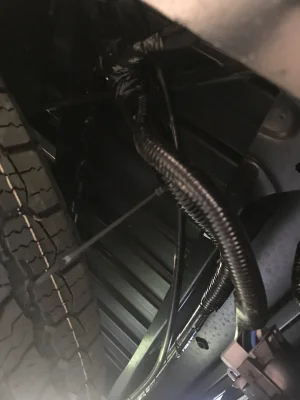
-ARB twin air compressor with Slee Off Road passenger engine compartment mount


(original post from April, 2020)
Howdy all,
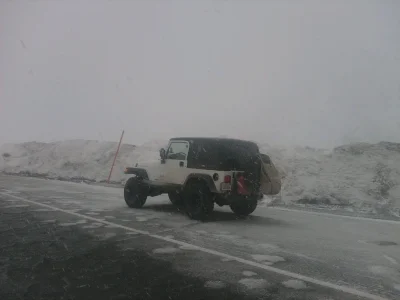
Just got rid of my 2018 JLUR (icon lift, 37’s, lots of do-dads) after the door hinges on my 2 year old, $50k rig started rusting from galvanic corrosion. Still grieving from the loss, but very happy with my new 2020 trd pro. Transmission tuning considerably better than my old 2016 trd off road.

Goal for this truck: all purpose adventure support rig for whitetail deer hunting, bass fishing, and overlanding.
 
Last edited:
Nice man! Welcome to the forum!
 
Due to Covid I'm stuck in my Jeep for a few more months. Congrats on the new Taco!
 
So, I’m realizing that Tacoma world is this strange place characterized by a cacophony of feces-throwing larvae who are still proud of their new-found pubic hairs. Really grateful to the team here who are keeping things clean, family friendly, and professional. Reminds me of the crew over at JLWranglerForums.
Much appreciated. Looking forward to building alongside you guys.
Amen to that. That's why many of us, including me, hang out here more than TW. I really go to TW just to get info, quick answers, and partake in group buys. lol.
 
So, I’m realizing that Tacoma world is this strange place characterized by a cacophony of feces-throwing larvae who are still proud of their new-found pubic hairs. Really grateful to the team here who are keeping things clean, family friendly, and professional. Reminds me of the crew over at JLWranglerForums.
Much appreciated. Looking forward to building alongside you guys.

That’s why I enjoy it here. I love a good, occasional, pot stirring but too many big heads on TW. I hang around there only to talk with the locals to me.

It’s a great place here on T3G, not saying that just cause I’m a moderator- I’ve been on here since I got my truck and only recently joined TW lol.
 
First mod, since I’m going camping this weekend, and it requires a 100yd 2ft deep water crossing. ARB’s differential breather valve relocation kit. Simple project, cheaper ways to do it, but arb’s kit is super clean, and I like the “everything you need” package. You guys will probably chuckle at the simple job and a needless write up, but I’m hoping to embolden a new taco owner to dive in a do their first little something.

04C3FF29-A28E-4EFC-A11C-B6B12AB4616A.jpeg
Tools required:
-drill (I used a 5/64’s drill bit, mostly because I broke the two sizes above it)
-wire cutters (tubing and zip ties)
-14mm socket and ratchet
-13mm wrench or small adjustable
-large adjustable wrench
-Phillips screw driver


B6F23044-0AC9-49E5-A3C9-E950B7C865BE.jpeg

Contents of the arb package
-4 bsp plugs (one for each end of the tube, one end goes in the differential, the other in the...)
-aluminum manifold
-air filter
-3 plugs (3mm Allen wrench to screw them in tightly)
-zipties
-tubing, lots of tubing.
3052234E-4118-410D-AF62-D8252E94DA47.jpeg

Here is where the differential breather valve is. Screw the old one out with the 14mm socket and ratchet, screw the new one in with a 13mm hand wrench (couldn’t get the 13mm socket around the connection mechanism without a lot of muscle, didn’t want to damage it).

DE90DE1E-AA74-4670-B1AA-6E06C236FF1E.jpeg

I soaked the tubing (keeping the ends above water) in hot water for about 5 minutes, which softened it up a good bit and made for easier manipulation.

I routed the tubing along a brake line (leaving extra length for an eventual lift) then to the drivers side and above the spare tire, along the electrical wiring, across the back just underneath and in front of the tailgate (again, along wiring). Come out above the frame just inside the rear passenger quarter panel, and up into a hole that *gasp* just happens to already be in the little storage cubby in the bed. The tubing fits into this thing perfectly.
7854D9C4-56FD-4516-AAAC-EF8C324608C1.jpeg

D7368FC0-3C99-46C6-A6E5-9CE0CA47846A.jpeg

CAD63774-D334-4C79-BEC5-FD0CD20B2D0F.jpeg

F9C9C20F-E62E-443F-BACE-83AF12E0B9E6.jpeg
95073BB5-A464-43FB-9C27-C67890EBF0B2.jpeg


Then prepare the manifold. I had to use a large adjustable wrench to get enough leverage to screw in the little bsp tuning attachment part. The tubing is pushed in while pressing down the little black connection mechanism, and releasing the mechanism once the tubing slips in allows little teeth to bite into the tubing.
Also screw in place the extra 3mm Allen wrench bits if you aren’t using the other ports.
93459938-90A9-467F-9BC0-497A62289C0F.jpeg

Drill a couple pilot holes after carefully measuring... and the using a Phillips screw driver (forgot to put that in the tools photo above), mount the manifold.
4218114E-A606-4067-8891-45BB97255808.jpeg


Screw in the arb air filter. And that’s that. Still enough room for a ratchet strap.
170407D8-1226-4DE8-B7F5-ACB8BC56FEC5.jpeg

7B2D6B4C-73A3-4AAA-A481-CEA0BD7AD7B6.jpeg
 

Attachments

  • 6E97D8FA-0B3E-40A8-8B2B-2AC73F5FBFE9.jpeg
    6E97D8FA-0B3E-40A8-8B2B-2AC73F5FBFE9.jpeg
    295.2 KB · Views: 136
Last edited:
Factory bed lights installed. Thanks JR for the recommendation. https://www.amazon.com/dp/B084ZYH1K9/?tag=tacoma3g-20
649AD668-9DF4-4F05-8F83-59BCAF03AD78.jpeg
tools: flat head screwdriver, 10mm wrench, fingers.
DAC504AD-5F7C-438E-B3A4-6B1D4CD968E9.jpeg

pry this thing off

4695392D-D0A5-4D61-8528-8BEC04BF98B7.jpeg
F8E62946-E198-4FB9-AB94-1841DE8D856F.jpeg

Take off these two bolts

2DC97FA6-AE26-4E33-B0E2-5173B75D670E.jpeg

Use your fingers and pull. There are two plastic female snaps that a metal male end inserts into at both the top and bottom. Pulling the tail light will pop it out.

1CC4AF78-0C48-43E8-9F31-79EAD6BDF399.jpeg

If your pre-wiring is done, this little dead end piece will be hanging around. Remove it from the bed support with lots of wiggling and pulling. Pop off the cap, then...
5ABDFC33-3D61-4ECC-8CA9-BB2E116CE991.jpeg

attach the new piece like so.

8B4E7F07-8478-44E6-B53F-35B35972C116.jpeg

Snake the other end back around to the hole in the bed (snap the little black pieces into the bed support frame afterwards, before you put everything back together).
E669B254-A6BE-49D3-84C7-C4200FAC3343.jpeg

And then plug into the light, and slip the light into place. Boom.

Let there be light. And there was. And it was good.
 
i see you don't waste any time.. nice write up. i haven't even taken possession of mine yet and yet here we are.. adding to the to do list :giggle:
 
Well, have some limited time and lost effort in the JL I just got rid of. Need to get this thing up to par ;).
 
Added a cbi hidden winch mount and smittybilt 10k h2o winch.
Had this winch on my JL previously, love it. Waterproof, great line speed, wireless function works great at over 50yds from the vehicle, backup wired function just in case, and the best thing of all: $500 bucks ($650 with synthetic line). Warn is $1000 more, and have heard various reliability issues.

these attached instructions are for their full bumper, but there is a little frame trimming, a power steering cooler relocation mount, and frame supports that mount at the sway bar sites that are a little tricky unless you have some explicit instructions which are the same for the bumper as the hidden winch mount.
 

Attachments

  • CBI Front T3 Instructions.pdf
    11.8 MB · Views: 118
Just installed Hondo Garage's unholey phone mount to my driver's right sided air vent. Extremely solid. The actual phone mount portion is very solid, but may not stay long because it takes about 5-10 seconds (opposed to 1.5 seconds with the ram x-mount) to place the phone and lock it in place.

I really like not having the phone be a mile away on the windshield, and it keeps the vent still useable (albeit slightly decreased in the range of directability).
34735C18-5EAB-4137-AF06-CCCB50BA085E.jpeg

86A6E921-7235-465A-AC00-DE7E40077926.jpeg
 
5 month update on the Hondo phone mount:
-outstanding device, exceptionally pleased with it.
-location is closer to my reach
-never falls off the window
-didn't require drilling into anything
-very solid mount, holds the phone still and secure even when bouncing around off road.
-easy install
 
Better: ride, quiet in the cabin, having a truck bed, dealership and service experience

worse: seating position, cabin layout, sound system, ease of modification (Jeep is super easy, designed for easy aftermarket mods), fuel economy, tire size, off-road capability.

I regret that the Jeep had all the little things that required fixing, and that it rusted at the door hinges due to Galvanic corrosion... but I wish I had been able to keep it. I think once I'm in a position to have more than one personal vehicle, a Jeep may well make it back into my garage
 
I made the swap from a Tacoma to a jlu and I don’t regret the swap one bit. Sure it’s got wind noise but it drives much better. The 8 speed is much much better. The layout is so much better
 
Better: ride, quiet in the cabin, having a truck bed, dealership and service experience

worse: seating position, cabin layout, sound system, ease of modification (Jeep is super easy, designed for easy aftermarket mods), fuel economy, tire size, off-road capability.

I regret that the Jeep had all the little things that required fixing, and that it rusted at the door hinges due to Galvanic corrosion... but I wish I had been able to keep it. I think once I'm in a position to have more than one personal vehicle, a Jeep may well make it back into my garage
yea, the sound system blows, I had a lexus 350 F Sport before, best sound system ever in that SUV.
 
I came to a Tacoma from a TJ, so other than the off-road capability and ease of modification, every bit of the Tacoma is way better. I am having a had time dropping the wave, I see a Tacoma and my brain thinks 'oh, same vehicle you are in, commence wave'.
 

Attachments

  • jeep.jpg
    jeep.jpg
    235.7 KB · Views: 91
Back
Top