Alright so I know many of you may have seen @Rob Daman and his install video, but I like some others would rather just click through pictures and see what I need to do so here it goes,
I installed mine by removing the grill, others will say go through the fender liner but this worked just fine.
Tools you will need,
Phillips head screwdriver
Flat head screwdriver
Removal
1.) First you need to remove your grill there are two screws on top and two push pins
2.) Next you will need to remove the pin holding in the shroud on each side, there is one per side
there are two clips on each shroud, one on top, one in the middle be careful but they should come right out.
3.) After pulling out the shroud you will need to unclip the factory fog light from the harness.
4.) The tricky part. removing the foglight bezel. I was able to just pull on it and pop it off. Rob showed that you can reach in and squeeze the clips and pop it out that way also.
5.) Reach around with a phillips screwdriver and remove the single screw holding the factory foglight in. Once you remove that pull the housing toward the truck and slide the to tabs out of the slot.
Installation
With the new items coming from Baja Designs with the bezel preinstalled I skipped that step.
6.) First step of the install starts with the mounting brackets. the tabs for the out side if the light will include the holes. (you will utilize this hole to screw it back in. Don't be alarmed there is only one hole the t4r requires 2 holes). The inside bracket is the one including two tabs. mount them with the tabs more toward the front of the light.
7.) The package is supplied with a block of foam. this is so that there is no slop in the mount and you won't have moving lights. Cut two pieces of foam. small enough to fit behind where the tabs will slide in, but big enough to hold them tight. (cut large first then trim down).
8.) Once you get the foam inserted you can now slide the two tabs into the mounting location. If your foam pieces are too big the won't allow you to insert the tabs.
9.) After you have the tabs with the foam inserts behind them you will need to reach around and screw in the factory screw into the same hole you removed it from.
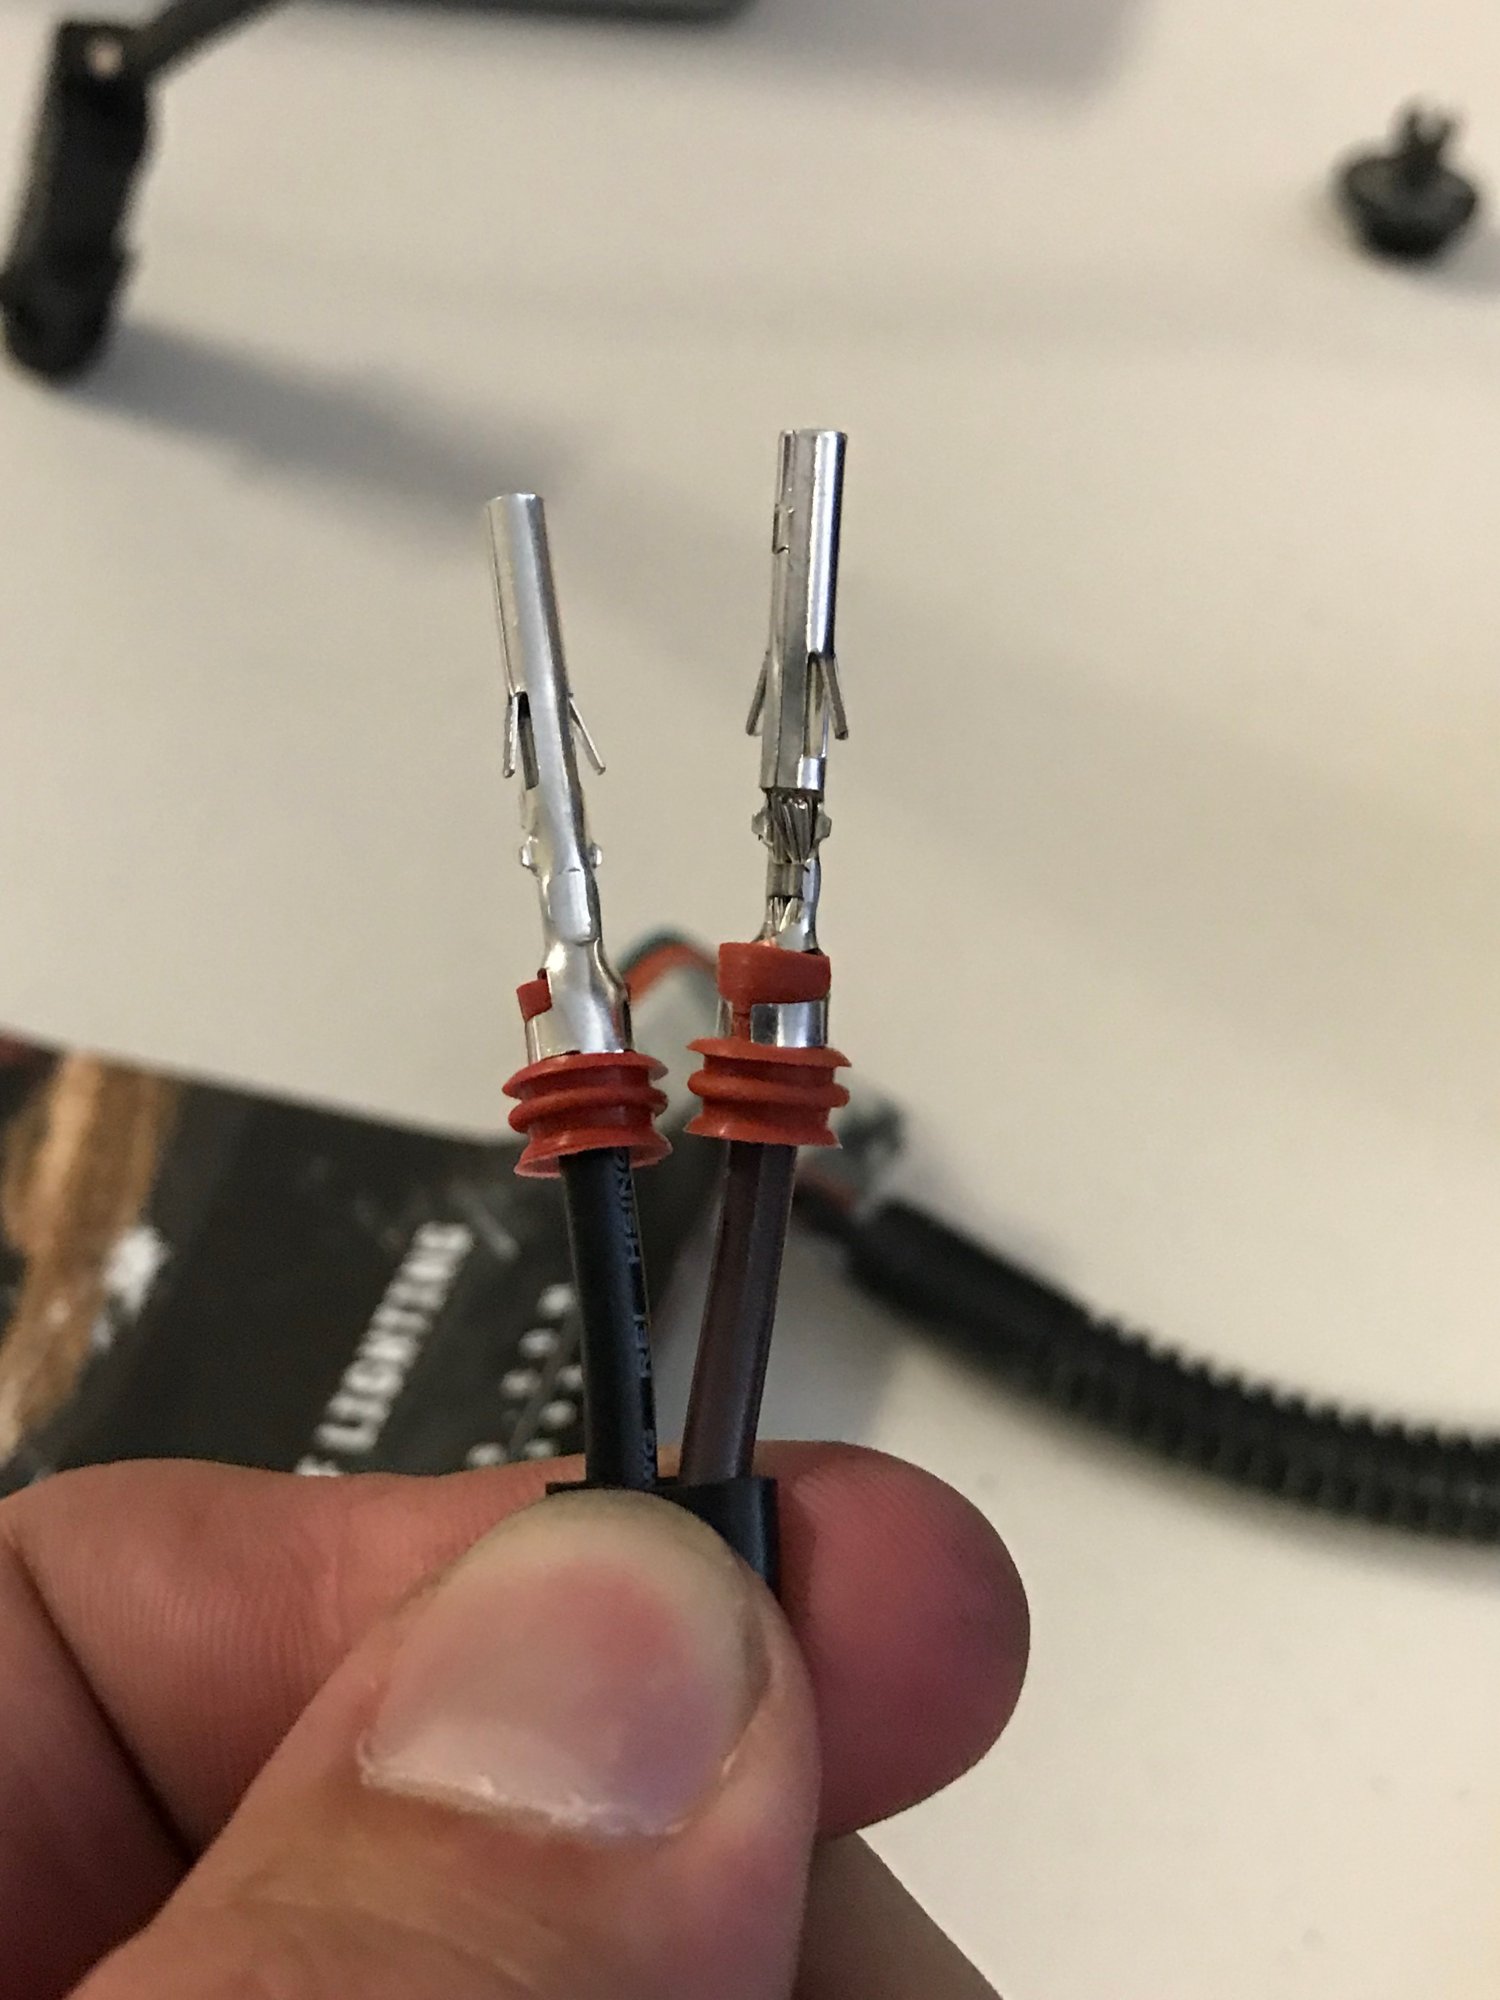
10.) The box will include a bag with connectors. You will need to slide the tabs into the connectors in the proper configuration. From the trucks factory harness to the first harness white = black/ brown = green on from the harness to the light harness black = black and brown = white.
11.) With the lights wired up you can now work on angling them. Once you get them where you want them you can tighten the bolts.
Reassembly
12.) With the lights installed start by putting the bezel back in place. You may have to readjust the lights so the fit with the bezel.
13.) Clip back in the shrouds starting with the middle then the top and insert the in.
14.) Reinstall the grill
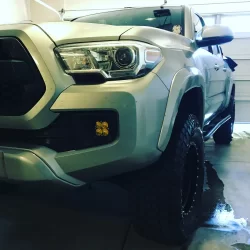
15.) enjoy these amazing lights


I installed mine by removing the grill, others will say go through the fender liner but this worked just fine.
Tools you will need,
Phillips head screwdriver
Flat head screwdriver
Removal
1.) First you need to remove your grill there are two screws on top and two push pins
2.) Next you will need to remove the pin holding in the shroud on each side, there is one per side
there are two clips on each shroud, one on top, one in the middle be careful but they should come right out.
3.) After pulling out the shroud you will need to unclip the factory fog light from the harness.
4.) The tricky part. removing the foglight bezel. I was able to just pull on it and pop it off. Rob showed that you can reach in and squeeze the clips and pop it out that way also.
5.) Reach around with a phillips screwdriver and remove the single screw holding the factory foglight in. Once you remove that pull the housing toward the truck and slide the to tabs out of the slot.
Installation
With the new items coming from Baja Designs with the bezel preinstalled I skipped that step.
6.) First step of the install starts with the mounting brackets. the tabs for the out side if the light will include the holes. (you will utilize this hole to screw it back in. Don't be alarmed there is only one hole the t4r requires 2 holes). The inside bracket is the one including two tabs. mount them with the tabs more toward the front of the light.
7.) The package is supplied with a block of foam. this is so that there is no slop in the mount and you won't have moving lights. Cut two pieces of foam. small enough to fit behind where the tabs will slide in, but big enough to hold them tight. (cut large first then trim down).
8.) Once you get the foam inserted you can now slide the two tabs into the mounting location. If your foam pieces are too big the won't allow you to insert the tabs.
9.) After you have the tabs with the foam inserts behind them you will need to reach around and screw in the factory screw into the same hole you removed it from.
10.) The box will include a bag with connectors. You will need to slide the tabs into the connectors in the proper configuration. From the trucks factory harness to the first harness white = black/ brown = green on from the harness to the light harness black = black and brown = white.
11.) With the lights wired up you can now work on angling them. Once you get them where you want them you can tighten the bolts.
Reassembly
12.) With the lights installed start by putting the bezel back in place. You may have to readjust the lights so the fit with the bezel.
13.) Clip back in the shrouds starting with the middle then the top and insert the in.
14.) Reinstall the grill
15.) enjoy these amazing lights