Chaury08
3️⃣ Silver
This is my first write up on how to do anything. I am no mechanic nor do I know if everything I did was right but it worked for me. Sorry I dont have torque specs either.
Budbuilt Stage 2 Rock Armor for Gen 3 Tacoma. My Tacoma is a 17 OR. I got the steel version with stainless hardware. I also got them in bare metal non prepped and to my surprise everything was prepped besides one of them. Which saved me a lot of time and work. After my shitty paint job and I was ready to install. I suck at painting but used self etching primer and stainless steel high performance rustoleum if anyone is interested.


Thanks again Budbuilt for the awesome skids.
Here are some of the tools I used.
3/8 and 1/2 ratchets, extensions for them as well
Sockets 12mm, 13mm, 9/16
9/16 ratchet wrench. (I know the picture shows 15mm, grabbed the wrong one)
C clamp
Anti seize (copper)
Most importantly if you are doing this buy yourself a motorcycle jack helps out so much.

This dewalt ratchet and 9/16 fit perfect when installing the gas tank skid. It was a tight fit not much space to work with.

I had a TRD pro skid on already so I removed the 4 bolts holding it on and then put the factory bolts back it to those places. Didnt take photos of that.

1. Starting with the front skid plate there is 2 hooks that you can hook the skid plate on to help hold it. You have 2 bolts front and 2 in the back.

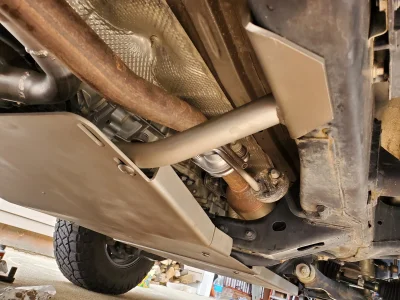
2.Once the front plate is secure move on to the mid. Using the lift I was able to position the mid skid. Line the 4 holes up then secure the mid plate.


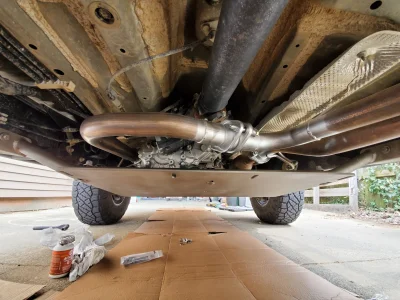
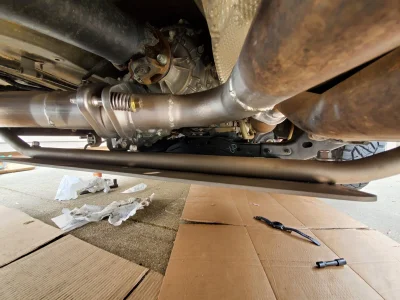
3. Adding the cross member. On this part I was a little lost so gave Bud a call and he was able to point me in the right direction. On the cross member you want the flanges pointing towards the back of the truck. It will go right after the frame supports behind your t-case. It was a tight fit and but was able to knock it with my hands. Then secure the nut plates on them. I left them loose at first while I put the t-case skid on just in case I needed to move it around.


4. T-case skid. Sliding the skid in place using the lift you want to slide the front of the skid over the the mid skid and the rear will line up with the cross bar. There are 7 bolts for the T-case skid. 2 bolts connect to the mid skid. 2 bolts to the cross member and 3 bolts for the cross bar.


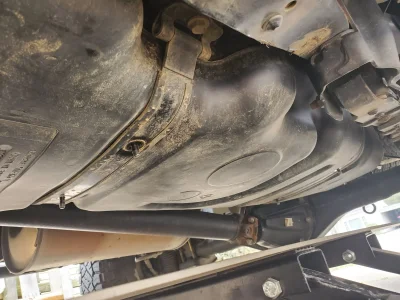
5. Gas tank skid. I have an OR so I already have the tank straps. Removed the 4 12mm bolts to drop the plastic tank skid. Then using the lift jack the tank skid in place and line up the 4 strap studs with the skid. They recommend your tank being at 1/4 full. Mine was 1/2 and was difficult to get all 4 studs lined up.


I got the front 2 studs easily and one of the back studs. I started the nuts on these but didn't tighten yet. Then moved up from the 2 bolts that go in the very front. I ended up using a c clamp to hole the skid to the frame and started both bolts. It is a tight fit but the dewalt 1/2 drive and 9/16 fit perfect.


Once that was secure I moved to the final nut that I was having troubles with. Using the lift I was able to lift that end enough to get the stud to come through. It was a bit difficult but was able to get enough threads through to get the nut to catch.


Probably not the best write up on an installation but I hope it helps someone. I tired to to get good pictures and if anyone has questions I can try to help.
Thanks everyone.
Budbuilt Stage 2 Rock Armor for Gen 3 Tacoma. My Tacoma is a 17 OR. I got the steel version with stainless hardware. I also got them in bare metal non prepped and to my surprise everything was prepped besides one of them. Which saved me a lot of time and work. After my shitty paint job and I was ready to install. I suck at painting but used self etching primer and stainless steel high performance rustoleum if anyone is interested.
Thanks again Budbuilt for the awesome skids.
Here are some of the tools I used.
3/8 and 1/2 ratchets, extensions for them as well
Sockets 12mm, 13mm, 9/16
9/16 ratchet wrench. (I know the picture shows 15mm, grabbed the wrong one)
C clamp
Anti seize (copper)
Most importantly if you are doing this buy yourself a motorcycle jack helps out so much.
This dewalt ratchet and 9/16 fit perfect when installing the gas tank skid. It was a tight fit not much space to work with.
I had a TRD pro skid on already so I removed the 4 bolts holding it on and then put the factory bolts back it to those places. Didnt take photos of that.
1. Starting with the front skid plate there is 2 hooks that you can hook the skid plate on to help hold it. You have 2 bolts front and 2 in the back.
2.Once the front plate is secure move on to the mid. Using the lift I was able to position the mid skid. Line the 4 holes up then secure the mid plate.
3. Adding the cross member. On this part I was a little lost so gave Bud a call and he was able to point me in the right direction. On the cross member you want the flanges pointing towards the back of the truck. It will go right after the frame supports behind your t-case. It was a tight fit and but was able to knock it with my hands. Then secure the nut plates on them. I left them loose at first while I put the t-case skid on just in case I needed to move it around.
4. T-case skid. Sliding the skid in place using the lift you want to slide the front of the skid over the the mid skid and the rear will line up with the cross bar. There are 7 bolts for the T-case skid. 2 bolts connect to the mid skid. 2 bolts to the cross member and 3 bolts for the cross bar.
5. Gas tank skid. I have an OR so I already have the tank straps. Removed the 4 12mm bolts to drop the plastic tank skid. Then using the lift jack the tank skid in place and line up the 4 strap studs with the skid. They recommend your tank being at 1/4 full. Mine was 1/2 and was difficult to get all 4 studs lined up.
I got the front 2 studs easily and one of the back studs. I started the nuts on these but didn't tighten yet. Then moved up from the 2 bolts that go in the very front. I ended up using a c clamp to hole the skid to the frame and started both bolts. It is a tight fit but the dewalt 1/2 drive and 9/16 fit perfect.
Once that was secure I moved to the final nut that I was having troubles with. Using the lift I was able to lift that end enough to get the stud to come through. It was a bit difficult but was able to get enough threads through to get the nut to catch.
Probably not the best write up on an installation but I hope it helps someone. I tired to to get good pictures and if anyone has questions I can try to help.
Thanks everyone.
Attachments
Last edited: