• Welcome to Tacoma3G.com, a free resource for 2016-2023 Toyota Tacoma owners!

    This website is the passion-project of a USMC veteran/mechanic, @Tyler. I created Tacoma3G.com to share my knowledge of this subject with others and to provide like-minded folks with a comfortable space to ask questions and create 'build threads' within our Tacoma Forums. Now, if the format of this website is confusing to navigate for you, or if you're interested in my full mission and T3G's history, check out the Help and About pages.

Tutorial Archive Garage Hammer Hangers install tips, photos, and review

Tyler

🔟 Mythical
Badministrator
Volunteer T3G Editor
Joined
Apr 12, 2018
Messages
8,591
Reaction score
17,710
Age
32
Location
Long Island, NY
Website
tacoma3g.com
2017 TRD OR DCLB Auto
Quicksand
🛠️ I've been sitting on these bad boys for a LONG time. Well, the time is here! (I mean, my truck left me no choice - more on that later.)

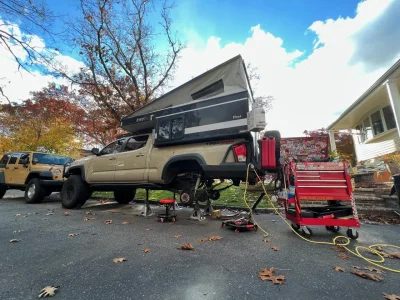
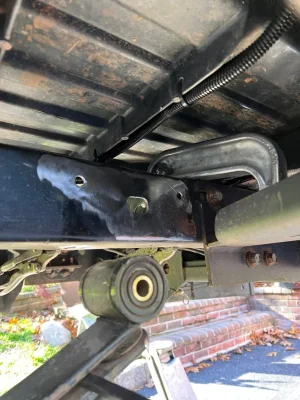
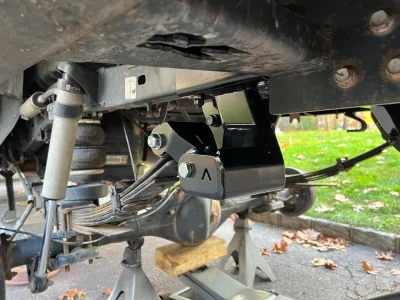
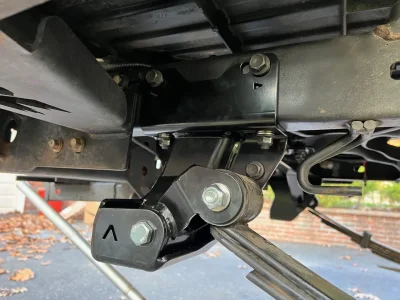
This will be my "live" install thread of the @ARCHIVE Hammer Hangers, shackles, and cross tube. I'll continue to update this thread with tips and photos while I'm actually doing the install. The process is generally considered very simple but time consuming due to the removal of factory rivets in the frame.


🎁 Here's the goods.

Tacoma3G forum members eligible for 5% discount, please message @ARCHIVE on the forum for coupon code BEFORE YOU BUY.

2005-2021 TACOMA HAMMER HANGERS SHACKLE HANGERS SOA+SUA TRD PRO
rs=w-970,h-970-2.jpeg

-WHAT THEY DO: Noticeably improve ride quality and composure, improve handling by reducing rear sway, increase travel capacity (12" typical with shock relo, 14" max), and vastly increase durability over stock flimsy hangers, which cause the annoying Tacoma rear jitters.

-Hammer hangers properly align with the leaf springs!!!

-Version 3: Highest clearance replacement hangers on the market, Features 2 positions: Max droop and now stock location possible by drilling 1 extra hole

-Compatible with EVERY Spring Over Axle (SOA) spring pack on the market and Spring Under Axle (SUA) conversions (4.0” shackles recommended).

-A must for all Tacomas from stock daily driver to fully built (No other mods are required to run these hangers)

-NO LIFT on VERSION 3. (HH version 3 released 8/2020; 4.0" shackles would lower the truck about 1/4" vs stock hanger/shackle.)

OPTIONAL SHACKLE ADD-ON
rs=w-970,h-970.jpeg

-Reusing stock shackles (3.4") and OEM rubber bushings are totally fine for SOA (Fab'd shackles extend your lead time)

-Select quality poly bushings/sleeves for the stock shackle for 10"-14" travel (must remove the stock metal/rubber bushings)

-3.6" shackles jig-built from 3/16" steel, 1/4" wall machined DOM tube, and assembled w/ poly bushings & grease fitting.

-4.0" shackles jig-built from 3/16" steel, 1/4" wall machined DOM tube, and assembled w/ poly bushings & grease fitting.

(4.0" shackles will work with any spring. 4.0" shackles required for Deaver SUA springs)

HIGH CLEARANCE CROSS TUBE OPTION FOR TACOMA HAMMER HANGERS
rs=w-970,h-970-3.jpeg

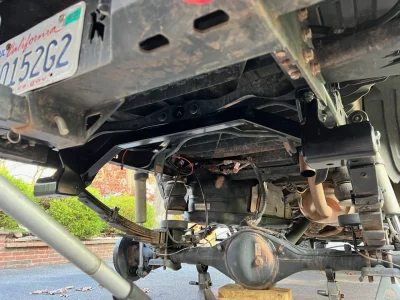
-This Hi clearance cross tube option is 1.75" SQ tube x .120 wall steel w/ 1/4" end flanges, also bolts to stock cross member with included bracket (100% bolt-on no drilling), powdercoated, and includes hardware.

The cross tube DOES add an additional improvement in ride quality (~20% of hanger improvement), because it connects the 2 hangers and frame rails together which adds torsional rigidity.

This also protects the frame from stress applied to one hanger like rock hits.


‼️ Here's why -- in my case in particular -- I have to do this upgrade.

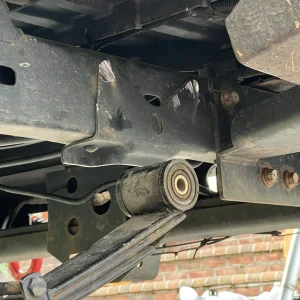
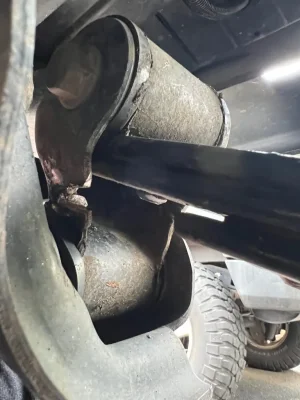
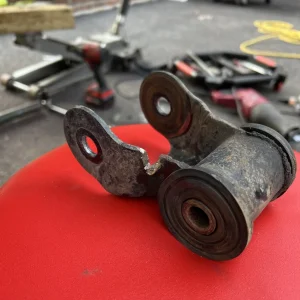
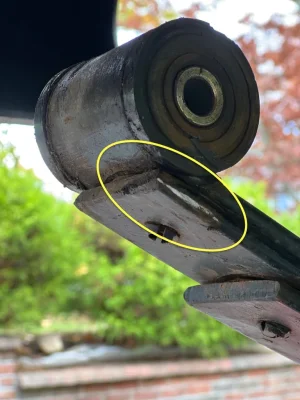
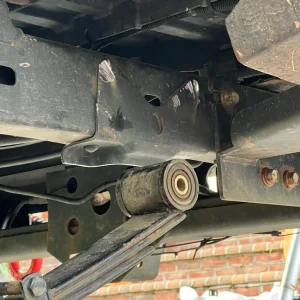
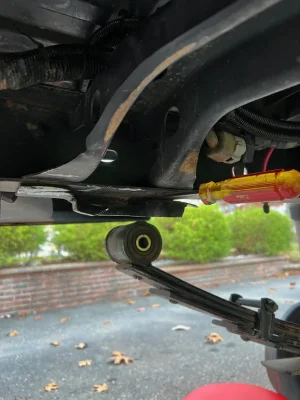
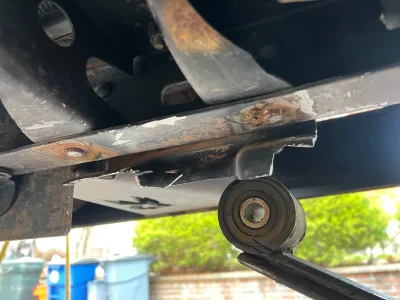
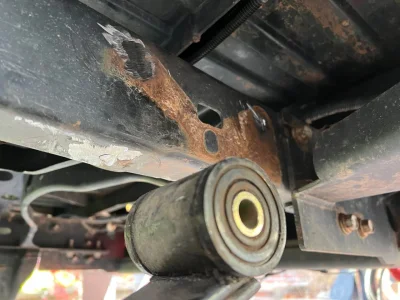
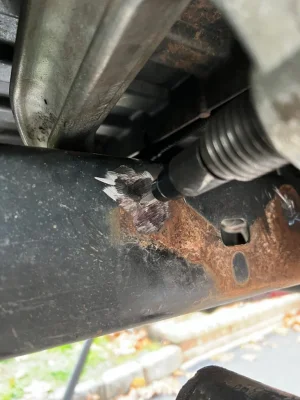
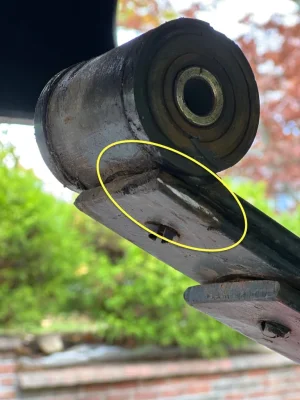
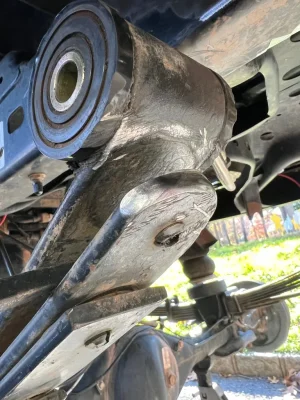
My @DobinsonsUSA leaf springs, over time, chewed into the factory leaf spring shackles. I believe its the edge of the second leaf that does this. I've heard this can happen with various aftermarket leaf springs, so check your truck! We have more leaf spring information and comparisons in this thread.

tempImage2y2wCx.png
 
Last edited:
Step 1: Remove the old junk.

TASKTOOLSTIPSPHOTOS
Disconnect leaf spring from factory hanger
  • 1-2 wheel chocks
  • Jack
  • 2-4 jack stands
  • 3/4" socket/wrench
  • Breaker bar
Set jack stands relatively high under the frame (easier to work), use jack to let rear axle droop almost fully (watch brake lines), remove 3/4" shackle-to-hanger bolt, spin shackle out of your way
Grind factory rivet heads down until flush with frame
  • Eye protection
  • Angle grinder
  • Multiple cut-off wheels
  • Grinding wheel
still in progresstempImage75X23W.png
 
Last edited:
Some live updates incoming...

IMG_0430.jpeg

Reason for doing this. Second leaf spring chewed through factory shackle:
IMG_0081.jpegtempImage2m9u5F.png

Evidence seen here:
IMG_0441.jpeg

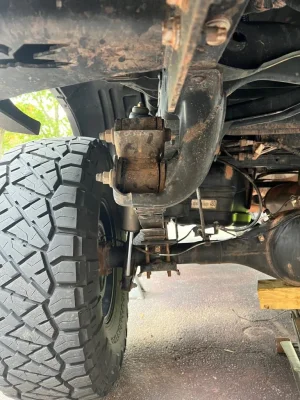
I think my factory hanger is also bent/out of geometry, causing the front alignment to seem bad, and causing a small vibration from the rear tires (think about a crooked axle trying to drive straight):
IMG_0079.jpeg
 
Last edited:
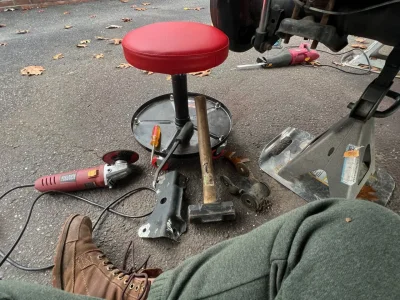
Main tools (I'm also a big tool):
IMG_0440.jpeg

Gotta get old hanger and rivets off. Ground down rivet heads:
IMG_0395.jpeg

Can easily bang off old hanger now:
IMG_0432.jpeg

More rivet exposed now:
IMG_0434.jpeg

Grind those off too:
IMG_0444.jpeg

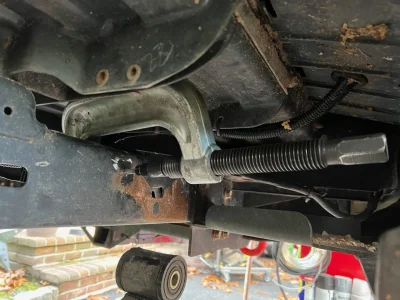
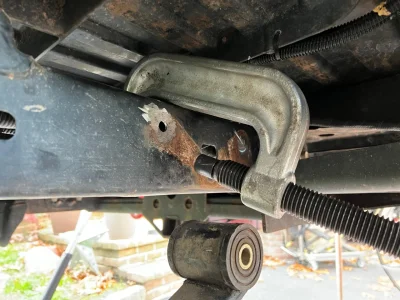
Need to bang rivets out now. Can use a punch/hammer, impact hammer, or try what I tried, which luckily made it very easy. This is a ball joint press:
IMG_0447.jpegIMG_0445.jpegIMG_0449.jpeg
 
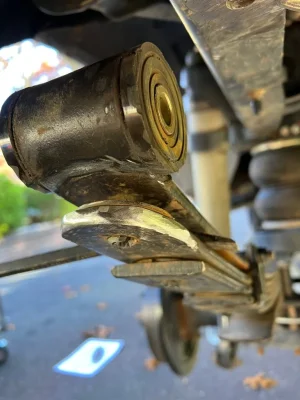
Before installing new parts, I trimmed the edges of the second leaf spring to prevent this from happening again. Depending on your aftermarket leaf spring manufacturer, you may want to consider doing this part.

Before:
IMG_0441.jpeg

After:
IMG_0466.jpegIMG_0465.jpeg


Good idea suggested by @ARCHIVE and @MJ'sTacoma!
 
Last edited:
How do they alter the ride if they use the stock shackle? are they in a different location? Or is it just that if you have a super heavy truck they will actually be straight?
 
How do they alter the ride if they use the stock shackle? are they in a different location? Or is it just that if you have a super heavy truck they will actually be straight?
Mine aren't using the stock shackle - I replaced those with @ARCHIVE shackles. The location isn't different; the hangers bolt to the holes from factory (after removing rivets), and the shackles bolt to the hangers and leaf springs as they normally would. Also, the @ARCHIVE shackles have a Zerk fitting for grease, so that's a plus.

How do they ride? I only did a quick test drive today. Tomorrow morning, we're leaving New York to drive to California. So I'll have a review about how they drive after that.

I'm not an expert but they appear to be built so well that other things would break way before they bend/stop being straight.
 
How long did the project take you to finish?
The first side took about 4 hours? But I learned a lot on that side. Little tricks and techniques that eventually worked well for me with the tools I have. A lot of trial and error at first.

The second side took 1.75 hours. The stuff I learned on the first side took all of the trial and error out of it, making it as efficient as I could've been.

The entire process is very simple but getting the rivets out is time consuming and there's no way around it. You just need to figure out what works with the tools you have.

Side note: Aftermarket rear bumpers can potentially make things more difficult and might need to come off completely, depending on the bumper. Mine was in my way for one of the rivets but I was still able to get in there to get it done without taking the bumper off. Albeit, extremely uncomfortably, lol.
 
Are the shackle mounts in a different location relative to the stock location?
 
Are the shackle mounts in a different location relative to the stock location?
There’s actually two positions for this.

The default position from Archive has the shackle land slightly toward the rear of the truck relative to stock. But this is the position that most will use because it doesn’t require adding holes to the frame, it just bolts into the factory holes. This position also provides a bit more max droop.

The alternative position will actually keep the shackle in the same location relative to stock. You would drill new holes in the frame and mount the hanger there. The geometry of the Archive hanger will then have the shackle land in the same position as stock.

Need to have @ARCHIVE confirm actual numbers for relative distances. I’m thinking about 1”?

For the forward "stock" position, you use 3 of the 4 original holes per side, and you just have to drill 1 additional per side in frame because of the aftermarket high clearance bumpers most land a bumper support 1/8" behind stock hanger.

The rearmost "droop" position is where the Hammer hangers have been from the beginning, we just added the option on version 3 (current) so that people could easily install in stock position, best of both worlds, especially when you upgrade from cheap springs to Deavers etc

Readers can take a look at post #7 above, you can see the holes are in the Hammer hangers already, so it to move forward
 
Last edited:
Thread update:

Left NY for CA on Sunday afternoon. It’s Monday night and we are currently here:

F1584E3E-1852-469C-94D8-5494812E6654.png

The truck has been driving and handling great with the hangers. But once I get to CA, I’ll finish putting the info in this thread and give them a proper review.
Any chance you're coming through Northern NV or Tahoe? We could do a video.

-M
 
Any chance you're coming through Northern NV or Tahoe? We could do a video.

-M
Going direct to SoCal for an event over the weekend. After that, I'll be all up and down the west for a while so we can definitely set something up for this winter.
 
So the ARB springs are doing the same thing to my shackles. I'm going to replace the shackles and grind the springs to clear them.

Any recommendations on replacement shackles for this? I don't really want to do the whole Hammer Hanger thing. at the moment.

-M
 
So the ARB springs are doing the same thing to my shackles. I'm going to replace the shackles and grind the springs to clear them.

Any recommendations on replacement shackles for this? I don't really want to do the whole Hammer Hanger thing. at the moment.

-M
If you don't want to do the whole Hammer Hanger thing, I would just replace them with OEM ones again. The OEM shackles (not hangers) should hold up basically forever, so long as your leaf springs don't eat them as a snack again, lol.
 
Wow. I gotta check mine out now. My friggin OME mediums suck ass. They’ve gone flat and squeak like crazy. Was thinking dobinson but not now. Icon rxt maybe
 
Yeah. I’m not sure I got deaver money. Lol
 
Yeah. I’m not sure I got deaver money. Lol
I have learned to wait, save then buy once cry once too many times I have settled for something of lower value to only replace it later, however I completely understand....mind you I am harder om my rig then most:LOL: with that said Tacoma's are capable to do most things stock.....I kept mine that way for 3 years before the mods started...
 
Wow. I gotta check mine out now. My friggin OME mediums suck ass. They’ve gone flat and squeak like crazy. Was thinking dobinson but not now. Icon rxt maybe
I'm pretty happy with the springs aside from the shackle issue. I have the heavies and they haven't sacked in 6 months or so.
 
Hey bud, first, great write up! I’ll be using your info when I install my hangers and cross tube here in about a week. Second, how’s the off-roading with airbags? I’m thinking about adding some. I typically off-road moderate-to-heavy in Colorado and Utah. Carry a full load out w/ rooftop tent and gear, etc… I am currently running Icon 2.5 extended shocks. What’s the pros and cons?
 
Hey bud, first, great write up! I’ll be using your info when I install my hangers and cross tube here in about a week. Second, how’s the off-roading with airbags? I’m thinking about adding some. I typically off-road moderate-to-heavy in Colorado and Utah. Carry a full load out w/ rooftop tent and gear, etc… I am currently running Icon 2.5 extended shocks. What’s the pros and cons?
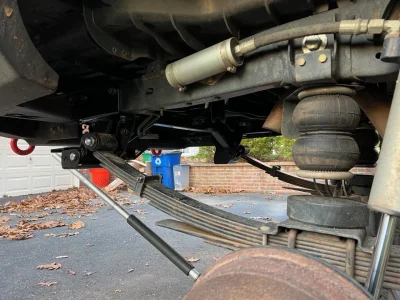
It has been great with the bags because of the optional cradles. The cradles allow you to still get full droop as you would without bags, but you also get the benefits (like stability) from the bags. It makes a very heavy truck feel more like a “regular” truck when going off-camber.
 
Hey bud, first, great write up! I’ll be using your info when I install my hangers and cross tube here in about a week. Second, how’s the off-roading with airbags? I’m thinking about adding some. I typically off-road moderate-to-heavy in Colorado and Utah. Carry a full load out w/ rooftop tent and gear, etc… I am currently running Icon 2.5 extended shocks. What’s the pros and cons?
I also have those same shocks.

8FD1C6D2-FE40-4036-BFBC-88CC8460FF1D.jpeg
BF123E07-6AA2-4519-B7E4-4BFD2FA8575A.jpeg
 
Back
Top