• Welcome to Tacoma3G.com, a free resource for 2016-2023 Toyota Tacoma owners!

    This website is the passion-project of a USMC veteran/mechanic, @Tyler. I created Tacoma3G.com to share my knowledge of this subject with others and to provide like-minded folks with a comfortable space to ask questions and create 'build threads' within our Tacoma Forums. Now, if the format of this website is confusing to navigate for you, or if you're interested in my full mission and T3G's history, check out the Help and About pages.

Hodakaguy's Overland Tacoma Builds - On to new adventures.

Our second SSO Bumper showed up and we opened it up for inspection.

The hoop on this one was straight so no having to cut and repair on the hoop like we did the first one......BUT. The welds holding the hoop on are terrible, I can't believe they allowed this to leave the factory this way. The rest of the welds on the bumper were OK but the ones on the hoop look bad and need to be fixed. The packaging was also terrible with very little padding in the box resulting in one of the sharp bottom corners becoming bent/cracked in shipping.

We didn't want to wait weeks for a new one so time to fix it so we can get the unit installed.

Bumper as it arrived.

IMG_0364-X3.jpg


IMG_0365-X3.jpg


Bent Corner

IMG_0366-X3.jpg


Factory SSO Welds on the hoop. Man I would be embarrassed to let this go out the door.

P3090159-X3.jpg


P3090161-X3.jpg


P3090190-X3.jpg


Going over the factory welds to clean them up. Not as pretty as starting with bare metal but a BIG improvement. Now it won't bug me to look at the bumper every time I walk by the truck :)

P3090195-X3.jpg


P3090197-X3.jpg


P3090175-X3.jpg


P3090186-X3.jpg


P3090202-X3.jpg


Straightening out the corner bend, welding it up and blending it back down again.

P3090203-X3.jpg


P3090207-X3.jpg


After welding we tweaked the sheet metal back to level above the light bar opening with a piece of wood and some wedges.

P3090204-X3.jpg


Now to get the bumpers primed, painted and installed.

More to come soon....

Hodakaguy
 
Update on the SSO Bumper. Kevin (Owner at SSO) posted on my FB post regarding the factory welds...here's his comment: " Tom, you're right. That weld is not acceptable. Had I seen it personally, it would have been re done. You are clearly a skilled craftsman and I wish all of my employees had you talents.

We have had our share of issues these past few months as we expand and hire new employees. I will be showing these photos and comments to my guys fist thing Monday morning so they understand the importance of their work. I'll also be personally reviewing our qc process to ensure this type of issue never happens again.

I've also initiated a refund for one of your bumpers because of the defects."

I appreciate Kevin reaching out and wanting to ensure these issues are fixed before sending out any more orders, shows that he cares about the reputation of his company and the quality of the product that he is putting out the door. Thanks Kevin.

Hodakguy
 
Time to get the bumpers coated in Primer.

P3100261-X3.jpg


LOTS of sanding and cleaning. These pics were taken before cleaning all the welds with a wire wheel.

P3100264-X3.jpg


P3100265-X3.jpg


Getting ready for Primer.

P3100275-X3.jpg


P3100276-X3.jpg


And 2K Epoxy bare metal primer applied. Now to let it dry and get the top coat applied.

P3100278-X3.jpg


P3100279-X3.jpg


P3100284-X3.jpg


More to come....

Hodakaguy
 
Out cruising the back roads tonight and snapped a few pics.

P3100298-X3.jpg


P3100310-X3.jpg


P3100326-X3.jpg


P3100303-X3.jpg


Hodakaguy
 
Installing the Solar Controller and Powerlet Connection.

I'm getting ready to install the solar panels on the roof and it's time to get the Solar charge controller installed. I'm going with a BlueSky Solar Boost 3000i MPPT Controller, I've used this controller in my Syncro and it worked great so decided to stick with what works :)

The factory provides a cut out for their controller right above the heater.

P3180403-X3.jpg


Removing the cover on the controller cutout.

P3180404-X3.jpg


P3180405-X3.jpg


P3180407-X3.jpg


The factory pre-wired the camper for a Solar Controller so install will be simple. The wiring is tucked up above the heater unit.

P3180410-X3.jpg


P3180411-X3.jpg


The 3000i charge controller

P3180408-X3.jpg


P3180409-X3.jpg


The factory cut out is a little small for this controller so some cutting is in order.

P3180413-X3.jpg


Covered the heater unit with a garbage bag to keep the saw dust out of the important bits.

P3180415-X3.jpg


Front cut out and here I've marked a notch that needs to be cut for the rear of the unit.

P3180418-X3.jpg


P3180417-X3.jpg


P3180428-X3.jpg


Test fitting the controller.

P3180421-X3.jpg


P3180425-X3.jpg


Battery wiring is tucked against the far wall behind the batteries.

P3180431-X3.jpg


All the wires were marked from the factory making it easy to identify, I went ahead and verified everything with a meter before wiring everything up just to make sure.

P3180432-X3.jpg


I used Marine grade heat shrink crimps on all connection. I didn't get any pics but there is a fuse holder wired into the battery area.

P3180434-X3.jpg


Connecting the controller. I'll be fabricating a cover for the rear of the controller soon.

P3180437-X3.jpg


P3180439-X3.jpg


Time to install the power connection for the ARB Fridge. I absolutely hate US cigarette lighter connections, they always get loose and your constantly pushing the plug back in. I cut the factory cigarette lighter plug off the fridge harness and wired in a Powerlet connector instead, I'll keep the cut off end and make an adapter so I can also connect to a Cig lighter if needed. Powerlet connectors are great, they snap in place and won't get loose as you travel down the road.

Here is the fridge harness with the new Powerlet end installed.

P3180461-X3.jpg


Powerlet socket that will be installed in the camper. The depth of the socket isn't deep enough to pass through the wood on the camper so an adapter will need to be fabricated.

P3180462-X3.jpg


Fabricating the Powerlet adapter from a scrap piece of aluminum.

P3180440-X3.jpg


Holes drilled and socket test fit.

P3180441-X3.jpg


P3180445-X3.jpg


I drilled a hole in the heater unit just above the heater to install the Powerlet. The hole needed to be slightly bigger to clear the nut on the back of the socket.

P3180449-X3.jpg


Wiring completed for the Powerlet socket.

P3180454-X3.jpg


Controller and Powerlet installed, I painted the adapter black. Looks factory :)

P3180469-X3.jpg


P3180466-X3.jpg


P3180472-X3.jpg


Hodakaguy
 
Installed the fridge to run it for a couple days and test the battery system, should be able to run for several days with no external power with the dual batt system. I'll be installing 240W of solar soon then battery power shouldn't be a issue.

IMG_0505-X3.jpg


With the top down on the camper there is still plenty of room to get into the fridge at rest stops ect without having to pop the top. I'll be installing mounting straps to keep the fridge secure in this location.

IMG_0510-X3.jpg


Next up fabricate a rear guard for the solar charge controller to protect it from items stored inside the cabinet.

Starting out with a piece of aluminum plate.

IMG_0512-X3.jpg


Cutting the piece down to rough size.

IMG_0513-X3.jpg


IMG_0516-X3.jpg


Corners trimmed.

IMG_0518-X3.jpg


Marking out the locations for the air vent holes.

IMG_0519-X3.jpg


Air holes drilled and beveled.

IMG_0523-X3.jpg


Using the finger brake to bend up the guard

IMG_0524-X3.jpg


IMG_0527-X3.jpg


P3200003-X3.jpg


Fabricating some hidden mount tabs from some scrap pieces of stainless.

P3200006-X3.jpg


P3200008-X3.jpg


P3200009-X3.jpg


Factory trim pieces cut down to size and re-installed.

P3200014-X3.jpg


Test fitting the guard in place.

P3200026-X3.jpg


P3200024-X3.jpg


Guard painted and installed in place. Should keep the controller well protected.

P3200030-X3.jpg


P3200032-X3.jpg


P3200036-X3.jpg


Hodakaguy
 
Lots of progress today......Picture Heavy!

Started this morning by installing a 110V NOCO power plug on the side of the camper. This port will connect to a IOTA 15A AGM onboard charger (to be installed soon).

The NOCO power port

P3230486-X3.jpg


I'll be sealing the port to the camper with Sikaflex 221....Good stuff.

P3230487-X3.jpg


The port will be going into the battery compartment just aft of the vent.

P3230489-X3.jpg


Pilot hole drilled....committed now lol.

P3230493-X3.jpg


2" hole drilled.

P3230495-X3.jpg


And power port installed and sealed.

P3230513-X3.jpg


P3230672-X3.jpg


P3230673-X3.jpg


P3230674-X3.jpg


Next up install the Hypertech inline speedometer calibrator. This is a small unit that goes behind the instrument cluster and allows you to correct the speedometer for larger tires. Drives me crazy seeing the speedo off from the GPS :)

The Hypertech unit.

P3230530-X3.jpg


Installing the unit. I routed the USB cable down under the dash and stored it up out of the way, if I need to make tweaks to the calibrator to get the speedo spot on with the GPS I can just plug in the computer and easily make the changes without having to remove the dash again.

P3230516-X3.jpg


P3230521-X3.jpg


P3230528-X3.jpg


P3230532-X3.jpg


Time to install the new SSO (Sothern Style Offroad) Hybrid bumper. Here I've installed the Baja Designs 30' light bar and the winch fairlead.

P3230519-X3.jpg


Installing the synthetic rope on the Warn Zeon 10S. The anchor setup to the spool is pretty slick.

P3230533-X3.jpg


P3230537-X3.jpg


P3230540-X3.jpg


We connected the winch to temporary power and with my dad pulling on the cable spooled it in. Once the assembly is on the truck we will properly tension the cable.

P3230544-X3.jpg


Mounted on the bumper.

P3230551-X3.jpg


Now the fun part....trimming the plastic. Grill removed and laying out the cut lines.

P3230553-X3.jpg


P3230557-X3.jpg


A cheap HF Die Grinder and a skinny wheel made quick work of the cutting.

P3230562-X3.jpg


P3230565-X3.jpg


Nice and clean.

P3230569-X3.jpg


Edge trim installed.

P3230578-X3.jpg


The factory bracing for the lower edge of the plastic bumper. This portion of the brace will interfere with the solenoid pack on the ZEON winch, other low profile winches will clear without modification but I wanted the ZEON unit. I really don't want to remote mount the solenoid pack so I decided to cut out this portion of the brace and fabricate some replacement braces that won't interfere.

P3230581-X3.jpg


My father starting to fabricate the new braces while I get ready to cut out the middle section of the brace.

P3230583-X3.jpg


Brace section removed.

P3230590-X3.jpg


P3230589-X3.jpg


New braces built and painted.

P3230594-X3.jpg


P3230599-X3.jpg


And braces installed. Lots of room for the winch now :)

P3230611-X3.jpg


P3230617-X3.jpg


With the center brace gone I supported the wiring harness with a snap tie.

P3230621-X3.jpg


Bumper in place, trim came out pretty good.

P3230631-X3.jpg


P3230630-X3.jpg


Running the winch wiring. I split some rubber hose and placed it under the tie points for the wiring. Drilled two holes and ran the electrical wiring out behind the drivers headlight assy.

P3230632-X3.jpg


P3230633-X3.jpg


P3230635-X3.jpg


P3230637-X3.jpg


Outside again :)

P3230661-X3.jpg


P3230649-X3.jpg


P3230658-X3.jpg


P3230662-X3.jpg


More to come.....

Hodakaguy
 
Starting to install the Switch Pro wiring unit and dual battery wiring.

I'll be running a Switch Pro unit that has 8 programmable circuits for electrical accessory distribution. First up I mounted the Switch Pro onto the PowerTray mount.

P3250682-X3.jpg


P3250688-X3.jpg


Local ground installed to the Switch Pro, Blue Seas fuse panel and ground buss bar.

P3250695-X3.jpg


P3250742-X3.jpg


P3250743-X3.jpg


Fabricating 1/0 battery cables from high quality welding cable. These cables will connect the truck battery to the aux battery through the ACR (Automatic Combining Relay).

P3250733-X3.jpg


P3250734-X3.jpg


P3250740-X3.jpg


Running the batt cables.

P3250731-X3.jpg


P3250720-X3.jpg


I places loom over the section passing by the battery tray and added a piece of rubber hose as an anti abrasion guard.

P3250724-X3.jpg


P3250736-X3.jpg


Next up I will splice into the factory wiring harness and extend it over to the smaller passenger side battery, this battery will become the truck starting battery. The larger drivers side battery will supply power to the Winch, Lighting, Camper, Air Compressor etc. The ACR will keep both batteries charged up while allowing me to manually combine the two battery banks for higher amp loads when winching or for jump starting a dead truck batt off the aux batt.

The temporary red fuse holder going to the camper will be changed out and cleaned up before it's finished. Still need to add the rest of the lock nuts on the ACR tie down bolts as well.

P3250738-X3.jpg


P3250739-X3.jpg


More to come...

Hodakaguy
 
Time to finish up the battery wiring.

I'll modify the OEM battery connector to work with the new style terminal. Here's the OEM unit.

P3280086-X3.jpg


Cutting the OEM unit apart and re-shaping. Camera got bumped into art mode in this shot.

P3280089-X3.jpg


P3280091-X3.jpg


And connected.

P3280094-X3.jpg


I removed the temporary red fuse holder that connected the Aux batt to the Four Wheel Camper. The wiring is re-routed to the Blue Sea fuse panel. I'll be using printed heat shrink wire labels to identify all wiring and make future troubleshooting and identification easier.

The wire label machine.

P3290099-X3.jpg


Camper wiring labels printed.

P3290103-X3.jpg


And installed.

P3290106-X3.jpg


P3290107-X3.jpg


P3290112-X3.jpg


P3290133-X3.jpg


Running fused power to the Blue Sea fuse panel and SwitchPro unit.

P3290120-X3.jpg


Factory positive terminal

P3290113-X3.jpg


Here I've cut off the factory battery harness end so I can extend the harness about 6" to allow connection to the ACR.

P3290124-X3.jpg


Splice completed.

P3290126-X3.jpg


And all wired up. I installed a 300 amp fuse on each end of the 1/0 positive cable connecting the two Batteries, this will prevent a vehicle fire if the cable ever grounds out for any reason while allowing enough amperage for jump starting a dead starter battery from the Aux unit.

As it is connected now the Group 35 passenger battery is the truck battery and connected to the starter/alternator. The Group 31M drivers side battery is the Aux battery and provides power to the Winch, SwitchPro (Lighting, Air Compressor, Front Locker, Etc) and camper connection. When the FWC is removed from the truck the Aux battery will also supply power to the ARB fridge.

I still need to fabricate some guards to protect all exposed positive connections.

P3290128-X3.jpg


P3290129-X3.jpg


P3290136-X3.jpg


P3290137-X3.jpg


P3290140-X3.jpg


300A fuse on the Passenger side main batt.

P3290130-X3.jpg


More to come.....

Hodakaguy
 
Lots of work done today....

Time for the truck to get a breath of fresh air.

ARB Snorkel arrived. Time to get invasive again on the truck.

P3290141-X3.jpg


Removing the inner fender liner. I decided to do this while leaving the fender flares in place, didn't want to snap any tabs on the flares. Managed to get all but 4 of the retaining clips holding the inner liner out in one piece (They are a pain).

P3290746-X3.jpg


P3290744-X3.jpg


Air box removed.

P3290748-X3.jpg


Setting up the template and marking locations for the required holes.

P3290753-X3.jpg


Pilot holes drilled

P3290756-X3.jpg


P3290757-X3.jpg


Bolt holes drilled to proper size.

P3290759-X3.jpg


Preparing to cut the large hole using a small air saw. Installing painters tape to protect the paint during the cutting process.

P3290761-X3.jpg


P3290761-X3.jpg


P3290763-X3.jpg


All bare surfaces coated in primer.

P3290774-X3.jpg


And top coated with two coats of Blitz black paint.

P3290779-X3.jpg


Removing the alignment tabs on the outlet of the air box so the new rubber boot fits/seals properly.

P3300781-X3.jpg


P3300782-X3.jpg


Installing the new air boot through the fender.

P3300784-X3.jpg


P3300786-X3.jpg


The vertical portion of the snorkel attaches to the A pillar with a small bracket and 3 bolts, the instructions tell you to mark it out and drill 3 holes in the A pillar where you will bolt the bracket in place. I don't mind drilling holes in the fender but won't do it in the cab if I don't have to. Instead of using bolts I'll be attaching the bracket to the A pillar with 3M VHB tape, this tape is ultra strong and will hold the Snorkel secure without requiring holes. I've used this tape on past vehicles in similar situations and it's held up very well.

This is where the bracket attaches to the snorkel and to the A pillar.

P3300790-X3.jpg


Bracket with tape applied.

P3300788-X3.jpg


P3300791-X3.jpg


And attached to the truck....rock solid!...and no holes!

P3300802-X3.jpg


P3300803-X3.jpg


Intake tubing connected. Inner fender liner re-installed right after this step.

P3300795-X3.jpg


Air box going back in. I always grease the seal on the filter with a good waterproof grease to ensure no fine dust makes it's way around the filter and into the engine.

P3300799-X3.jpg


P3300800-X3.jpg


The quality and fit of the ARB unit is VERY good!

P3300837-X3.jpg


P3300829-X3.jpg


P3300832-X3.jpg


Playing with ART mode on the camera.

P3300826-X3.jpg


Time to work on my fathers truck and get it caught up to mine. First up install the Hypertech speedo calibrator and TPAM mount.

First the Hypertech unit going in. About a ten minute job.

P3300813-X3.jpg


P3300808-X3.jpg


P3300812-X3.jpg


Installing the TPAM mount. I found it easier on mine to remove the entire radio unit and AC controls.

P3300814-X3.jpg


P3300815-X3.jpg


Tying the USB power on the TPAM into the factory accessory plug. On mine the wire they gave me was about 1" short and I really had a problem making it reach. This time I extended the harness to make sure I had enough play.

P3300816-X3.jpg


P3300817-X3.jpg


TPAM installed. Haven't mounted the RAM accessories yet.

P3300821-X3.jpg


P3300824-X3.jpg


Not a lot of pics but we installed the Sliders on my fathers truck today.

P3300806-X3.jpg


P3300842-X3.jpg


P3300843-X3.jpg


Last on the list for today is to install the onboard charger in the camper. I'll be installing the charger in the battery compartment, I know that's not an ideal location but space is limited for these kind of mods in the shell model. The battery compartment has two outside vents and the batteries are sealed. I'll monitor the temperature on the charger unit and if it's getting to warm I'll install a small 12v fan on one of the vents to pull in fresh cool air when charging.

The IOTA 15A onboard charger with IQ AGM Module. This charger will provide proper voltages for the 3 stages of charge on the AGM batts and bring the batts up to 14.7V for a proper bulk charge.

P3300845-X3.jpg


P3300846-X3.jpg


Marking the bolt locations. The charger will be mounted on the roof of the battery compartment with flush mounted SS through bolts.

P3300848-X3.jpg


Flush mounted hardware.

P3300849-X3.jpg


P3300851-X3.jpg


Charger mounted and wired.

P3300855-X3.jpg


Plugged in and charging the batts :)

Hodakaguy
 
Today's task....Wiring up the Switch-Pro unit.

Getting ready to run the wire from the Switch-Pro unit to the interior switch assy. There is a rubber plug on the drivers side next to the brake booster that allows easy access to the interior through the firewall. The hole is just big enough that you don't need to remove the electrical connector to get the wiring through. I cut a hole the size of the wire in the middle of the plug and re-installed the plug once the wire was through.

P3310859-X3.jpg


P3310860-X3.jpg


P3310862-X3.jpg


Removing the factory switch holder and storage pocket. This will be replaced with a SDHQ Switch-Pro mount.

P3310866-X3.jpg


P3310867-X3.jpg


The factory switch holder on the left and the SDHQ unit on the right....Quality piece!

P3310869-X3.jpg


OEM switches transferred over to the SDHQ holder.

P3310871-X3.jpg


Getting ready to install the switch assy. Using Loctite 243 to anchor the studs into the rear of the assy. Note: Don't assemble the unit out of the dash plastic or you won't be able to get the whole assembly back in the dash in one piece, the unit needs to be assembled in the dash plastic.

P3310872-X3.jpg


The Switch-Pro harness is very long, I coiled the excess up under the dash and secured it hidden and out of the way.

P3310876-X3.jpg


Unit assembled in the dash plastic.

P3310878-X3.jpg


And installed. The quality and fit of the SDHQ holder is awesome, looks factory!

P3310883-X3.jpg


Wiring as it enters the truck through the firewall, it's way up high and out of the way.

P3310887-X3.jpg


Terminating the power wires to the Switch-Pro. Marine grade heat shrink terminals work great, coupled with some marine grade heat shrink tubing it makes for tidy wiring. I think down the road I will make a cover for the unit to protect the positive terminals and keep any moisture off the unit.

P3310889-X3.jpg


P3310892-X3.jpg


P3310894-X3.jpg


Making up a harness for the Baja Designs S8 light bar that's installed in the bumper.

P3310900-X3.jpg


P3310901-X3.jpg


P3310904-X3.jpg


P3310905-X3.jpg


Light bar wiring terminated and labeled.

P3310908-X3.jpg


P3310909-X3.jpg


Connecting the trigger wiring to the fuse panel. There are three wires that get connected to the fuse panel, one for ignition so that the Switch Pro knows when the truck is running, one for lights (used to auto dim the face and also as a trigger wire if desired and a third wire that is a trigger wire you can connect to your choosing depending on desired application.

P3310911-X3.jpg


The mini add a fuse holder. This is a super clean way of tapping into your factory harness without compromising the factory wiring in any way.

P3310913-X3.jpg


And trigger wires connected. I ran the white wire to the low beam headlights circuit, the light blue ignition wire to the AC circuit and the pink trigger wire to the high beam circuit.

P3310916-X3.jpg


P3310921-X3.jpg


P3310920-X3.jpg


Wiring enters in the corner of the fuse box up from the bottom and heat shrink tubing on the wiring makes a good seal.

P3310917-X3.jpg


Starting to add the labeling on the switch panel, even more factory looking.

P3310918-XL.jpg


Wiring finished.

P3310927-XL.jpg


P3310928-XL.jpg


Now to download the Bluetooth app and program the Switch-Pro unit. This thing is slick!

EDIT: Add a Circuit Fuse Holders

The Switch-Pro kit came with one Add a Circuit fuse holder assembly that accepts Mini fuses. I purchased two more identical Add a Circuit fuse holders to use on the remaining two trigger wires (I don't like to cut factory wiring if not needed). When I pulled the OEM fuses I noticed they are using Mini-Low Profile fuses and not the standard Mini fuse that came with the Switch-Pro. The Mini Add a Circuits fit ok but seemed to have a tad looser fit than I like, although I'm sure it would work fine in the long run. I installed what I had and yesterday picked up a few Add a Circuit units that are designed for the Mini Low Profile fuses.

A standard Mini fuse on the left and a Mini Low Profile fuse on the right. Notice the plastic is thicker between the connectors on the Mini low Profile, this makes for a snug fit in the fuse panel.

P4010972-X3.jpg


Here are the Add a Circuit Fuse Holders....again Mini on the left and Low Profile on the right. The bottom fuse is for the factory circuit and you need to match whatever was in the factory location. The top fuse protects the circuit your adding, I'll be running 5 amp fuses on the trigger wires.

P4010970-X3.jpg


P4010974-X3.jpg


I replaced two of the three Add A Circuits with the low profile units. Because of where I chose to connect for my trigger wiring one location wouldn't properly accept a low profile Add a Circuit. At the High Beam fuse location there is a square fuse that sticks up a bit and prevents the low profile unit from fully engaging the fuse panel, the taller standard Mini Add a Circuit fit in this location with the extra clearance it provides. I swapped out the Ignition trigger and the Low beam trigger with the Low Clearance units and kept the Standard mini on the High Beam trigger. Note: I replaced the snap tie attached to the factory wiring bundle in this picture with tape to prevent and future chaffing on the factory wiring.

P4010976-X3.jpg


Hodakaguy
 
Went out this morning to try out the 30" S8 light bar. Pics were taken on the same manual settings for each shot. This baby throws some good usable light!

I love the daylight color spectrum of the Baja Designs lights, no weird blue or purple tint.

Baja Designs 30" S8 Bar in the SSO Hybrid Bumper.

P3230661-X3.jpg


The low and High beams are the stock bulbs .

Low Beams...

1-X3.jpg


High Beams

2-X3.jpg


High Beams and Light Bar

3-X3.jpg


In these shots I zoomed in a ways down the road to better see how far each beam is throwing.

Low Beams

4-X3.jpg


High Beams

5-X3.jpg


High Beams and Light Bar

6-X3.jpg


Hodakaguy
 
Some camper mods and a review of the cooking gear we carry.

Custom floor mats on the cheap! I picked up a $20 foam backed kitchen mat for the entry of the camper. A little trimming is in order to make it fit perfectly.

Getting ready to trim the mat to size.

P4010980-X3.jpg


I used a socket and a razor blade to round the corners for a factory finished look.

P4010981-X3.jpg


P4010984-X3.jpg


And installed in the camper. The fit is perfect and the foam backing feels great on bare feet. I'll purchase a couple more mats and custom fit the rest of the camper out.

P4010995-X3.jpg


Next up a storage location for our cooking supplies. Storage space in a small camper is at a premium so we need to utilize any available space. This box will go in the open area under the bench seat.

This wood box is light weight, fits the open space perfectly, it's durable and only $17! It also matches the campers interior very nicely.

P4010987-X3.jpg


Adding adhesive backed felt pads to the sides and rear of the box to prevent any wood to wood contact/scratching. Rounded the corners with the socket and razor blade.

P4010988-X3.jpg


P4010989-X3.jpg


P4010990-X3.jpg


Test fitting in the camper....spot on.

P4010994-X3.jpg


P4010993-X3.jpg


Ultra light weight/compact cooking gear review....Our cooking setup in our SWIFT.

With small campers weight is everything and space is a premium, the lighter the overall weight the more enjoyable the trip. Over years of long distance off road motorcycle travel and camping with our past FWC we have refined our light weight cooking gear set. This entire lot of gear fit's nicely into the small light weight wooden storage box and stows perfectly in the open space under the bench seat.

P4011016-X3.jpg


And unloaded.

P4010998-X3.jpg


JetBoil stove: This stove gets used heavily. It's compact and the whole unit stores inside it's own cook pot. It will boil a pot of water in 2 minutes! We use this every day to make coffee in the morning, for anything that needs hot water and you can also cook soup etc in the Pot. The cook pot has a heat sleeve around it and as soon as the water is boiling you can remove the pot from the stove, snap the plastic lid back onto the metal bottom area (Protects you from the hot pot) and hold the pot comfortably in your hand to eat out of if needed. The fuel canister lasts a surprisingly long time, love this piece of kit.

P4010999-X3.jpg


P4011002-X3.jpg


P4011001-X3.jpg


P4011000-X3.jpg


BioLite Wood Stove: This is a very efficient and compact wood burning stove. It will run on any type of wood that you can stick into the burner, I carry pre-cut chunks of Hickory to cook with and can easily restock on the road with bags of BBQ smoking wood chunks available at most stores . There is a small internal electric fan that creates a swirl chamber inside the burner pot for smoke free operation. Once the stove is up and running the TEG (Thermo Electric Generator) produces electricity from the heat and charges it's own internal battery, runs the fan and will even charge a cell phone from a USB port. There are multiple fan speeds to control heat output. The optional grill attachment is awesome, we cook steaks, chicken, hot dogs etc almost nightly with this unit. You can open the lid on the grill and feed the burner without removing the grill. The setup makes for a VERY compact and efficient BBQ!

P4011014-X3.jpg


P4011008-X3.jpg


The TEG Unit.

P4011011-X3.jpg


And grill attached.

P4011010-X3.jpg


Folding Bucket: This is a super light and compact bucket that folds up into a little square pouch. Once deployed it's very durable and self supporting once filled with water. We use this for washing dishes, fetching water to put out a camp fire etc. Very handy.

P4011006-X3.jpg


P4011005-X3.jpg


Primus Fuel Stove: This is a ultra compact stove that screws onto the same bottles of fuel that the JetBoil uses. We use this with the small folding handle pan and have cooked many meals for the three of us with this setup. It's very stable once set up, weights almost nothing and takes up very little space.

Handheld lighter/torch: This is a small extendable handheld lighter that puts out a nice intense flame. Great for lighting the BioLite stove, camp fires etc. There is a small adapter I carry (Pictured) that allows refilling the lighter from the Jetboil fuel containers.

P4011007-X3.jpg


Cooking gear loaded into the camper.

P4011017-X3.jpg


P4011021-X3.jpg


Hodakaguy
 
Time to install the ARB Air compressor and fabricate a folding aluminum step for the camper.

With the Dual Batts and the SwitchPro already mounted under the hood space is becoming harder to find. I looked around a bit and decided the only area that I liked for the Compressor is directly behind the passenger side headlight. The space here is tight but the compressor will fit.

Here's the open area behind the passenger side headlight.

P4061025-X3.jpg


P4061027-X3.jpg


Time to start fabricating the mount. I will utilize the two factory bolts that hold the power steering reservoir to the fender as well as an open hole up high next to the radiator that I will install a bolt through, no drilling on the truck will be needed :)

Laying out the design and cutting parts.

P4061029-X3.jpg


The upper left hole will be a through bolt that will mount to the body, the remaining three holes will have studs welded into them. All 4 holes will secure the compressor to the bracket.

P4061030-X3.jpg


P4061032-X3.jpg


P4061035-X3.jpg


P4061038-X3.jpg


Fabricating the lower mounts. I love MagSwitches!

P4061041-X3.jpg


P4061063-X3.jpg


P4061065-X3.jpg


The extra brace is bolted onto the unit for easier install.

P4061068-X3.jpg


Setting up the compressor. Installed the Solenoid for the front locker, pressure switch and riser for the air hose fitting. I went with the Single cyl unit for the size, this compressor will air up tires and the air bags as well as running the locker. I'll get a rubber cover for the air fitting.

P4061079-X3.jpg


Mount finished and painted.

P4061100-X3.jpg


P4061108-X3.jpg


And installed in the truck, fits like a glove! Shown here with the washer tank removed for easier install.

P4061111-X3.jpg


P4061112-X3.jpg


And washer tank re-installed. Now to hook up the wiring and locker tubing.

P4061137-X3.jpg


P4061140-X3.jpg


Next up....Fabricating the hitch step for the camper. Since the camper sticks out past the rear of the truck the step needs to be quite a ways out to be useful, because of this I wanted the assembly to be fold-able so it can be tucked out of the way when traveling.

We will be using a Weathertech BumpStop Step (easy on the shins if you run into it) and 6061-T6 Aluminum for the extension/folding mechanism.

P4061052-X3.jpg


My father at work drilling the holes for the hitch pin.

P4061060-X3.jpg


Using a Jig saw and a steady hand to cut out the pivot plates from a sheet of Aluminum.

P4061084-X3.jpg


Notching the Tubing.

P4061087-X3.jpg


P4061089-X3.jpg


P4061093-X3.jpg


Welding on the pivot plates

P4061094-X3.jpg


P4061095-X3.jpg


P4061096-X3.jpg


Assembled and on the truck. The pivot bolt and pivot lock pin are temporary in these pics as I didn't have the right size on hand, I'll snag some tomorrow. The whole assembly is super light, strong and folds in just a few seconds.

P4061122-X3.jpg


P4061124-X3.jpg


P4061125-X3.jpg


P4061126-X3.jpg


And extended. The step works great with no deflection....seems to be rock solid.

P4061132-X3.jpg


P4061134-X3.jpg


P4061135-X3.jpg


Hodakaguy.
 
Solar Install.

Originally I was planning on utilizing two 120W flexible solar panels on a custom aluminum mount that I would fabricate to fit the FWC, I utilized a similar setup (with 3 panels) on our old Syncro and it worked out really well. After doing some more research I found a 175W single Mono panel with almost the perfect dimensions for the Swift so decided to switch to this panel. This switch will save a lot of time and hassle over using the flex panels, and should be more durable in the long run.

The NewPowa 175 W Mono Panel.

P4071141-X3.jpg


Back side of the panel.

P4071142-X3.jpg


The factory solar plug installed on the roof of the camper is an SAE connector, I will shorten the wiring on the panel and install the SAE connector in the proper location. I'm using high quality crimps and two layers of marine grade heat shrink on the splices. The connections will be covered by the panel. The insulation on the panel wiring is quite a bit thicker than the wire on the SAE connector, the actual conductor size is very close to the same size.

P4071143-X3.jpg


P4071152-X3.jpg


You can see the factory installed solar plug on the roof of the camper in this shot. The panel will mount on the Yakima roof tracks and fit between the two vents.

P4071148-X3.jpg


Fabricating 4 mounts from 1.5" aluminum angle. These mounts will bolt to the Yakima tracks then onto the aluminum frame of the solar panel.

P4071154-X3.jpg


P4071156-X3.jpg


Connecting the panel to the camper.

P4071157-X3.jpg


Panel mounted up. The size of the panel is perfect, almost like it was made for this application.

P4071166-X3.jpg


P4071169-X3.jpg


P4071163-X3.jpg


P4071164-X3.jpg


It was raining and nasty this morning, after the sun popped out I was able to check out the panel operation. I ran the heater and roof fan for a couple hrs to pull some juice out of the batteries so the panel had something to make up. The sun eventually started popping in and out but I seen as high as 8.5 amps going back into the batts, not bad. I programmed the 3000i charge controller for a bulk charge voltage of 14.8v for the AGM batts, and a Float rate of 13.8V.

Hodakaguy
 
With 5K miles on my truck it's time to pull it in the garage and change the engines vital fluids, I know they aren't due yet by the book but having fresh fluids in the engine every 5K miles makes me feel all warm and fuzzy inside :) Installed fresh oil and filter, greased the upper control arms, greased the front drive shaft and will rotate tires soon.

IMG_0647-X3.jpg


Someone was asking for a picture of the amber back lighting on the S8 bar, not the best shot but you can see what they look like.

IMG_0660-X3.jpg


Our running errands this weekend and parked next to a fellow Snork :)

IMG_0654-X3.jpg


Installed my fathers RAM phone holder on his TPAM mount today, I love this setup!

P4081361-X3.jpg


Also installed my fathers Snorkel this weekend.

I typed up a detailed How-To article on the installation with lots of pics and info. The install article is located here: CLICK HERE

Snorkel on my fathers truck

P4081364-X3.jpg


More to come.....

Hodakaguy
 
Re-visiting the storage box area. Decided to make some rub rails out of 1/4" ABS Plastic to protect the wood next to the storage area.

Piece of scrap ABS that I picked up a few days ago.

P4081376-X3.jpg


Cut a 1" Strip on the table saw.

P4081379-X3.jpg


Beveling the ends that are open to the camper.

P4081382-X3.jpg


I'm using 3M tape to adhere the rails to the camper. It can be removed if needed by carefully sawing through the tape with some fishing line.

P4081384-X3.jpg


P4081385-X3.jpg


And installed in the camper. I will install matching ones in the rear and back corner. Should do a good job at protecting the camper from the wooden storage box. I left a gap on the front edge since I thought it looked better than the plastic going all the way across....if I change my mind down the road I'll install some new pieces :)

P4081386-X3.jpg


P4081388-X3.jpg


P4081392-X3.jpg


Hodakaguy
 
Solar issues and wiring the Air Compressor....

The morning after I wired the controller I noticed that although the controller was showing amps in/out it wasn't actually going into charge mode and connecting to the batteries. After some troubleshooting with a meter I found that the factory red power wire going to the solar roof plug was shorted to ground......Ugggg. If I was running an older PWM style charge controller it wouldn't be that big of a deal since I could swap the ground wire over to be power and let the red wire stay shorted/grounded, with a PWM controller the PV and Batt ground can be common. But...I'm running a newer style MPPT controller that is more efficient and requires a separate PV and Battery ground to function correctly.

Factory power wire shorted to ground. Time to get searching for the culprit, at this point I'm suspecting a screw in a wire somewhere or a stray frogs hair.

IMG_0711-X3.jpg


I connected the meter to the wire and started chasing the wire up to the front lift panel where it goes into the roof looking for a short. I was really hoping the short wasn't up in the roof itself. After a bit I found the short right at the end of the bed, there is a loop in the wire that is tucked back into the campers side where the wire transitions and goes vertical. A staple had been shot directly into the wire at this point during construction. Soon the wire was fixed and panels were back in place.

P4121396-X3.jpg


P4121402-X3.jpg


Almost back together in this pic, just need to apply a new strip of Velcro to secure the Arctic liner back in place.

P4121411-X3.jpg


Yesterday evening I pulled the truck out of the shop to test the panel. Everything is working great! This shot shows the advantage of a MPPT controller, it will take the higher voltage of the solar panel and convert it into extra amperage going into the batteries. The older PWM controllers basically draw down the PV voltage to batt voltage and you only get what is coming into the controller from the PV.

6.1 amps coming into the controller from the 175W panel (with late afternoon light) and the controller is outputting 8.1 amps out to the battery....nice!

P4121417-X3.jpg


P4121415-X3.jpg


Time to wire up the air compressor and hook up the front locker.

The Supplied ARB wiring harness. The quality looks really good, will have to extend the pressure switch and control/trigger wires.

P4131419-X3.jpg


Draining the washer fluid out to remove the bottle, makes access a lot easier.

P4131421-X3.jpg


Pressure switch wires extended, will install loom on the wiring once it's in the truck.

P4131427-X3.jpg


Running the switch wiring and air tubing for the front locker.

P4131435-X3.jpg


Wiring and tubing tucked away in loom and ran across the firewall.

P4131462-X3.jpg


Electrical and air tubing connected to the compressor. I installed the relay close by on an existing stud. I have a plastic cap installed over the air fitting for now to keep nasties out until my purchased cap shows up.

P4131444-X3.jpg


The compressor is a tight fit in this area but works out really well with the limited under hood space.

P4131459-X3.jpg


Connections made to the SwitchPro.

P4131454-X3.jpg


P4131455-X3.jpg


All tested and the Air Compressor and Locker are working great :)

More to come....

Hodakaguy
 
Solar and ACR’s. I’m running a total of 4 batteries on our truck/camper. Two AGM deep cycle batts in the camper and two AGM batts in the truck. I have an ACR (Automatic Combining Relay) under the hood that ties the truck battery and Aux battery together when the alternator is charging and the FWC has its own ACR that connects the camper batteries to the truck AUX batt when the alternator/truck is charging.

Both of the ACR’s are dual voltage sensing so when the solar charge controller starts bringing the voltage up in the camper batteries the camper ACR pulls in and starts charging the trucks AUX battery. When the trucks AUX batt starts charging the trucks ACR pulls in and starts charging the trucks starting batt. Now all 4 batts are charging off the solar controller.

With AGM batteries requiring a higher bulk charge voltage than standard lead acid batteries this setup allows the solar controller to bring all 4 batts up to proper charge of 14.7 volts, important for a full charge and longer battery life on AGM Batteries..

I’m going to add a switch on the campers ACR to give me the ability to turn off the ACR for times when I want the solar to just charge the camper batts ( days with limited sun when your not driving, this ensures the best charge of the camper batteries since everything the solar panel produces will go only to the camper batteries).

Charge controller in action.

IMG_0755-X3.jpg


The trucks drivers side Aux battery, the camper's ACR is pulled in and the Aux battery is charging. You can see the trucks ACR (located on top of the battery) pulled in as well and providing power to the trucks passenger side starting battery.

IMG_0761-X3.jpg


Passenger side starting battery charging.

IMG_0758-X3.jpg


Hodakaguy
 
Installed the SSO Slimline Hybrid bumper on my fathers truck on Friday.

I'll post a couple pictures of the install here but I typed up a complete How-To article on installing the Bumper/Winch over at TacomaWorld. For full install details and pics click here: https://www.tacomaworld.com/threads...nstall-guide-how-to-article-with-tips.545427/

Getting the bumper, winch and light bar ready for installation on the truck.

P4131470-X3.jpg


P4131476-X3.jpg


P4131492-X3.jpg


Truck trimmed to accept the bumper . We did the same modifications to the factory lower bracing that we did on my build to allow clearance for the WARN ZEON winch, more details in the link at the top of this post.

P4191495-X3.jpg


P4191550-X3.jpg


And the bumper installed. I really like the looks of this bumper on the truck, looks very factory and clean.

P4201641%20-1-X3.jpg


P4201639%20-1-X3.jpg


P4201643%20-1-X3.jpg


P4201647%20-1-X3.jpg


P4201652%20-1-X3.jpg


So yesterday I was running around town and stopped at REI to look for a hat. When I pulled into the parking lot I saw my fathers truck already there so I parked next to him and went inside. My father was already inside.....looking at hats LOL.

Identical twins (Minus the camper/canopy)

IMG_0816-X3.jpg


Hodakaguy
 
Let’s talk radio knobs. Installed a new set of machined aluminum radio knobs today, these things are the ticket!! These knobs sticks out further than stock (about double), have a knurled grip on the sides and they look factory! They also eliminate the super annoying trait of accidentally changing the radio station when you try and adjust the volume with the stock radio knob, by pushing the knob out further your fingers can grip the knob without bumping the touch screen.

Available on TacomaWorld by sending a PM to “Tacowiede”. They cost $29 a set and are totally worth it to me. Quality is a 10 out of 10.

Link here: https://www.tacomaworld.com/threads/new-option-for-radio-knobs.543100/

IMG_0850-X3.jpg


Stock next to the new aluminum knobs.

IMG_0854-X3.jpg


IMG_0856-X3.jpg


IMG_0855-X3.jpg


Stock

IMG_0851-X3.jpg


IMG_0853-X3.jpg


And new knobs.

IMG_0857-X3.jpg


IMG_0858-X3.jpg


Hodakaguy
 
Spent the weekend up in Troy Montana, very cool country up there. My mother is building a cabin outside of Troy and I went up to install the HVAC system, it's now up and running and keeping the cabin nice and toasty :). With the heat pump work out of the way we had a little time to explore around the area. Went up to Libby and checked out some local sites as well. Will explore more in this area this summer.

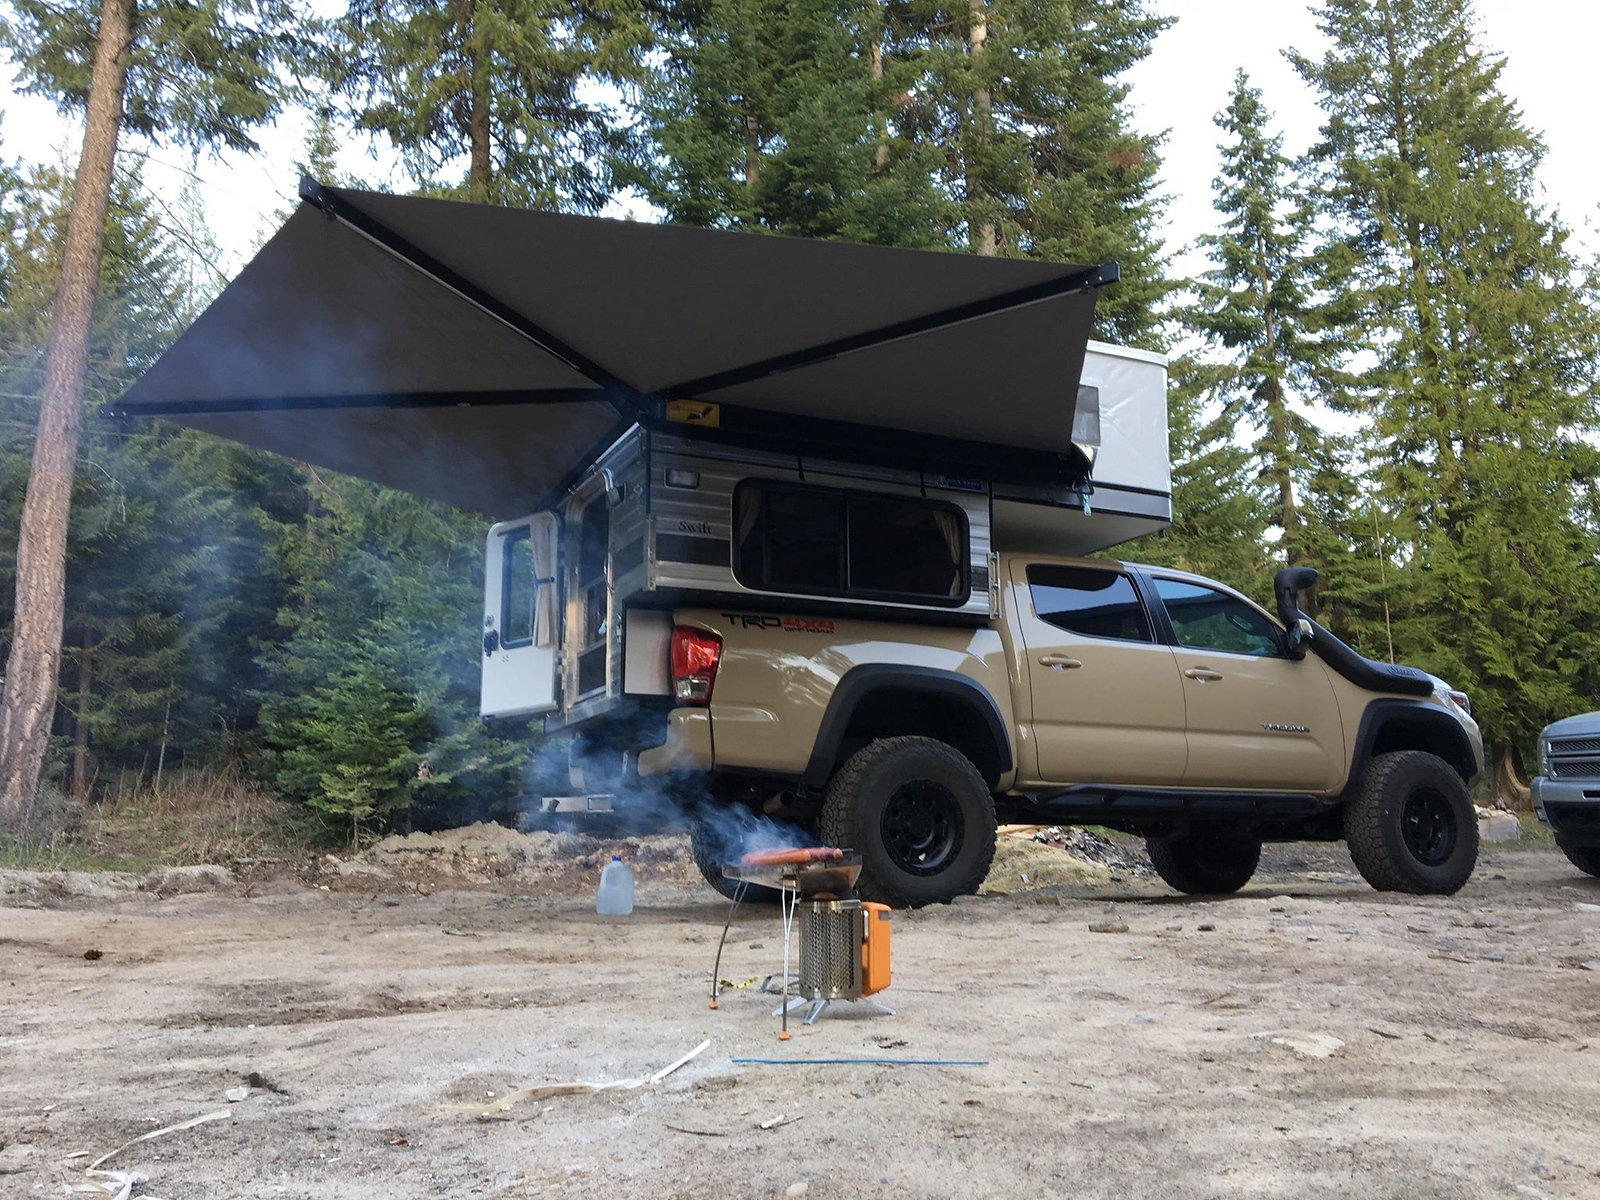
Cooking up some lunch on the BioLite stove. This stove has been great, we use it almost daily on our trips and it makes a great way to carry a super compact BBQ.

31326903_10210873400620559_8752378071975198720_n-X3.jpg


Crossing a cool old bridge in Troy. This is the Theodore Roosevelt Memorial Bridge, opened in 1912.

P4281801%20-2-X3.jpg


P4281804%20-1-X3.jpg


P4281808%20-1-X3.jpg


Just up the river we stopped to check out this cool swinging bridge over the Kootenai river. If your traveling through this area this is a must stop.

P4281664-X2.jpg


P4281682-X3.jpg


P4281683-X3.jpg


My son and wife crossing the bridge.

P4281688-X3.jpg


P4281693-X3.jpg


P4281722-X3.jpg


P4281721-X3.jpg


Picture of my ugly mug checking out the Kootenai Falls.

P4281754-X3.jpg


Playing with a ND filter, forgot the tripod so had to make do with a rock.

P4281737-X3.jpg


On the way back home another Tacoma/FWC was chasing us down the highway :)

IMG_0874-X3.jpg


Hodakaguy
 
Quick after work upgrade. On our last outing I noticed that the USB charge ports in the camper charged my phone and tablet very slowly, there is no rating printed on the factory USB units so I assume they are cheap low amperage chargers.

Time to upgrade!

Here's the factory USB chargers, taken as I'm removing them from the camper.

P5020016-X2.jpg


P5020018-X2.jpg


I'll be installing two Blue Sea 4.8A chargers. I've used these before and they work great.

P5020014-X2.jpg


The new Blue Sea charger next to the removed factory unit.

P5020022-X2.jpg


Marine heat shrink terminals installed on the factory wiring and new chargers going in.

P5020027-X2.jpg


P5020031-X2.jpg


And all installed...ready to charge up our gadgets while we travel.

P5020032-X2.jpg


P5020032-X2.jpg


P5020033-X2.jpg


Hodakaguy
 
Time for a TPAM mount power upgrade.

Just like the camper the TPAM mount came with a cheap low power USB charger that won't charge my Garmin Montana and charges the phone very slowly. I'll swap this unit out with a Blue Sea 4.8A unit (2.4A per channel). NOTE: Jeff from ExpeditionEssentials seen my post and may start offering the Blue Sea chargers with the TPAM when you order....Nice.

First removed the TPAM from the truck. Here you can see the low power charger I'll be replacing. It's quickly removed from the mount.

P5010002-X2.jpg


P5010011-X2.jpg


Now a little back story on my install: I originally planned on using a Blue Sea 4.8A round charger that I already had on hand, Just like the ones I installed in the camper. I figured I would file some notches in the TPAM mount to allow use of the round charger in the factory square cutout, I would then fabricate a cover plate to cover any gaps on the sides of the charger. Filing the notches and installing the round charger went to plan but I failed to notice the charger was to long and would hit the dash when trying to install the unit back onto the truck......Time for Plan B. I ordered a square Blue Sea 1039 charger which is a direct replacement (should have just started with this unit) and fabricated a small aluminum cover plate to cover up the half round notches I had previously filed into the TPAM, if I hadn't done that it would have been a 5 minute plug and play job! Oh Well...what I get for not thinking things all the way through :)

The notches I cut in for the round charger.

IMG_0021-X2.jpg


Here's the square Blue Sea charger next to the original unit.

IMG_0015-X2.jpg


IMG_0017-X2.jpg


Time to fabricate a cover plate to hide the half round notches I filed into the TPAM mount. A small chunk of aluminum will do nicely.

IMG_0019-X2.jpg


IMG_0024-X2.jpg


And painted a matching textured black.

P5031810-X2.jpg


New charger installed in the TPAM mount. I need to trim the rubber gasket on the back of the charger a bit so it doesn't stick out past my cover plate.

IMG_0025-X2.jpg


IMG_0025-X2.jpg


IMG_0032-X2.jpg


This charger is also slightly longer than the original unit, to give a little extra clearance between the electrical connections and the dash I bent the tabs upward on the back of the charger.

IMG_0028-X2.jpg


And all mounted back up. My Montana is now happily charging :). Overall a quick and easy upgrade (If you don't try and make it fit a round charger lol).

IMG_0046-X2.jpg


Hodakaguy
 
Sunday night and not ready for the weekend to be over? Wife wants to camp out in the Swift tonight...in the Shop. Sounds like fun to me :)

P5061828%20-1-X2.jpg


P5061819-X2.jpg


Hodakaguy
 
Hhhhoooollllyyyy crap I made it through it all! I'm at work and just finished scrolling through and reading everything after 2 hours! This whole thread was incredible, I'm very envious of everything you've done and will 100% be stealing some of these for my future additions lol. I'll be sure to tune in every time you add something because I've already learned so much. Excited to see what comes next, I'm hoping at some point I can see this in person lol it's amazing.
 
Hhhhoooollllyyyy crap I made it through it all! I'm at work and just finished scrolling through and reading everything after 2 hours! This whole thread was incredible, I'm very envious of everything you've done and will 100% be stealing some of these for my future additions lol. I'll be sure to tune in every time you add something because I've already learned so much. Excited to see what comes next, I'm hoping at some point I can see this in person lol it's amazing.
Me too! It’s absolutely insane. The quality of the work, the photos, the write ups...
 
Hhhhoooollllyyyy crap I made it through it all! I'm at work and just finished scrolling through and reading everything after 2 hours! This whole thread was incredible, I'm very envious of everything you've done and will 100% be stealing some of these for my future additions lol. I'll be sure to tune in every time you add something because I've already learned so much. Excited to see what comes next, I'm hoping at some point I can see this in person lol it's amazing.

I’ll keep the mods coming as they happen. Order in for the Orange Virus...can’t wait to try it out :)

Hodakaguy
 
Back
Top