- Joined
- Oct 26, 2021
- Messages
- 91
- Reaction score
- 195
- Location
- Eugene, OR
- Website
- morelinfo.com
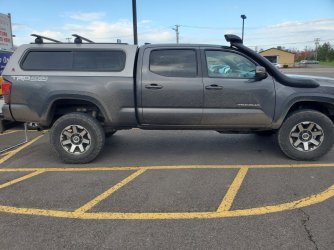
Magnetic Gray
Some buddies and I headed to the beach and we were all going to camp, but the only available spot was past some sand.
My 2000 Durango has 4WD, but the bushing to the linkage had rotted out and, while I was able to get it into 4L, it popped out halfway through the sand.
A few days later, one of them told me, "You just need to replace your truck."
While The Tick (my Durango) has been a pretty good vehicle, and I've MORE than gotten my money's worth out of 'er, I couldn't fault the logic of having something from a recent year that would last me for a long time to come... So, I started looking at trucks in my area.
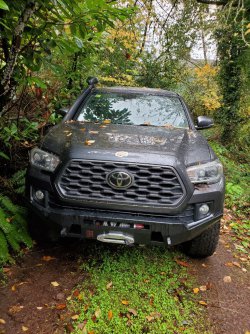
The third hit on Craigslist was a 2018 TRD Off-Road in Magnetic Gray Metallic with pretty much all of the important stuff already done to 'er.
I talked with the owner, took 'er for a spin, and kinda fell in love.
So, the next week, we got together and made money happen for him and a truck happen for me.
So, here I am - a Tacoma owner, now.
This is my Taco, Belle.
It occurs to me that I should document what has been done already, and what will be done.
Here is the PO's doing (copied from the CL ad where I found the truck):
Engine:
K&N air filter
Drivetrain:
Nitro 5.29 gears to manage larger tires and weight
Long Rang America fuel tank - 33 gal replacement
IFJF diff breather F and R - not installed
Exterior:
TRD desert air intake - keeps engineer [sic.] filter cleaner and don't [sic.] drill into the A-pillar, not for deep water
Smittybuilt winch X20 9500lbs w/ synthetic line
SOS Offroad steel skid plates - engine, trans, transfer
Proline 4x4 steel plate Low Pro bumper
Cab Mount trim w/ BAMF plates to clear larger tires
Brakes:
Wheelers Performance stainless braided brake lines - +0" front, +4" rear
EBC Stage 5 brake kit - dimples/slotted rotors w/ YwllowStuff pads - front
Wheels and suspension:
Old Man Emu BP-51 w/ compression and rebound adjustment
Dobinsons Heavy 113 (112+extra leaf) leaf springs, 880-1210lb constant load - camper ready
SPC adjustable uppper control arms w/ spare ball joint
Icon coilover covers
Spidertrax 1.25" wheel spacers - all 4 corners
4Runner OR wheels - 17x7.5 ET15
BFG K02 tires - 285/70R17 load range C
Electronics:
Hypertech inline calibration for larger tires and re-gear
N2 Designs plug-n-play remote start works w/ factory remote
Pop and Lock power latch for topper - locks and unlocks with all the other doors
Pop and Lock power latch for tailgate - locks and unlocks with all the other doors
Anytime Backup Camera switch with inputs for additional front and rear camera
Interior:
Desert Does It Seat Jackers - driver's seat
Meso Customs red/white combo LED dome and map light (map not pictured)
Topper/Bed:
BedRug liner carpet for bed and tailgate - matches carpet of the topper
Rago Fabrications bed stiffeners (not pictured)
Leer 100XL w/ Thule roof tracks, carpeted interiou, and pet screens - 3rd brake light and interior LED not connected
Extra topper clamps to keep it from moving - 4 per side for a total of 12 attachment points (not pictured)
Now, things that I have done:
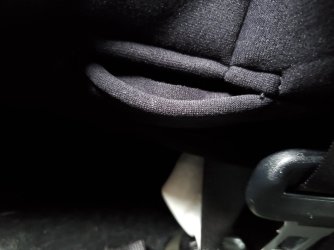
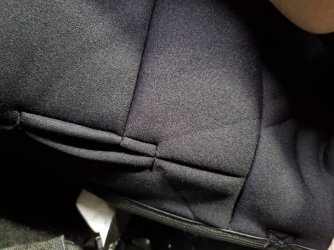
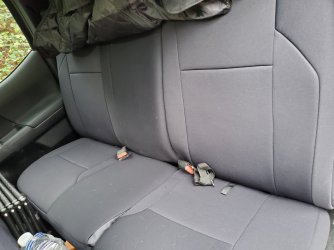
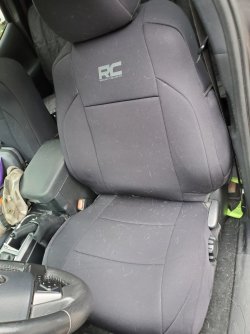
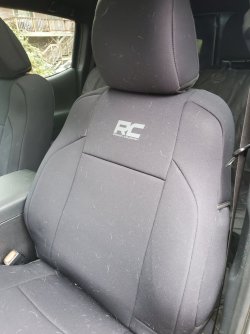
Rough Country neoprene seat covers (front and back)
Glove box organizer ('cause you GOTTA)
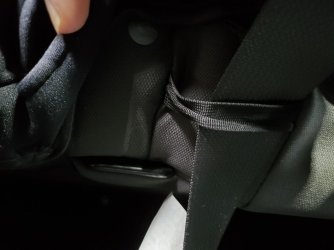
Console organizer
Console tray
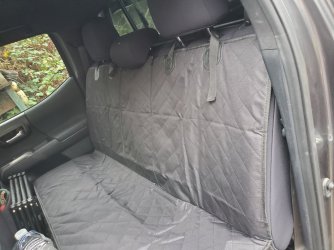
Pet-proof seat cover (rear)
Neoprene console cover (because the li'l dog likes to ride there... he's kind of a dumbass sometimes.)
Things that I have, but have not yet installed:
Front-facing camera (PO was good enough to get the input line into the engine bay, and I have the camera, but not the mounting bracket).
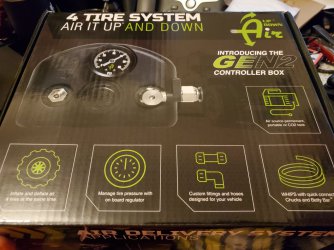
Air Up Down 4-wheel tire adjustment system with gen2 controller - Engine bay mount and matching compressor. (arrived today and should be installed on Sunday - Look for the awesome video link in the comments once we're done!)
Cargo net organizer and T-rail mounting hooks (PFCC Replacement for Mini Tie-down with hooks)
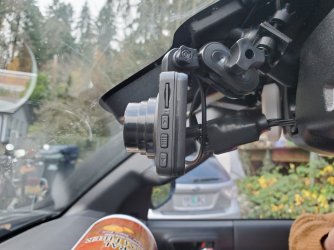
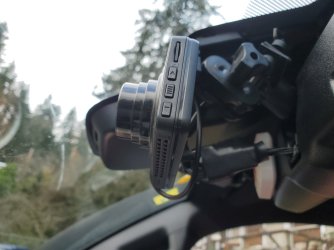
Universal dash cam mount (mounts on the rearview mirror pivot bar)
Mirror power take-off for dashcam power (Dongar) adapter.
My 2000 Durango has 4WD, but the bushing to the linkage had rotted out and, while I was able to get it into 4L, it popped out halfway through the sand.
A few days later, one of them told me, "You just need to replace your truck."
While The Tick (my Durango) has been a pretty good vehicle, and I've MORE than gotten my money's worth out of 'er, I couldn't fault the logic of having something from a recent year that would last me for a long time to come... So, I started looking at trucks in my area.
The third hit on Craigslist was a 2018 TRD Off-Road in Magnetic Gray Metallic with pretty much all of the important stuff already done to 'er.
I talked with the owner, took 'er for a spin, and kinda fell in love.
So, the next week, we got together and made money happen for him and a truck happen for me.
So, here I am - a Tacoma owner, now.
This is my Taco, Belle.
It occurs to me that I should document what has been done already, and what will be done.
Here is the PO's doing (copied from the CL ad where I found the truck):
Engine:
K&N air filter
Drivetrain:
Nitro 5.29 gears to manage larger tires and weight
Long Rang America fuel tank - 33 gal replacement
IFJF diff breather F and R - not installed
Exterior:
TRD desert air intake - keeps engineer [sic.] filter cleaner and don't [sic.] drill into the A-pillar, not for deep water
Smittybuilt winch X20 9500lbs w/ synthetic line
SOS Offroad steel skid plates - engine, trans, transfer
Proline 4x4 steel plate Low Pro bumper
Cab Mount trim w/ BAMF plates to clear larger tires
Brakes:
Wheelers Performance stainless braided brake lines - +0" front, +4" rear
EBC Stage 5 brake kit - dimples/slotted rotors w/ YwllowStuff pads - front
Wheels and suspension:
Old Man Emu BP-51 w/ compression and rebound adjustment
Dobinsons Heavy 113 (112+extra leaf) leaf springs, 880-1210lb constant load - camper ready
SPC adjustable uppper control arms w/ spare ball joint
Icon coilover covers
Spidertrax 1.25" wheel spacers - all 4 corners
4Runner OR wheels - 17x7.5 ET15
BFG K02 tires - 285/70R17 load range C
Electronics:
Hypertech inline calibration for larger tires and re-gear
N2 Designs plug-n-play remote start works w/ factory remote
Pop and Lock power latch for topper - locks and unlocks with all the other doors
Pop and Lock power latch for tailgate - locks and unlocks with all the other doors
Anytime Backup Camera switch with inputs for additional front and rear camera
Interior:
Desert Does It Seat Jackers - driver's seat
Meso Customs red/white combo LED dome and map light (map not pictured)
Topper/Bed:
BedRug liner carpet for bed and tailgate - matches carpet of the topper
Rago Fabrications bed stiffeners (not pictured)
Leer 100XL w/ Thule roof tracks, carpeted interiou, and pet screens - 3rd brake light and interior LED not connected
Extra topper clamps to keep it from moving - 4 per side for a total of 12 attachment points (not pictured)
Now, things that I have done:
Rough Country neoprene seat covers (front and back)
Glove box organizer ('cause you GOTTA)
Console organizer
Console tray
Pet-proof seat cover (rear)
Neoprene console cover (because the li'l dog likes to ride there... he's kind of a dumbass sometimes.)
Things that I have, but have not yet installed:
Front-facing camera (PO was good enough to get the input line into the engine bay, and I have the camera, but not the mounting bracket).
Air Up Down 4-wheel tire adjustment system with gen2 controller - Engine bay mount and matching compressor. (arrived today and should be installed on Sunday - Look for the awesome video link in the comments once we're done!)
Cargo net organizer and T-rail mounting hooks (PFCC Replacement for Mini Tie-down with hooks)
Universal dash cam mount (mounts on the rearview mirror pivot bar)
Mirror power take-off for dashcam power (Dongar) adapter.
Attachments

Last edited:


")